The Best Streaming Software We Use In Our 7-Figure Business

The best streaming software helps you build trust with your audience, get instant feedback and charge more money for real-time access.
However, for this to work, you must choose the right software.
The wrong one will fail under pressure (i.e., when you’re live), ruin your reputation and cause you to never go live again.
In this post, I’ll share the best streaming software right now. I’ll mention the software we use in our business (super easy to use) but also provide other recommendations if you’re more technical. I’ll also share must-have information for high-quality live streams.
Can you build YOUR business using live streaming?
Yes, you can. Our business is proof of this.
Live-streaming is a core part of what we do over at IGE. In fact, it’s critical for us to charge premium prices for access to our blogging course.
If you’ve ever signed up for a course, you’ve probably gone through all of the sales pages, only to get into the course and find it’s a bit…meh. The community is dead and the instructors are nowhere to be seen.
Well, live streaming is a core way for us to keep our community alive and create real connections with our premium audience.
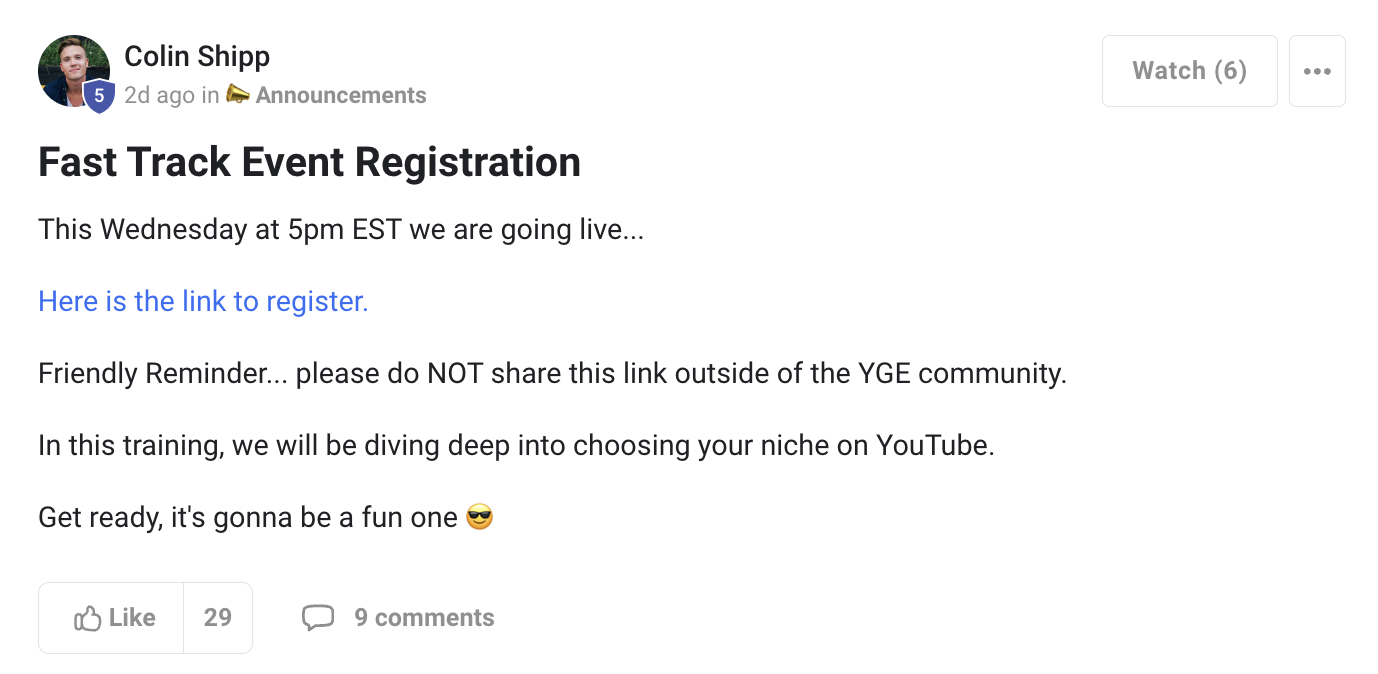
Here’s an example from a recent live stream.. Firstly, Colin announced we would be holding a live event:
The comment section was filled with people excited for the event to take place:

One comment that really stood out was this one:
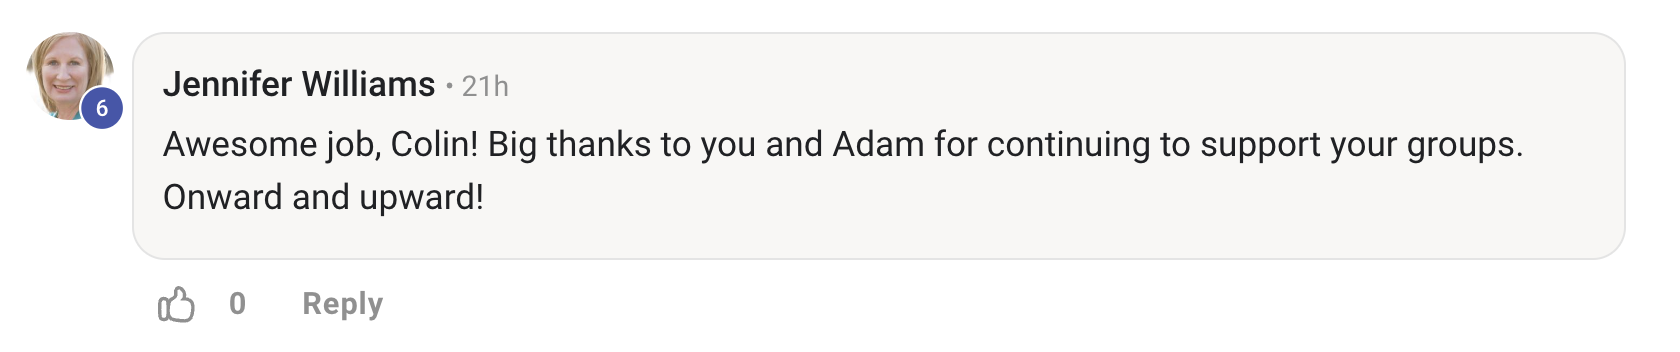
If people leave comments like this before your event, you know you’re doing something right!
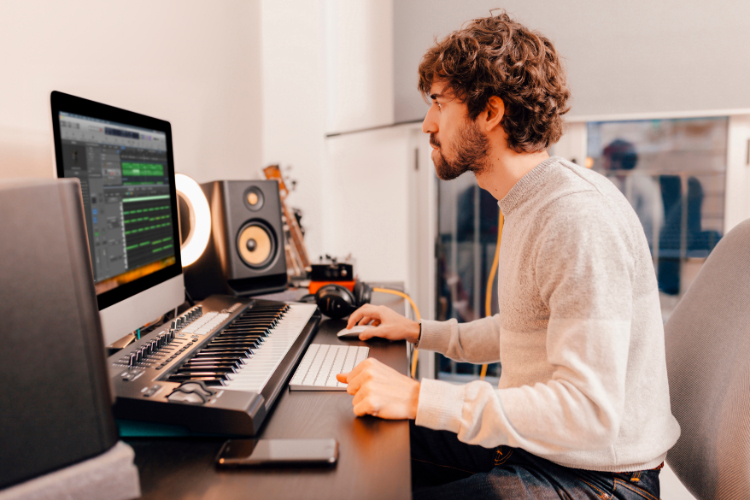
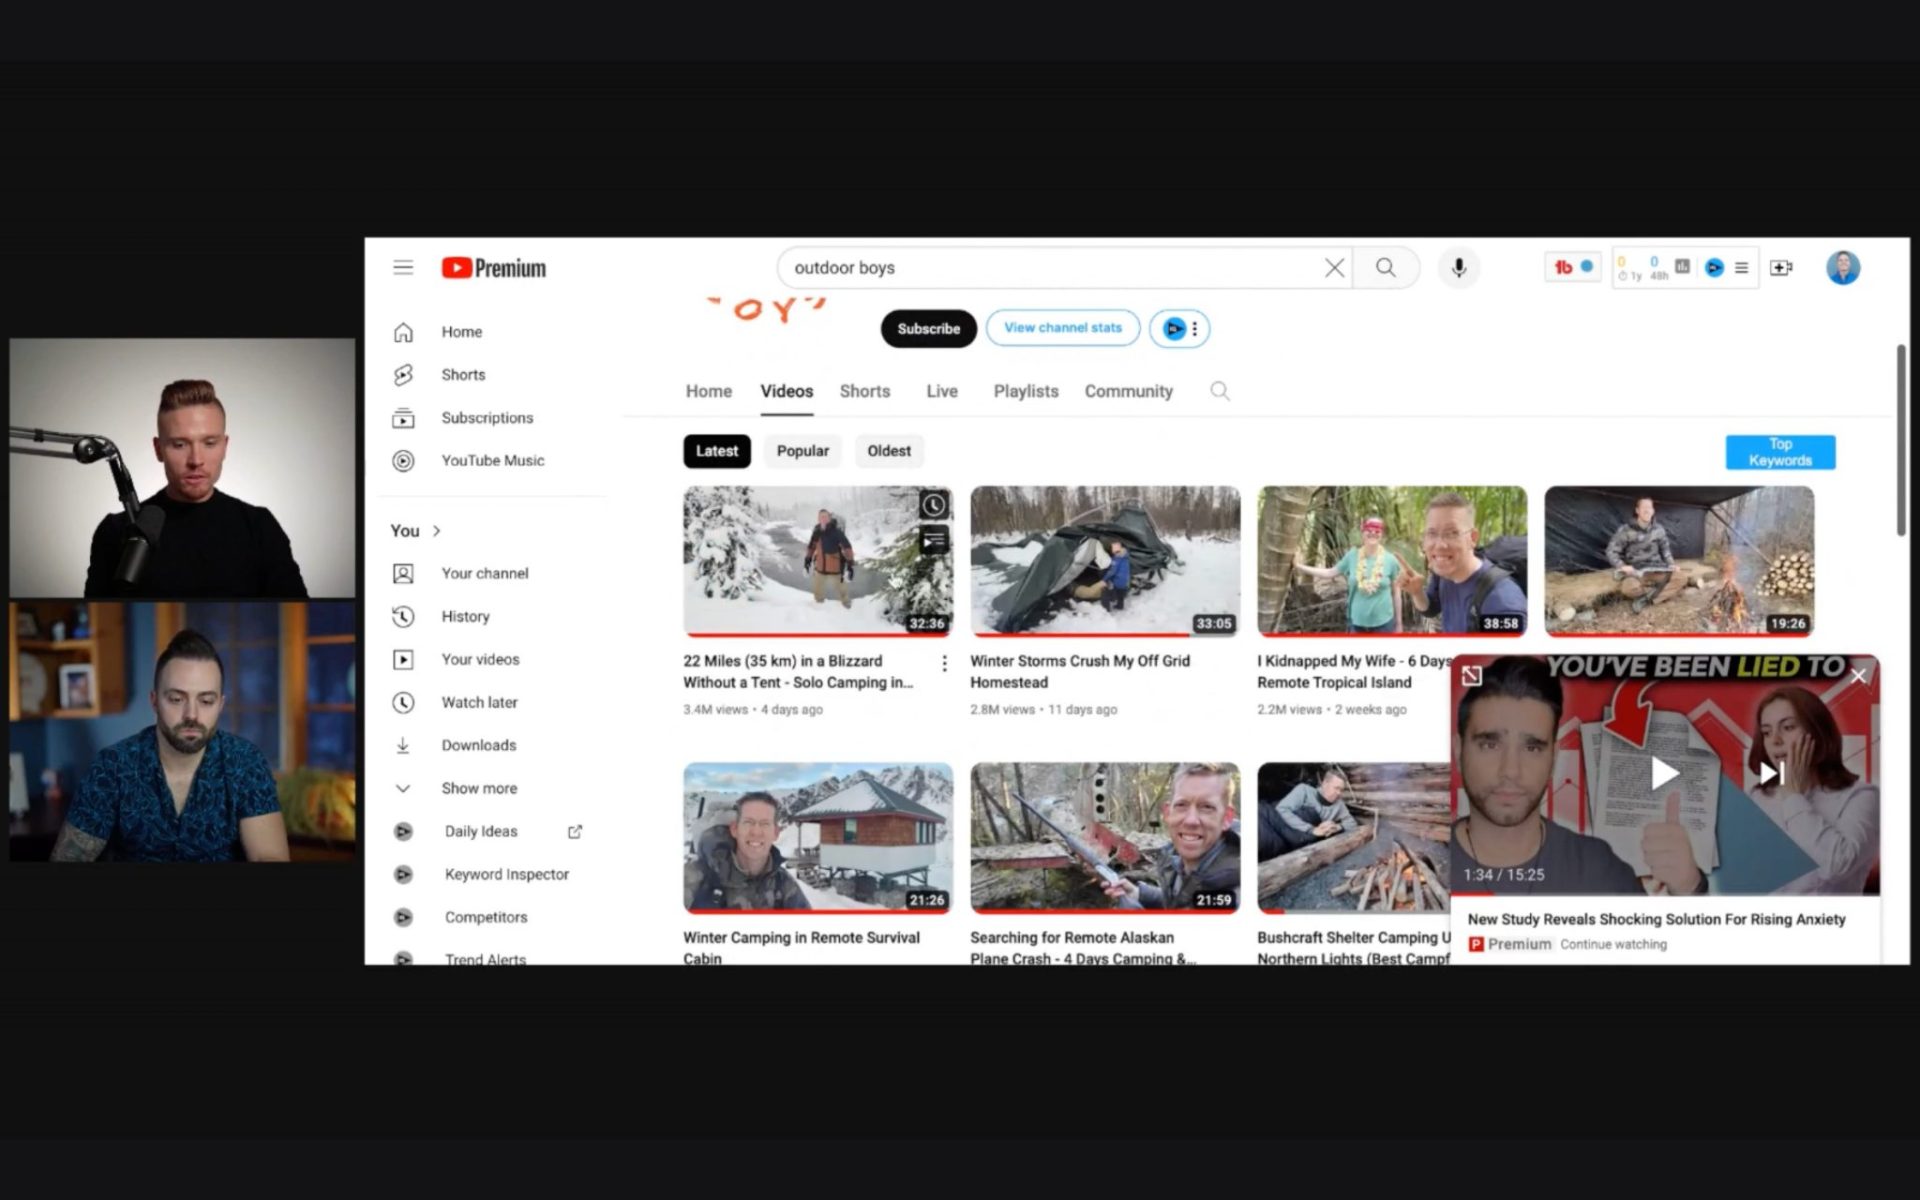
On the livestream, it was easy to provide lots of value. Firstly, we are experts at the topic we speak about. Secondly, the side by side layout is great:
- or me as a presenter to keep track of what’s going on
- and for the audience to follow along.
In our live stream, we love to highlight user comments and address them in real-time:
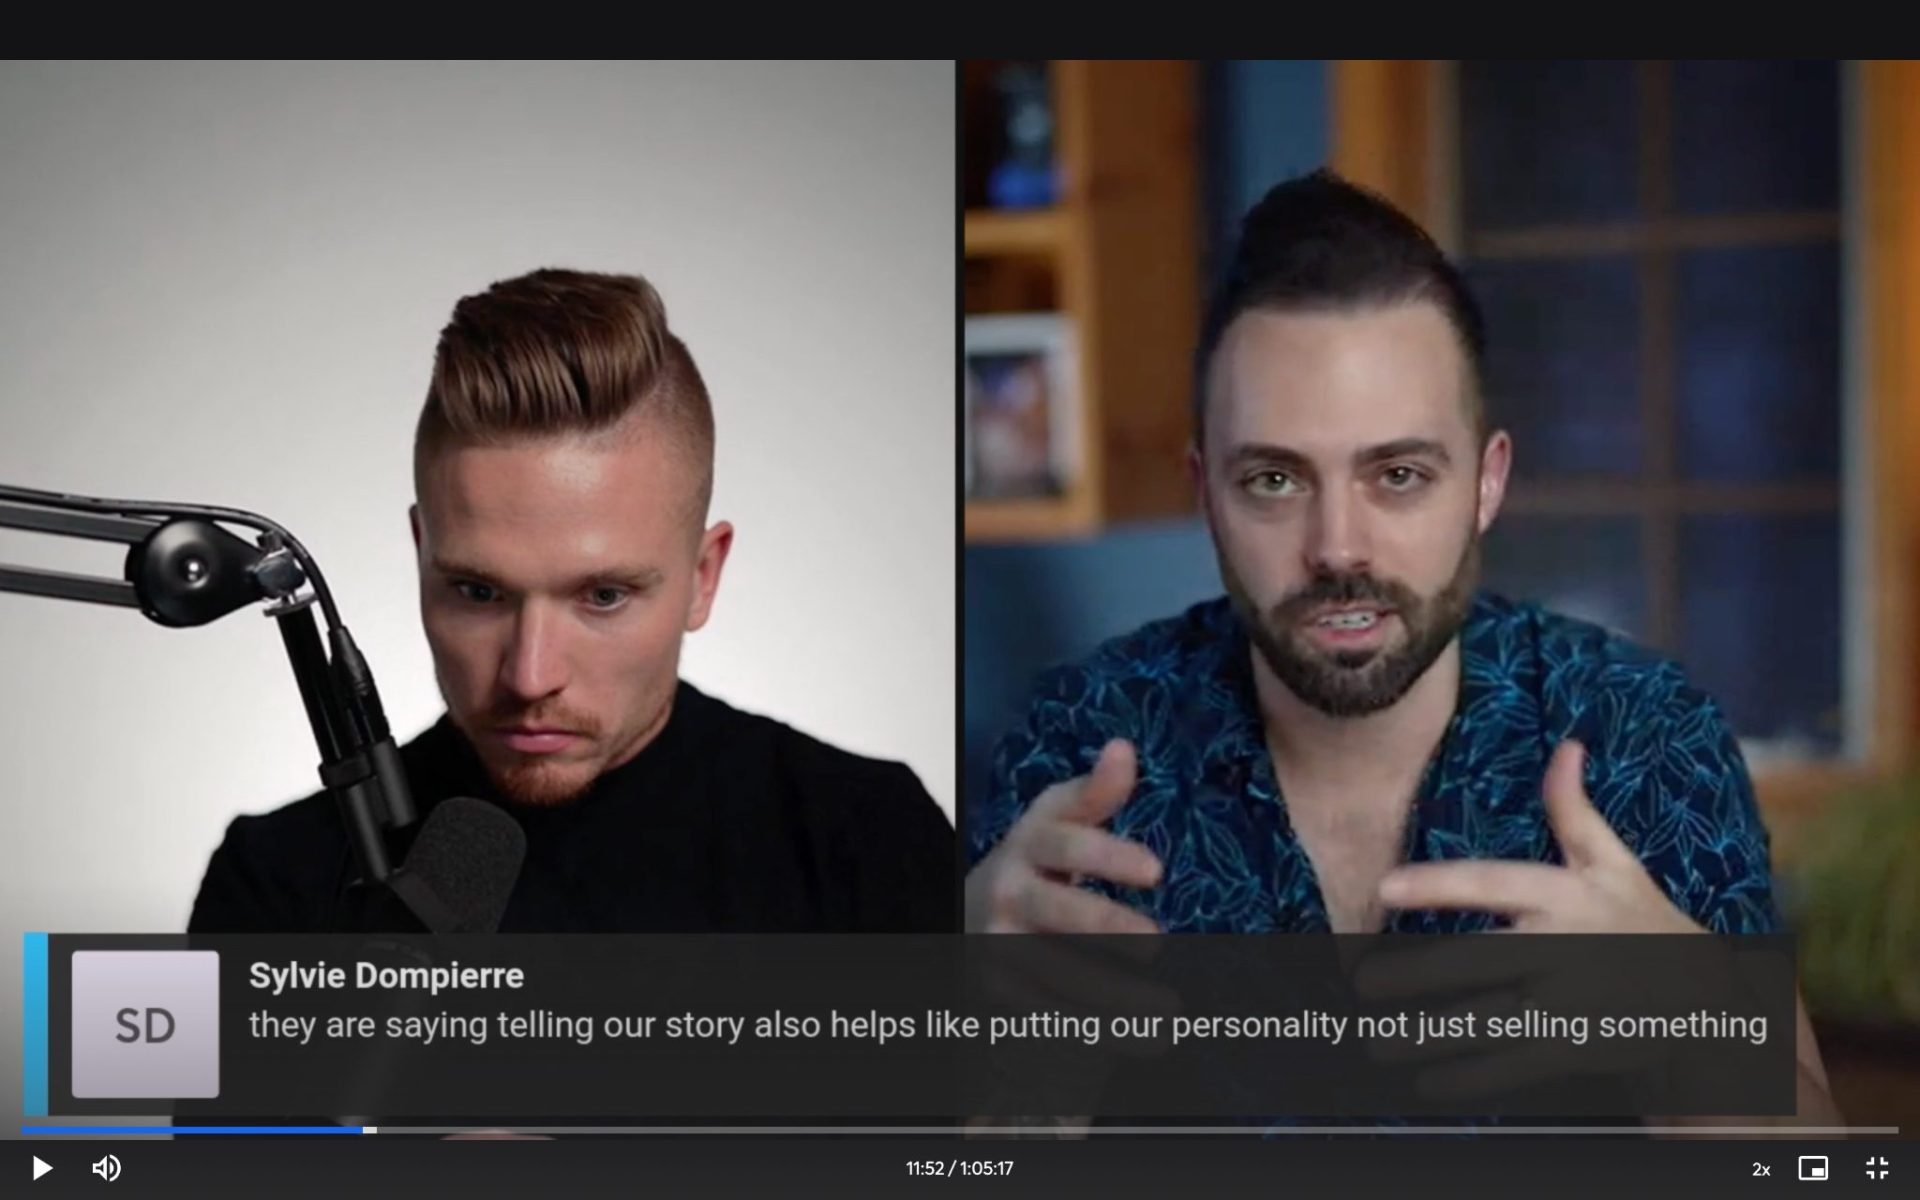
The result? The community engagement is through the roof!
Using the right software also makes it easy to share our screen and adds a visual element to our discussion (while still keeping our faces on screen):
Building a community of people who know, like, and trust you is ultimately why you want to be live streaming. Unlike your competitors, you’re no longer selling just information.
This makes your offer more valuable (i.e., you can charge more) while providing your audience with personalized answers to help them overcome obstacles.
Finally, it’s easy to take the stream recordings and use them in various ways – more on this later
What are the best streaming software choices to consider?
Here are the best streaming tools right now. Whether you’re looking for fine levels of control or prefer a solution that gives you the easiest user experience, here’s all you need to know.
1. Streamyard – Our Favourite Choice.
Looking for a quick way to start live streaming without downloading any software?
Streamyard works directly from your browser. This is an excellent solution if you’re doing the stream yourself or want to bring guests on board.
We also use this platform in our business when holding live sessions.
Even if your internet connection isn’t the best, Streamyard records video and audio on your computer, ensuring uninterrupted recordings.
Getting started using the platform is easy. There’s no big learning curve as everything is pretty intuitive. Sign in, start your stream, and you’re good to go.
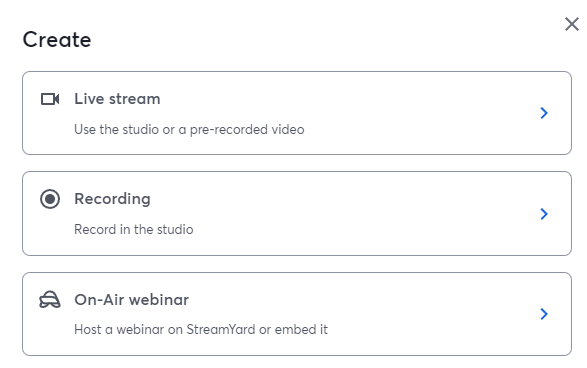
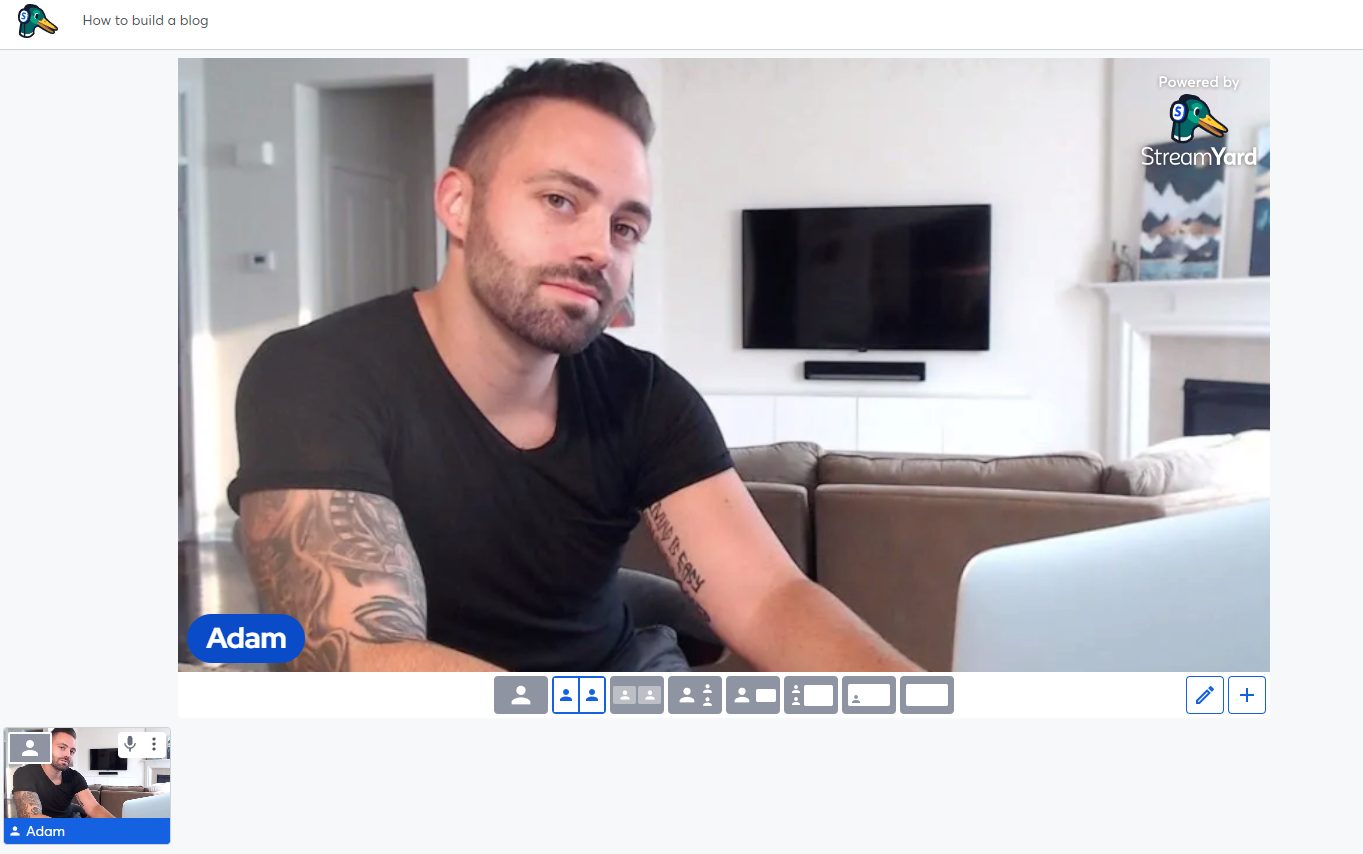
After you choose ‘live stream’, you’ll enter the studio. You’ll need to enable microphone and camera access.
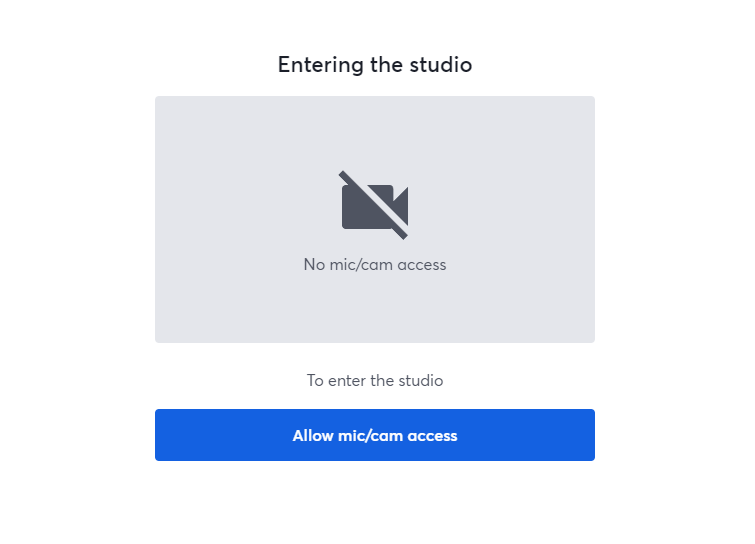
Once you’re in the studio, you can choose the layout you want as you add additional guests or media items. This is the default layout:
There are other layouts you can use. For example, you can include additional speakers and multimedia and move these around on your screen.
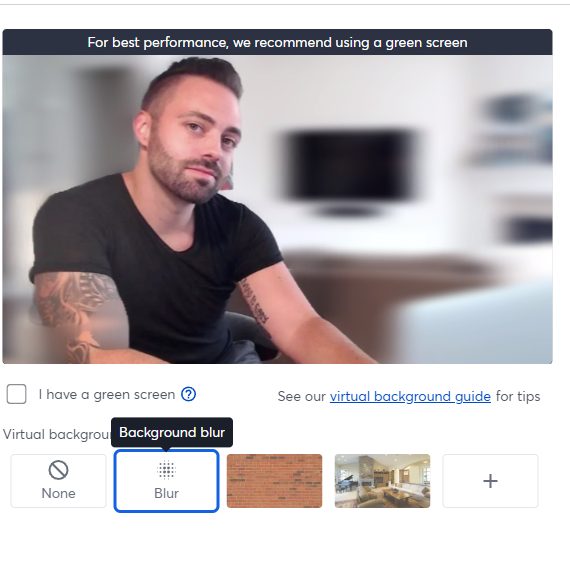
You can also set virtual backgrounds for your stream:
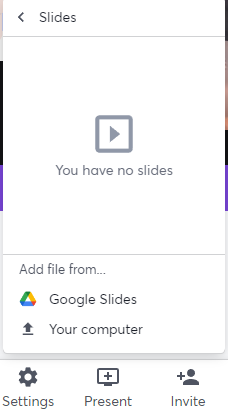
It’s also very easy to invite participants to your stream. Simply hit the invite button and choose your guests. Through the menu, you could also pre-load any slides you’ll use during your stream:
“StreamYard is an AWESOME platform to virtually engage your audience in a polished high quality manner. It’s VERY user friendly and easy to use.” – Softwareadvice.com user review
Key Features
- Event Scheduling: Plan ahead and schedule your events giving people plenty of time to make themselves available for your stream.
- Moderation: Ensure no unplanned interruptions by deleting unwanted comments and banning ill-intentioned commenters during your live shows
- Multiple Camera Feeds: Want to use multiple camera angles during your stream? You can do it with the click of a button.
- Multistreaming: You can stream to Facebook, LinkedIn, YouTube, and more at the same time.
- Audience Engagement: Whether you want to show your audience’s comments or do giveaways to encourage engagement, Streamyard makes it easy.
- Video editing tools: You can trim and split recordings with their in-built video editing software.
Streamyard Pros
The number one pro of Streamyard is that there’s no technical skill needed. With other software, you must understand the settings that make for the best stream.
Streamyard removes all that and allows you to focus on sharing your expertise.
You can also add videos, slides, banners, and other types of multimedia to your live stream.
The price is also very affordable for beginners.
Streamyard Cons
If you want to have the best quality stream (Full HD), you’ll have to opt for a higher pricing plan. For those just starting, this expense might seem unnecessary.
Some people also complain about their streams dropping off while on their phones. However, the same people also seem to believe their (weak) internet connection might be the root cause.
Streamyard Pricing
Streamyard offers pricing plans for both individuals and beginners. Both of these come with monthly and yearly plans.
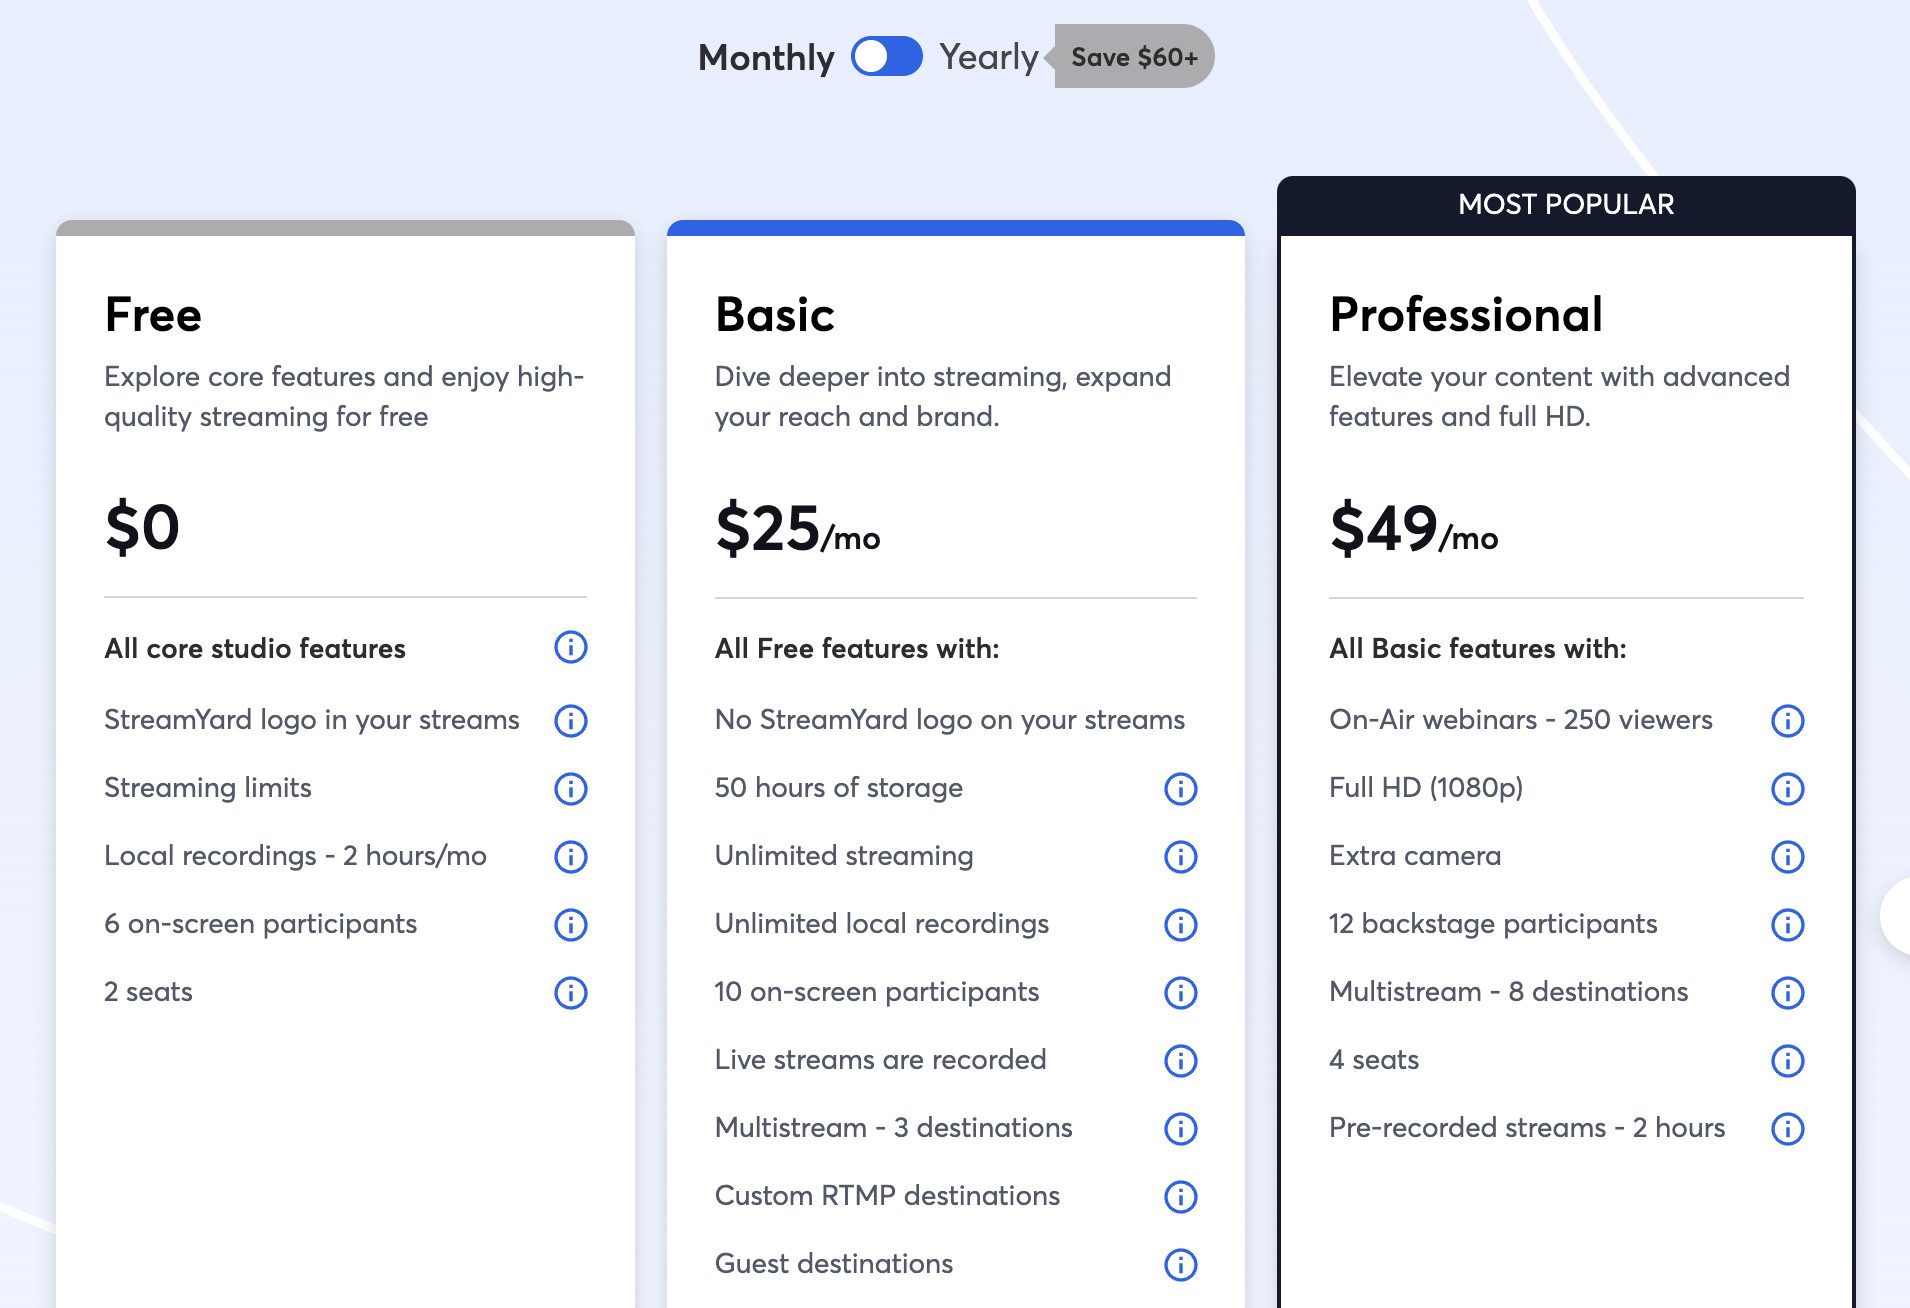
With the individual monthly plans, you get three options:
- Free: You get all the core features included
- Basic: $25/month. Here you get features like unlimited streaming and local recordings, up to 10 on screen participants and the ability to simultaneously stream to 3 locations.
- Professional: $49/month: With this top-tier plan, you get full HD streaming capabilities, live simultaneous streaming on up to 8 destinations time, pre-recorded streams, and much more.
Here’s a more in-depth look at how to use Streamyard:
How To Go Live With StreamYard | Complete Tutorial
2. OBS Studio – For Complete Control.
Are you after free live streaming? Open Broadcaster Software (OBS) Studio is your best choice.
Download this application based on your operating system and hit go.
The downside?
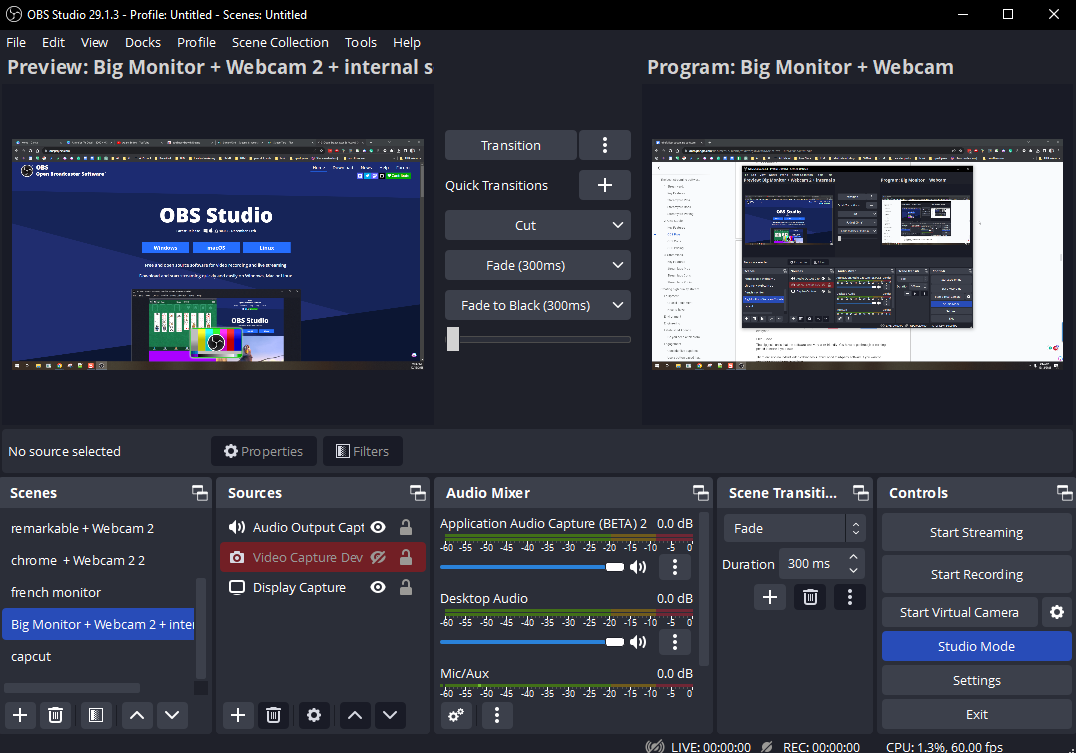
OBS Studio isn’t the most user friendly software out there. When you first launch it, you have to set up your scenes and sources. A scene refers to a combination of media sources like video and audio. Scenes can also have multiple sources and even other scenes.

You should probably also fine-tune various settings like your audio and capture inputs as well as set custom shortcuts.
Some people see all of this as a bad thing. However, if you take the time to understand how OBS Studio works (and get good at it), you get a high level of control.
“The most powerful free screen recorder and streaming tool available for gamers, with everything you need to achieve professional results. It might take a little while to familiarize yourself with its interface, but the effort will pay off.” – Techradar.com
Key Features
- Studio Mode: Take on the director’s chair, making changes to your scenes without viewers being able to see the changes. Once you’re ready to show these changes, hit the right button and viewers will get the updated scene.
- High performance: With the real-time ability to capture video and audio from your computer, you can run live streams even with older computer models. The application is lightweight and doesn’t require many resources to run.
- Audio mixer: The audio mixer has specific effects and filters you can easily apply. From reducing noise to increasing gain, you can make the audio sound the way you want it.
- Customization: OBS is an open-source platform. The community behind it is highly active, constantly adding plugins that make the application more functional. If you need OBS to do something it doesn’t natively, chances are there’s already a plugin for it.
OBS Pros
Being a free, open-source project, there are no costs involved. This beats having to pay a monthly fee to use the software.
The video quality is exceptional. The only caveat is that you must understand which settings work best based on your goals and your computer. Things can get a bit technical but this is generally a one-time setup.
You can quickly go from one scene to another time and time again. If you use the same applications, video sources, audio sources, etc, you can customize the look and feel of your live streams so they are consistent.
Moreover, multiple devices (like the Streamdeck mentioned below) have in-built integrations to help make the most of OBS Studio.
OBS Studio also runs on Windows, Mac, and Linux making it accessible to pretty much everyone.
OBS Cons
The biggest con is that the software isn’t very user-friendly. You have to go through a learning period to make it your own.
There are also no in-built video editing tools. You’ll need third-party software if you want to repurpose your stream recordings.
OBS Pricing
OBS Studio is free to use.
Want to learn the ins and outs of OBS Studio? Here’s an in-depth video:
3. Streamlabs – Combining The Pros Of Other Software
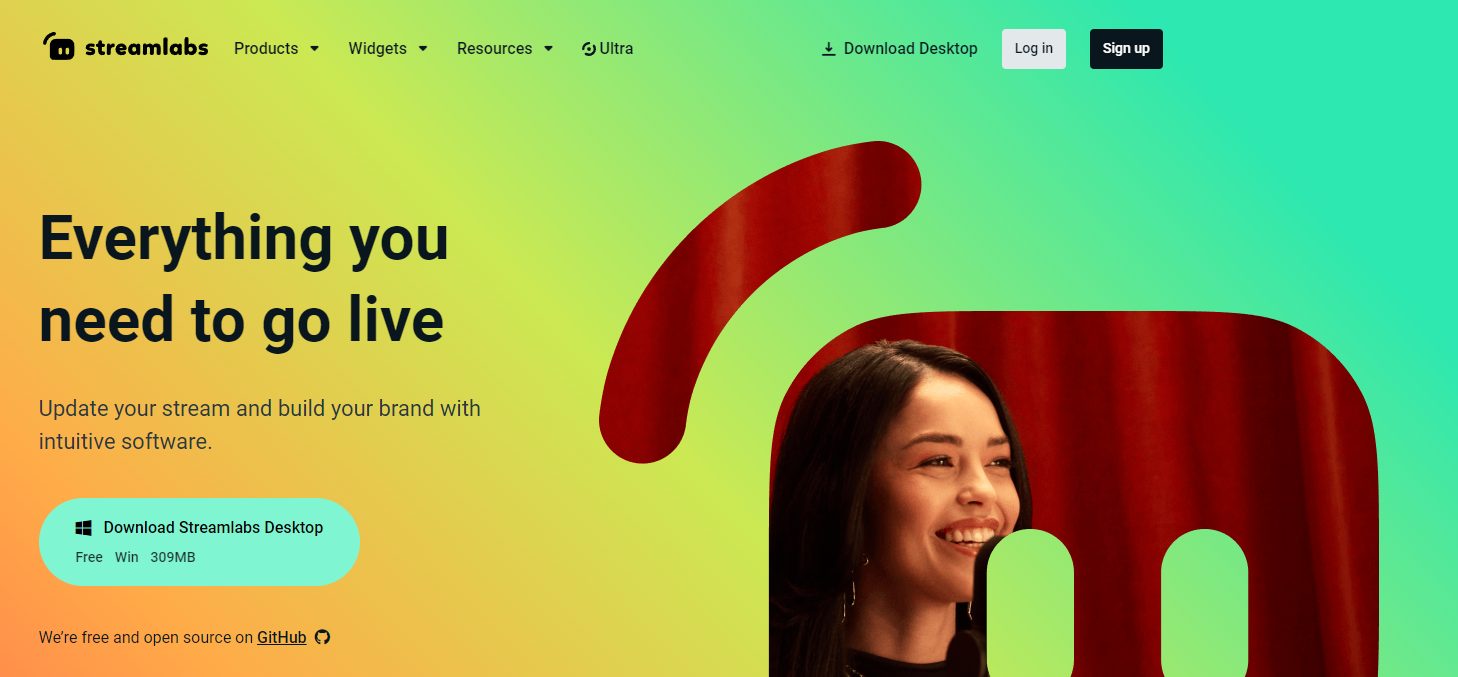
Streamlabs provides the sweet spot between control and ease of use
It makes it easy to enhance user engagement by providing built-in chat support during your live stream. Understanding live stream engagement means you’ll always know if your content is hitting the mark.
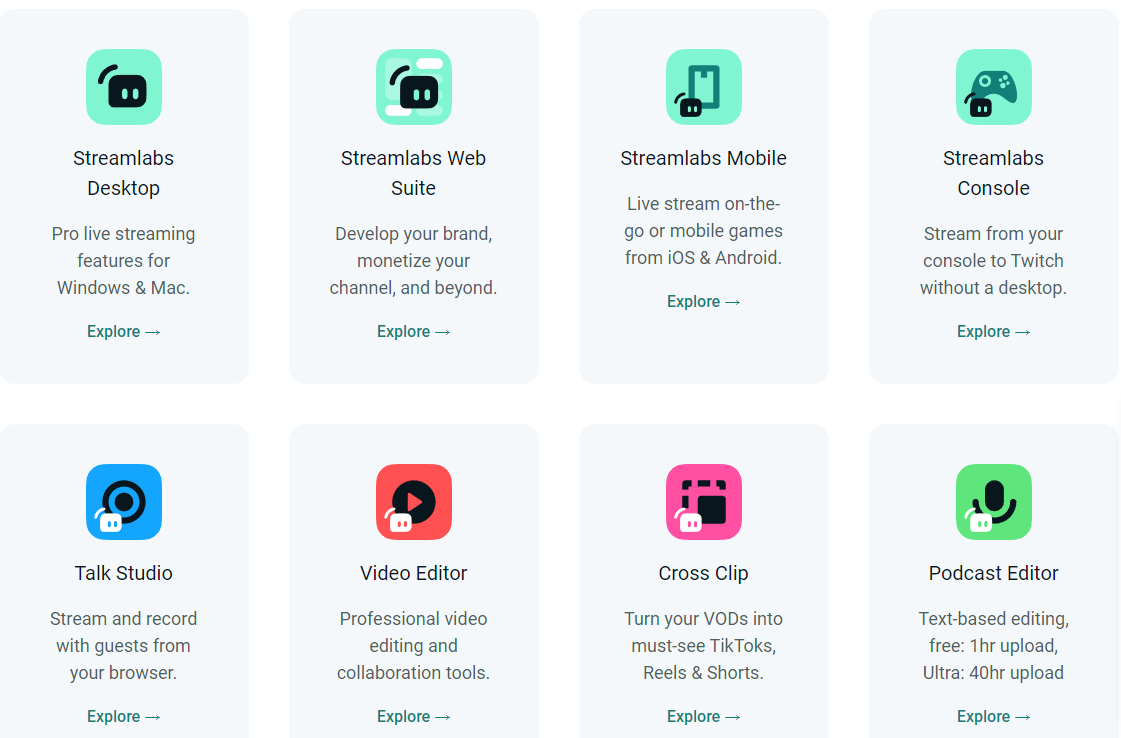
You can also go live from your phone using the Streamlabs Mobile app. Available for both Android and iOS, the app provides all the features found on the desktop version.
“Overall, I love Streamlabs as my tool for streaming on Twitch. It has everything I want it to have and is likely going to get the things I want it to have overtime going by their own updates. Highly recommended for new and old streamers.” – L’Nai C on Getapp.com
Key Features
- Test button: This is one of the most useful features not available on other apps. You can ensure things are running A-OK before going live. No unwanted surprises once you’re mid-stream.
- Monetization options: Want to make money directly through your live streams? Choose from paid tier subscriptions, selling your merchandise, adding donation buttons, and more.
- Free live stream customization: Ensure your brand shines through as you share your content.
- A complimentary range of tools: Streamlabs provides a suite of tools to get the job done. You generally won’t need third-party applications from the desktop, console, or mobile app (to live stream) to their video editor and cross-clip app (to edit your content).
Streamlabs Pros
Adding multiple video sources is easy. The same applies to adding audio from various inputs.
The platform offers a powerful and customizable platform with a small learning curve.
The features offered on the free tier are also more than enough to get you started.
Streamlabs Cons
Since Streamlabs is software you download and run on your computer, you’ll need a reasonably well-performing machine to optimize your streams.
You might also want to get more features as you get more advanced. In this case, you’ll have to pay their monthly/yearly fee for the pro version.
Streamlabs Pricing
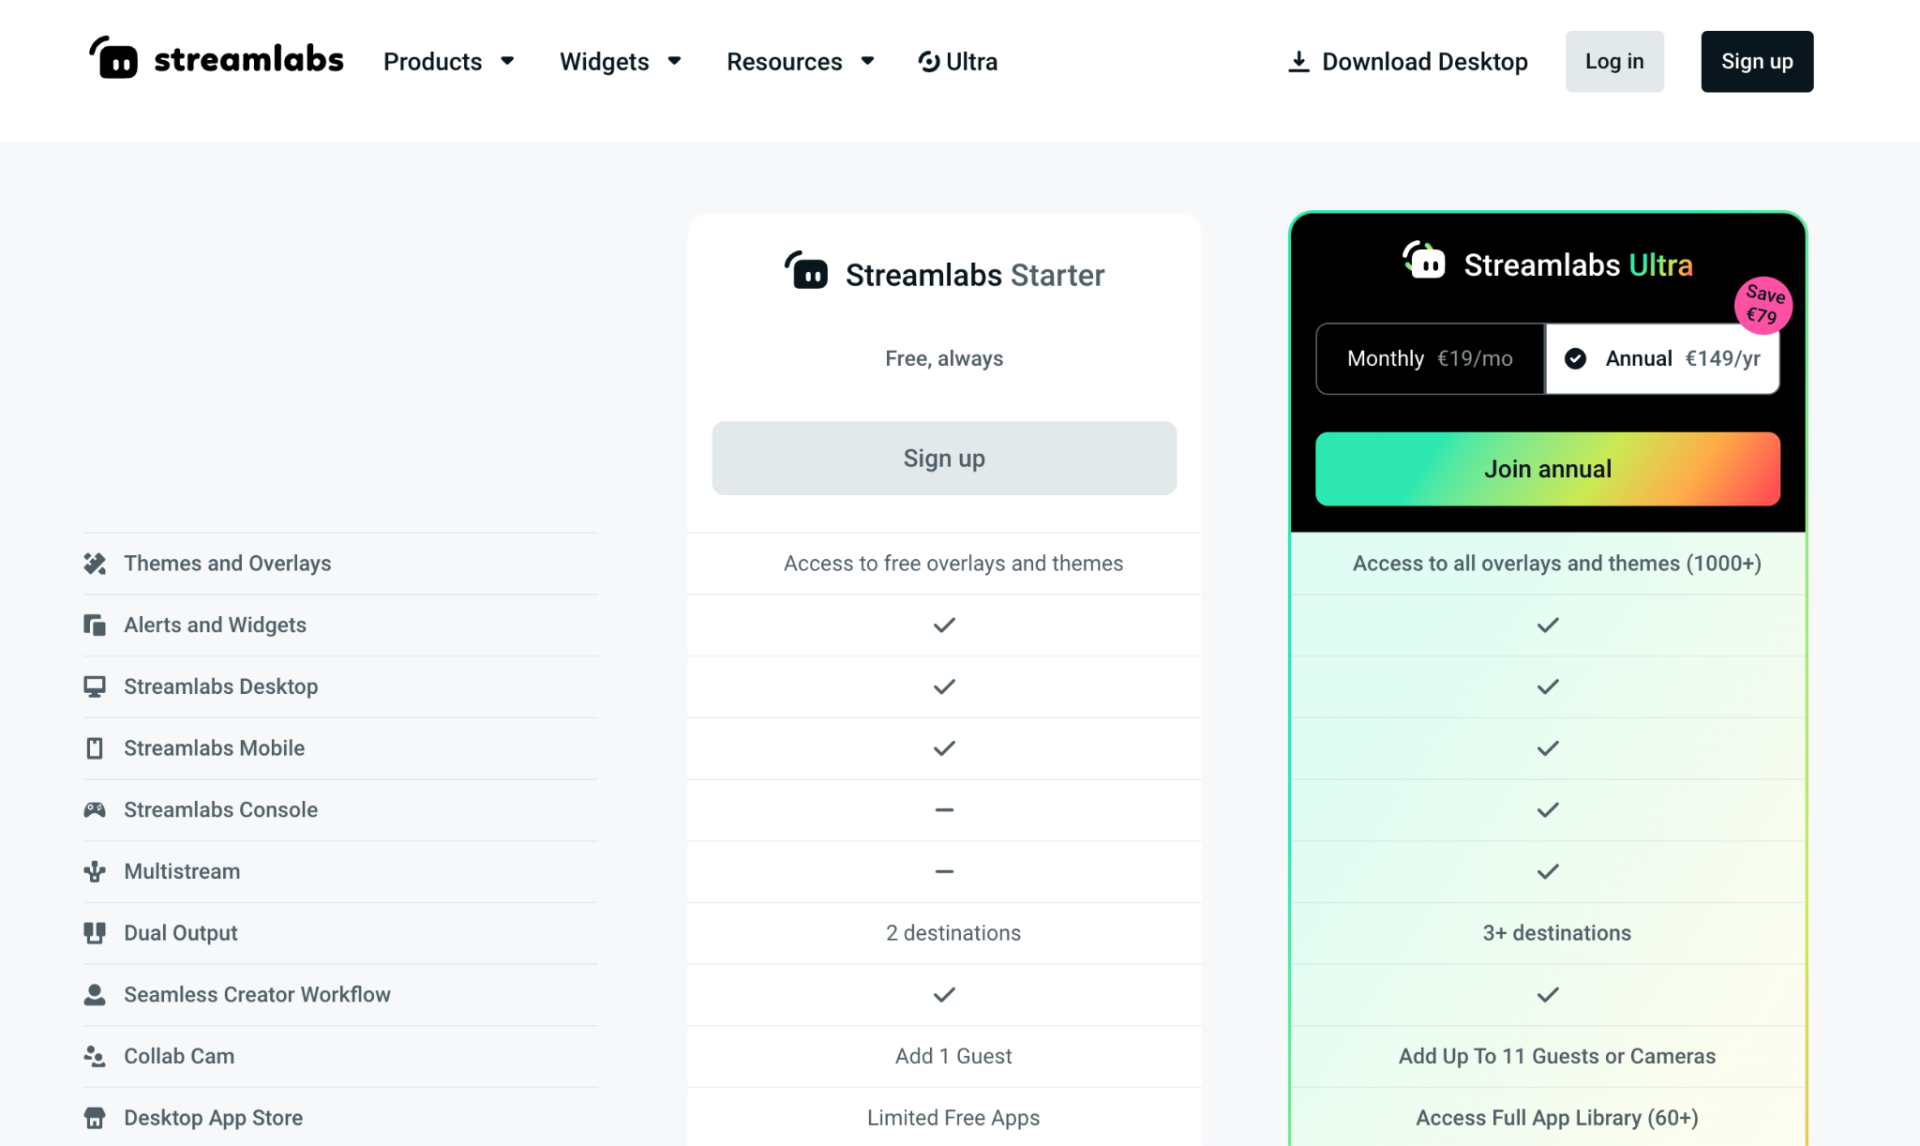
The basic version of Streamlabs is free to use. For those wanting more features, their Ultra version comes in at $19 per month (or $149 yearly).
This offers additional features, including more output destinations, up to 11 guests, full access to the app library, and more.
Here’s a more detailed look into using Streamlabs:
The 5 Es to high-quality streams (use these in every stream)
Now that you know which software can help produce high-quality streams, let’s discuss how.
Here are the 5 E’s to consider.
Equipment
What’s your budget?
There’s low-end and high-end equipment you can go for.
Here’s a list you’ll need to create high-quality streams, divided by the equipment you:
- “can’t-do-without” AND
- equipment that is “nice-to-have”
Can’t do without
A question we often get is, “Can I run a live stream with my current setup?” The answer is that it depends.
If you’ve never purchased equipment with streaming in mind, you’ll probably have to invest in a few key items. Here are the must-have pieces for high-quality streams:
- Computer: A computer that can process lots of data is essential as you’ll be running multiple applications simultaneously. The last thing you want is for your computer to freeze midstream because it runs out of memory. When it comes to processors, Intel® Core™ or AMD Ryzen™ processors are generally good to go. Regarding RAM, you should be looking at 8-16GB as a minimum.
- Solid Internet Upload Speed: Highspeedinternet.com recommends a minimum upload speed of 10 Mbps. However, the higher, the better. When it comes to internet, people tend to focus on their download speed. However, with live streaming, you must consider how fast you can upload data to the internet.
- Camera: On a live stream, you want the video quality to be the best possible. Your budget will dictate how cheap or expensive your camera can be. My suggestions? Go for a camera that’s (at least) able to record in 720p. Choose a 4K camera if you want the best quality.
- Microphone: Similar to your camera choice, your budget will influence your microphone selection. Choosing between a dynamic microphone and a condenser microphone will depend on your intended use. If you’re going for a live stream where you’ll be talking most of the time, a dynamic microphone will work best. If you’re going to record instruments and other vocals, a condenser microphone will be better.
Nice-to-have
If you’re covered the crucial equipment and want to take your streams to the next level, here is some “nice to have” equipment:
- Lighting: I was tempted to add this to the crucial equipment. However, I believe that with the right camera setup and natural lighting, you’ll go a long way. But if you want to take your streams to the next level, investing in artificial lighting will enhance your streams. Consider your room’s natural brightness and color temperature before choosing your lighting. If the room is already bright, you may not need a super strong one (and vice versa). You should also consider the general color temperature, as this should match your camera’s white balance settings. Here’s some important information on lighting color temperature.
- Encoder: Let’s get technical for a second. The encoder’s job is to take your live stream and convert the video file into a format other services can understand. Most encoders will also make this file smaller to ensure it gets to its destination successfully. The best streaming software all come with software encoders within them. However, hardware encoders are available for those who want to take things to the next level. With these streaming encoders, you will increase the final output’s quality. A hardware encoder will also put less strain on your computer as it will take on work the software (i.e., your computer’s processor) would normally do.
- Accessories: the list of accessories I could mention here can be endless. From green screens to remove any background color to tripods (that vary in size, weight and height), you can go as simple or complex as you want. A (non-exhaustive) list of accessories you could consider when streaming includes wireless mics, a laptop stand, an audio mixer, a secondary camera, external hard drives, and a video splitter.
Environment
Will you live stream from home or a less formal location? There’s nothing wrong with that. Just be aware of your environment.
For example, if you work from your kitchen table (with your sink as your backdrop), you don’t want your dirty dishes showing up on your stream. Likewise, if other people are moving around in the background, it can quickly become distracting. Not a professional look.
On the other hand, a well-thought-out environment adds to your authority and credibility. If you’re a fitness trainer doing live streams, why not line up all your certificates, competition medals, and client testimonials on the wall behind you?
If you’re a YouTuber sharing your expertise on a topic, why not have a library of books behind you that show your background and knowledge?
Lighting also plays a significant role if you’re streaming from a home office. A simple 3-point lighting setup (comprising a key light, fill light, and backlight) will give you a professional look.
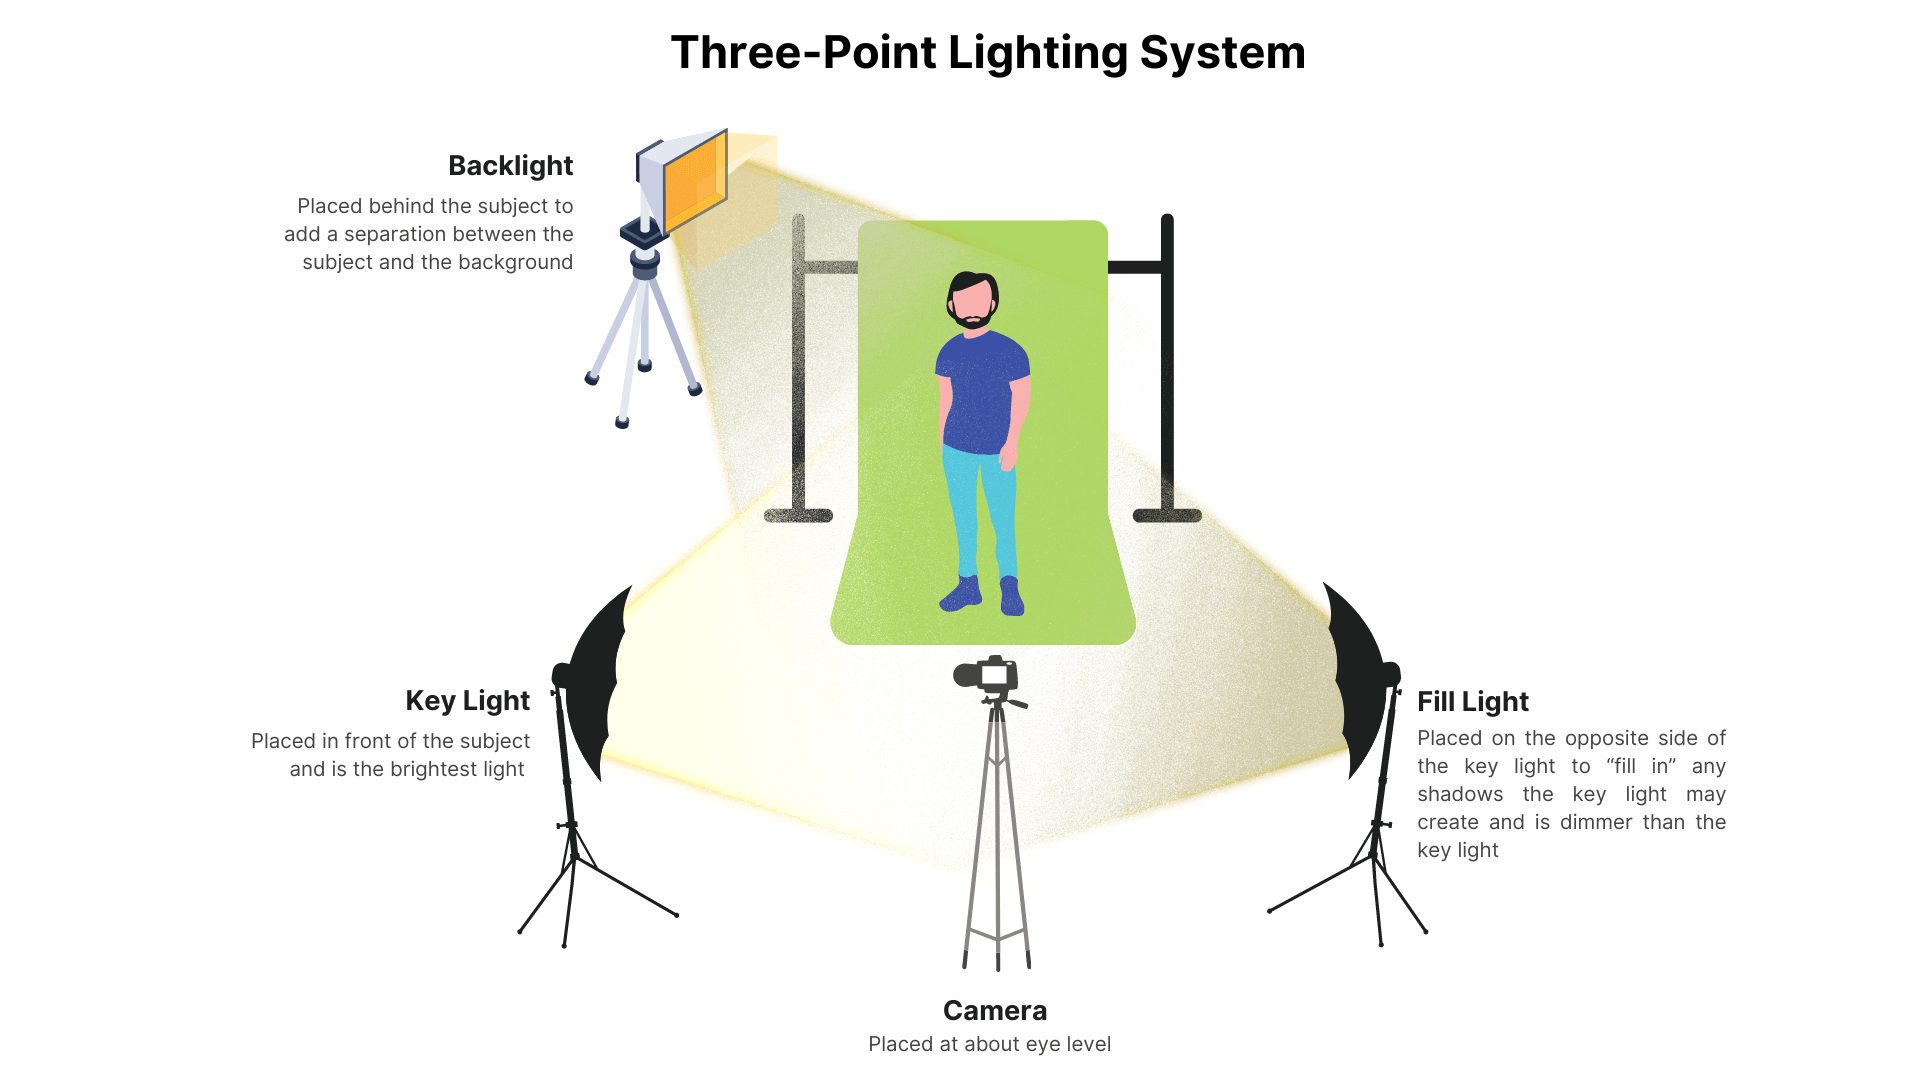
Image credit: https://streamyard.com/
Here are some other ideas to consider:
Engineering
The right settings will produce the best output. Knowing what settings are available (and how to use them) will set your content apart.
Want to geek out?

Here’s a detailed article on the best OBS settings to use for a great streaming experience.
Established Agenda
You should have a goal when you stream. To achieve it, come up with an outline of what you want to cover.
Consider:
- How detailed do you want to get on each point?
- What are the key aspects to speak about?
- What are the takeaways points?
The more detailed my outlines, the better the final output – and the fewer edits needed.
This doesn’t mean you should plan EVERY SINGLE WORD. It just means knowing the crucial elements that you must include.
You should also know the medium you’re using to share information. If you’re going with a talking head, consider how you’ll get audience engagement (more on this in the next section). If you’re screen sharing, you need the right information that adds to what you’re saying.
Do you need a teleprompter?
I don’t think so. However, I’ve also been doing videos for quite some time. I also found that having someone to give me feedback after each video I recorded helped me improve.
However, I know people who find a teleprompter helpful in ensuring they don’t forget the points they want to cover.
If you feel better having every word scripted, use a teleprompter. If you do, you must ensure you don’t come off robotic in your streams. Nothing makes a streamer less attractive than this.
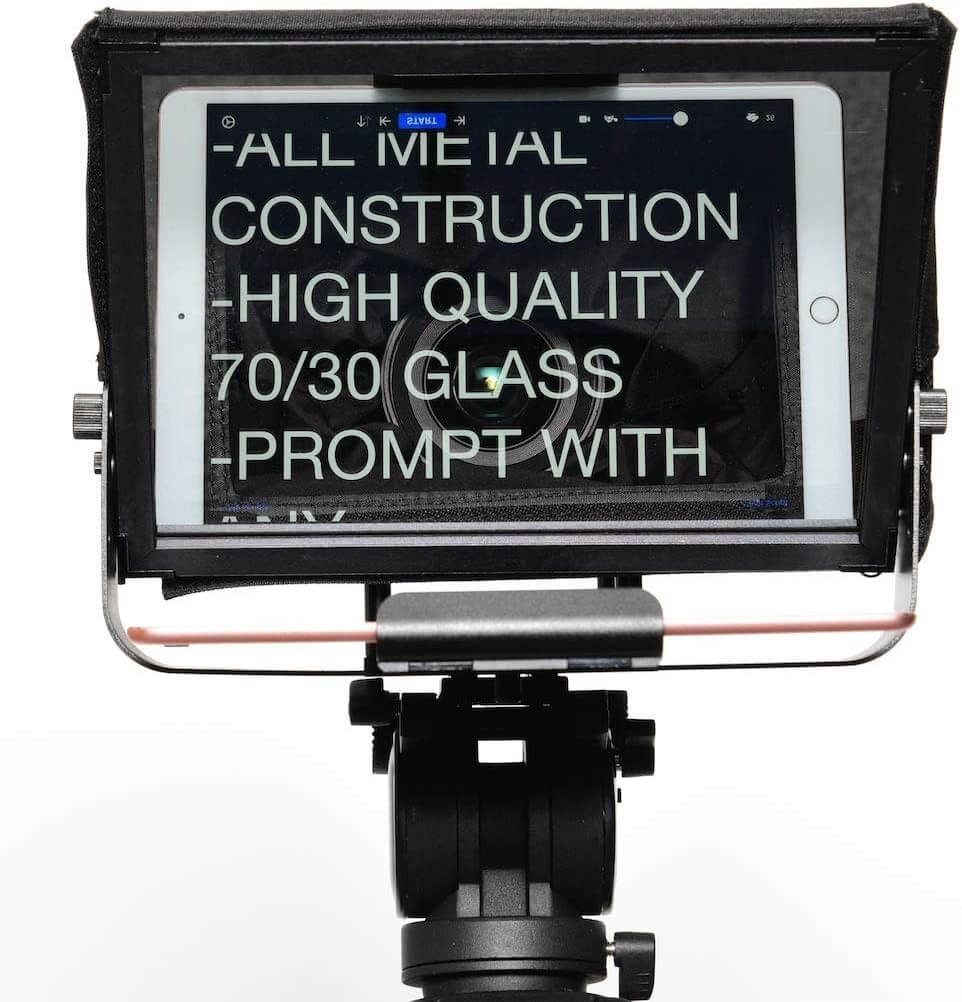
Image credit: https://streamyard.com
Teleprompters come in various forms. You can also use a wide range of applications on your mobile phone to get the job done.
Engagement
Engagement might be the most important factor in a high-quality stream. When you think about it, streamers follow every item in the above list to increase engagement.
Providing people with valuable content that’s entertaining, engaging, or both (based on your industry) leads them to see you as an authority and gets them to consume more of your content.
A big factor in increasing engagement is having a great online presence. One of the best ways to improve is to become confident speaking on camera. This is a case of practice makes perfect.
One thing that helped me get better is considering I’m speaking to just one person. Looking into the camera and imagining I’m having this type of conversation is critical.
Looking at things through this lens (pun intended) makes it easy to remove any pressure.
Want to take it to the next level? Imagine you’re providing a friend with a solution they need. If you can do this, things become even easier.
Here are a few more ideas to help with a better online presence:
- Confidence: knowing (and believing in) what you’re saying can cure any limiting beliefs you might have on camera.
- The tone of voice: being interesting on camera is similar to being interesting in real life. When having a ‘real’ conversation, you don’t use one tone ALL THE TIME, right? Sometimes… you go slow. Other times, you go fast. It depends on what you’re saying and the message you want to convey. Do the same on your live streams.
Consider live captions
Some software solutions provide live in-stream captions.
The software takes what you’re saying, transforms it to text in real-time (or with a slight delay) and places it on screen. This can provide an additional layer of clarity for viewers.
Live captions can be useful for those who are:
- deaf
- hard of hearing
- not native speakers
- in noisy environments
Not all software can do this. However, it might be something worth looking into.
Use a button-based hardware device
Want to take your stream engagement to the next level? Consider investing in a button console device like the Elgato Streamdeck or the XK-24 USB Keypad.
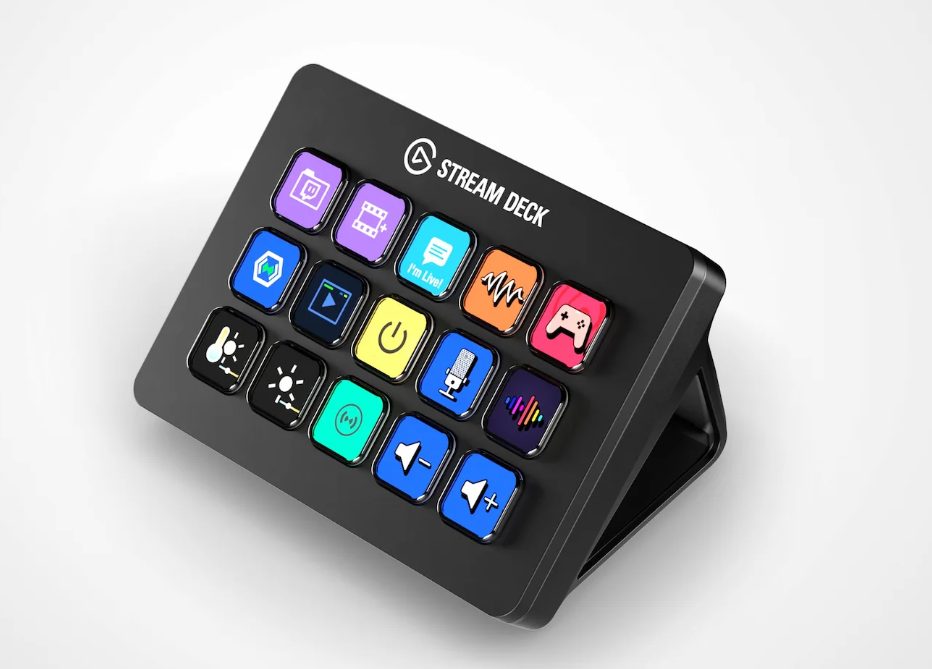
Image credit: https://www.elgato.com
Many streamers use these devices to perform features like:
- Switching between camera angles
- Adding real-time sound effects
- Adding animations
- Loading up applications
- Switching lighting on/off
This device isn’t just for streaming. You can pretty much automate any action you perform on your computer.
However, in a live-streaming context, it’s a powerful way to record preset tasks and then execute them at the press of a (physical) button.
Here’s more information on the Stream Deck:
Getting more from your content (without doing anything extra)
Note: creating new content is always a good idea.
But that doesn’t mean you shouldn’t repurpose streamed content in multiple formats.
Here are some helpful ideas.
Creating long and short videos from your stream
You can take streams and use the video file to create long and short-form content.
In this case, there are two factors to consider:
- Editing
- Structure
Depending on the type of streams you do, there might be moments where nothing happens. That’s where editing comes in. In your recorded video, these moments add nothing of value and should be cut out.
As people’s attention span gets shorter, leaving these ‘empty sections’ will cause you to lose out on viewership.
The second factor is your video’s structure. If you create videos that hook the viewer from the first moment, you’ll get people who watch more of your videos. This will increase your video retention rates.
The higher your retention rate, the more views your videos will get, the more likes, shares, etc..
Where should you post your long and short-form videos?
YouTube is one of the best channels for posting long-form content. The YouTube audience is there to watch more in-depth stuff (and learn something in the process).
When it comes to short-form, there are three major platforms to focus on:
- Instagram Reels
- YouTube Shorts
- TikTok videos
Image credit: https://www.socialpilot.co
All platforms have their pros and cons. Different audiences also prefer one channel over others. Knowing who you’re targeting is key. In this context, here’s an interesting read comparing the three channels.
Converting your streams into audio for people listening on the go
Why not take your streams and create a podcast?
You can use various video to MP3 converters to make the change. Once you have your audio file, use a podcast hosting platform to upload and host your recording.
You’ll then be ready to share your content with a new audience.
Having an established outline for your blog posts (or just making them more interesting)
If you started a blog and wanted to include multimedia in your posts (who doesn’t like more interesting reads?), including your stream recording will add another dimension to your posts.
You can also convert your livestream into a text transcript and use this as the basis of a new blog post.
Moreover, you can place this transcript in various AI Image generators and use them to create the artwork for your new posts.
Creating hard-hitting social media posts
Creating social media posts is yet another way to use your live stream transcript.
Be aware that different social media channels require a different way of presenting information.
For example, if you’re creating business posts for LinkedIn, you’ll need to use a more professional tone than if you were creating Instagram posts.
However, it’s easier to tweak your content to fit various platforms than start from scratch.
Conclusion
Now, you know which software to use to start live streaming.
You also know the factors that lead to high-quality streams that leave your audience wanting more. To recap, these factors are:
- Equipment
- Environment
- Engineering
- Established agenda
- Engagement
What’s next?
I suggest grabbing any equipment you might need, choosing your live-streaming software, and getting started with your first (or next) stream. Then, consider how you’ll repurpose your content for maximum reach and engagement.
The sooner you start building your presence on live-streaming platforms, the sooner your business will start growing.