Must-Use Content Creation Tools For Bloggers (2024)

Starting a blog today is easy. You don’t need to be technical, spend thousands of dollars or even hire anyone else to get going.
But are you tapping into all the opportunities your blog could offer you?
Your blog should be a gateway to ad revenue, affiliate earnings, sponsored content, subscription sales, and consulting opportunities (just to name a few). Yet, without top-notch content, these opportunity doors remain firmly shut.
In this saturated content landscape, the real question isn’t if you should use content creation tools, but which ones are the best? Which tools ensure consistent quality without overwhelming you or consuming too much time?
With over 700 articles under my belt in just two years, I’ve found my top picks. And today, I want to share them with you so you can stop missing out on opportunities and make the most of your blogging career.
How Did I Choose These Content Creation Tools?
I chose them based on my personal use.
I’ve tried many SO MANY tools. Lots were just full of empty promises and complicated user interfaces. Some were a bit better, giving you some good output here and there.
But that’s not really what we’re after, right?
I wanted tools that give me the best results in the shortest time. It didn’t make sense to spend days creating a blog post – I wanted to bring my content creation time (per post) to around 3-4 hours.
I also wanted to optimize content efficiently – gone are the days of guessing which keywords go where.
I was also responsible for the whole content creation process on AdamEnfroy.com – something which I never took lightly and wanted to live up to expectations.
These factors made me very aware of the tools I was using.
I’m going to divide these content creation tools into these various sections:
- Writing & Editing Tools
- Graphic Design Tools
- Video and Audio Editing Software
- SEO Research Tools
- SEO Optimization
Feel free to jump to any of the above sections if you’re more interested in them.
Using Writing And Editing Tools To Increase Reader Retention
With people’s short attention spans, captivating readers is totally an undervalued skill.
More captivated readers = increased retention = more blog shares and recommendations.
Writing and editing tools can take a content piece from ‘let’s skim this before moving on’ to ‘let me read every single word of it (and take notes)’.
Big difference.
The following tools are my top recommendations for those who want to achieve blogging recognition, secure better opportunities, and build a loyal audience base.
Jasper
You know one thing I hate when creating online content? Seeing a blinking cursor and not knowing which keyboard button to hit next. It’s not a nice feeling.

Jasper ensures that that feeling doesn’t happen often. It has also evolved SO MUCH over the 2+ years I’ve been using it – which is a credit to the team behind it.
Here’s what you can do in Jasper and why it’s my favorite writing tool.
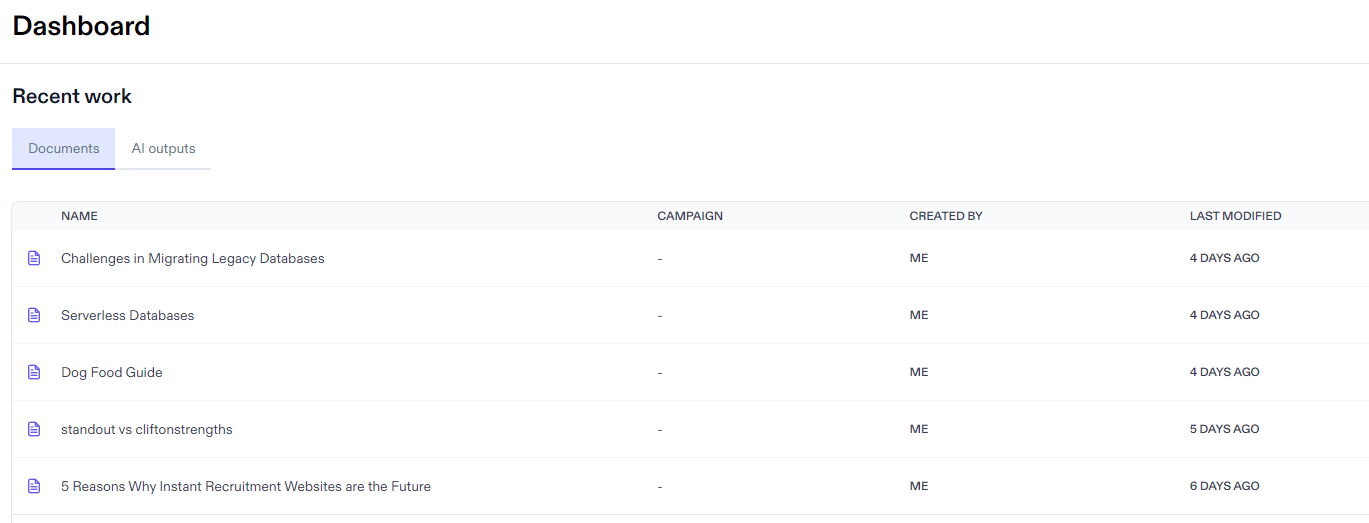
The Jasper Dashboard
The dashboard lets you quickly look at your recent documents and open up the one you need. You can also search for any document you were working on in the past using the pagination menu.
But what if you want to start a new document? Choose “Create Content,” and you’ll be presented with a few options:
- Blank document
- New from template
- New blog post
- New art
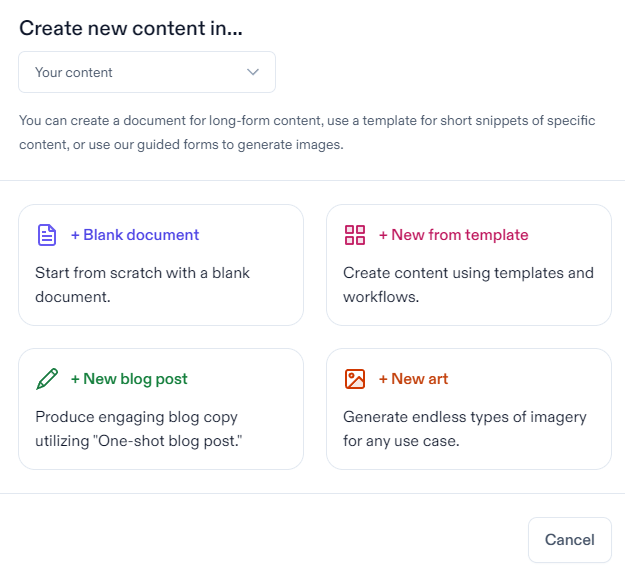
The blank document takes you to the Document Editor – this is a complete editor where you can write your text, issue Jasper with specific commands, format your article, integrate with third-party tools, use templates, and much more.
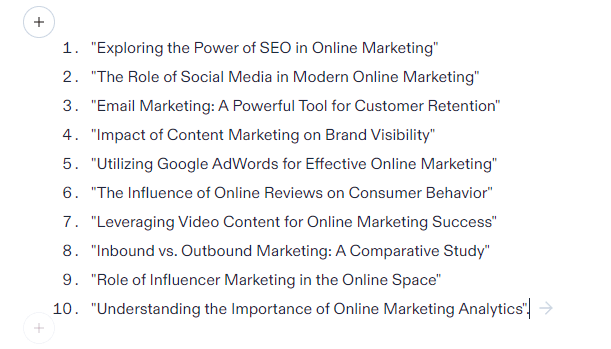
Here’s an example of how I use this editor. I start with a command

And I get this output:
I can then ask Jasper to give me an outline for example 4 above:
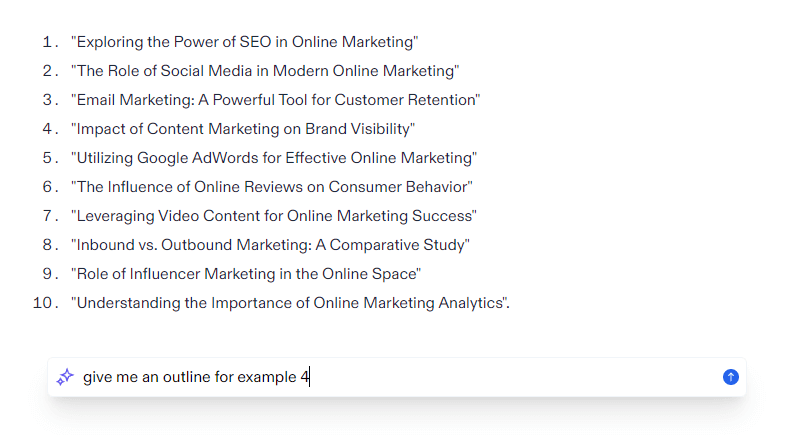
And I get this output:
Not too bad! I can then keep using Jasper to build up my content. A way of looking at Jasper is like you’re dancing with it to create the output you want. It’s never a complete solution but rather a two-sided dance where you direct and it obeys.
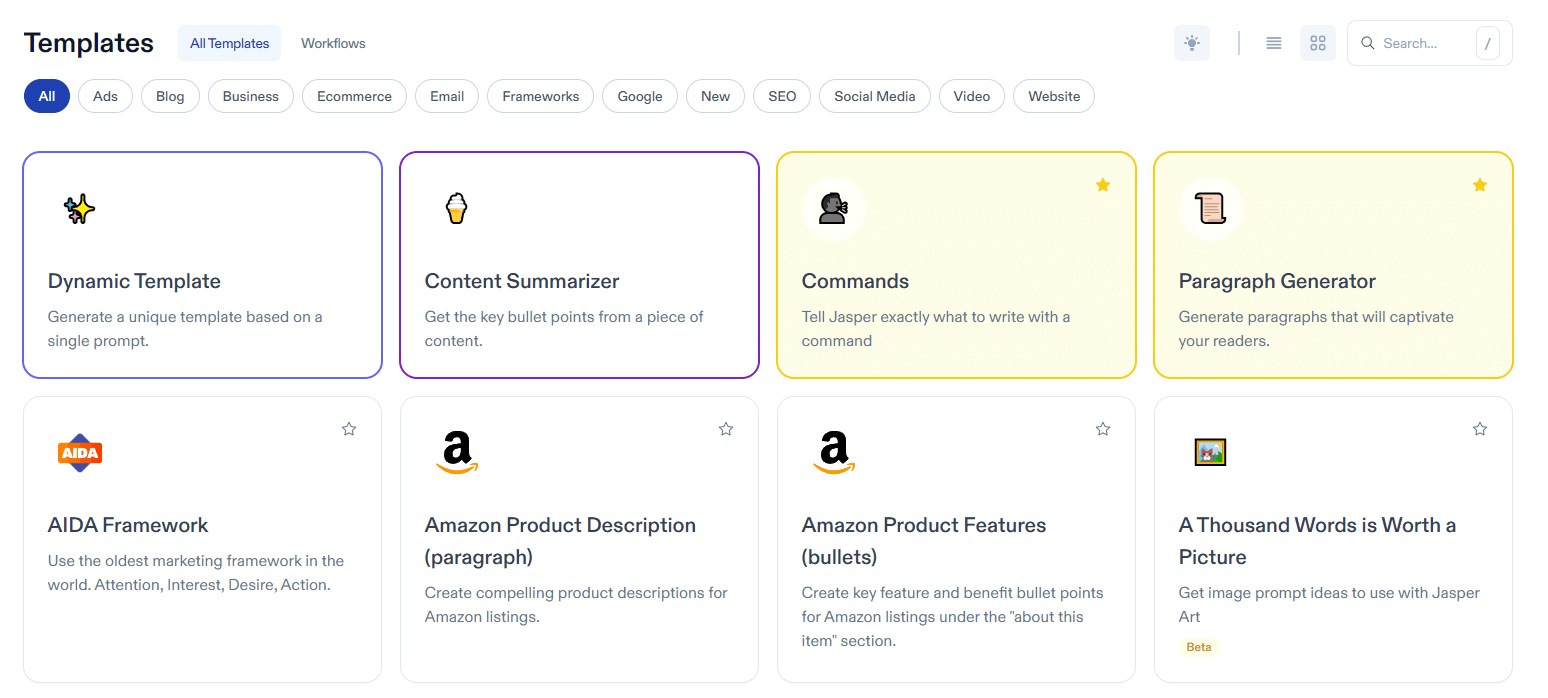
The new from template option brings you to the Templates screen. With over 70 templates, finding what you’re after isn’t hard. Some of my favorite templates are the Blog Post Topic Ideas, One-Shot Blog Post (also accessible through ‘new blog post’ option) and Paragraph Generator.
I have used this workflow quite a lot:
- generate ideas using the topic ideas template
- manually create an outline based on my expertise
- see what Jasper can come up with using the one-shot blog post based on this outline.
- I then sometimes use the paragraph generator to fill in where necessary
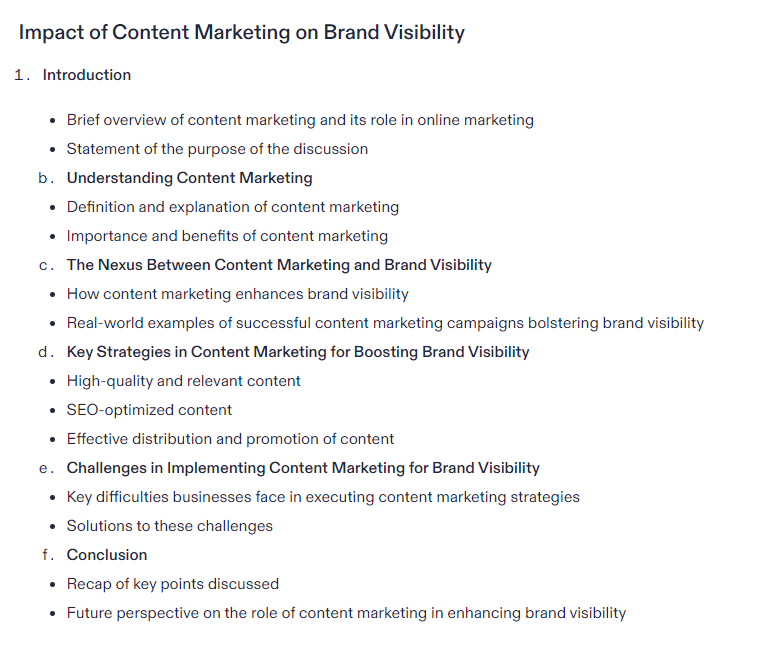
Here’s an example of a one-shot blog post on the topic of ‘impact of content marketing on brand visibility’.
Blog Title: Amplifying Your Brand Through Content: Exploring the Impact of Content Marketing on Brand Visibility
Blog Introduction:
It’s no secret that content is king. With the digital landscape constantly evolving, content marketing has emerged as one of the most effective approaches for brands looking to establish a strong online presence. As a result, more and more companies are investing in content marketing initiatives with the hope of boosting their brand visibility. But just how effective is content marketing on brand visibility?
In this blog post, we’ll explore the impact of content marketing on brand visibility, looking at the ways in which it can drive traffic, increase engagement, and ultimately help businesses to reach their goals.
Blog Body:
1. Driving Traffic:
Developing compelling content that resonates with your target audience is a necessity for driving traffic to your site. Through strategic keyword research, content creation, and optimization, your brand can rank higher in search engine results pages. This, in turn, can lead to increased website traffic from potential customers seeking relevant information.
2. Increasing Engagement:
By producing content that speaks to the needs and interests of your audience, you can foster a sense of community and build brand affinity. Offering value through informative and entertaining content can entice viewers to engage with your brand on a deeper level, leading to increased social media engagement, comments, shares and ultimately, loyal customers.
3. Establishing Authority:
As your brand becomes synonymous with valuable content, it establishes itself as an industry authority and serves as a thought leader. This is particularly relevant for businesses operating in competitive markets. By providing informative content that speaks to your audience’s pain points, you can earn their trust, and ultimately their loyalty.
4. Driving Conversions:
In addition to driving traffic and increasing engagement, content marketing can drive conversions and revenue generation for your business. By producing content that responds to the needs of potential customers at various stages of the buyer’s journey, you can effectively nurture leads and guide them towards becoming paying customers.
5. Measuring Success:
Finally, it’s important to note the importance of measuring the success of your content marketing initiatives. This includes tracking website traffic, engagement, and conversions while also analyzing the sentiment and consumption habits of your audience. By analyzing your data over time, you can further refine your content marketing strategy and continue to optimize for maximum results.
Not quite a complete piece of content but definitely something you can work with.
You can also use Jasper to generate AI art. Their AI art generator takes text inputs and turns them into art. I gave Jasper the same statement as above. I wasn’t really being helpful:
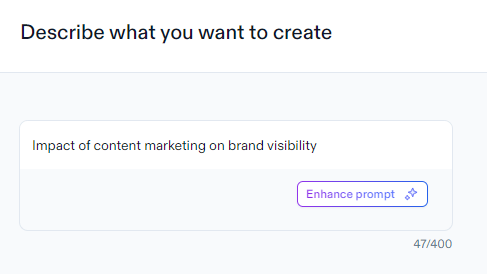
This is the result:

Hmm.. not quite sure about this one. Let’s try and give Jasper a better input. I’m going to use the enhance prompt command:
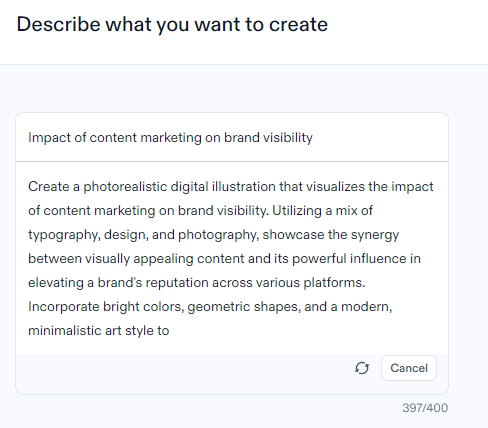
This prompt has SO MUCH more potential. Here’s the result:

Still requires some editing using a graphics tool (check out the appropriate section) but much better than before.
Also, personal observation: As long as you’re not creating art pieces involving hands and faces (this seems to be a general AI art weakness), you can create quite a few interesting outputs.
Organizing Your Jasper Projects
Jasper offers folders where you can organize your projects. In the beginning, all the documents were listed underneath one project. This made bigger projects much more challenging to keep track of.
Now, you just need to create a folder and work within it to create your documents. Easy peasy.
Other Features To Know About
Brand voice is key when creating content. It helps shape how others perceive your brand and can be more important than the words themselves.
Jasper assists in ensuring your brand’s voice remains steady, no matter where you express it. You can train Jasper on the brand voice you want and then use this content tool all over the internet to ensure the right message is sent.
Jasper also makes collaboration easy. Multiple people can work on a document at the same time. No more back and forth between people or losing track of who wrote what. Everyone can see the changes made to a document and ensure the right message is sent out easily.
Integrations are also another thing to love about Jasper. It integrates natively with Surfer SEO and Copyscape. You can confidently write content for your website, knowing it is optimized to the highest degree. You can also check (in real-time) that the generated content isn’t already out there.
Jasper’s Chrome extension is another feature to consider. It gives you access to all the tools Jasper offers, without ever leaving your browser. You can write, edit, and more, all while surfing the internet.
Jasper can also create content in multiple languages. With 30+ languages at the time of writing, Jaspe helps craft the right content no matter which language you are writing in.
Here are some additional features to consider:
- Free Tools Library: You can see if Jasper fits your needs with their free tools library. It contains all the necessary tools to get started and create high-quality content quickly! As far as free content creation tools go, this option is great to have.
- Security: Jasper is committed to user privacy, providing a secure environment that allows users to share documents safely and securely. Jasper is SOC 2 Compliant, GDPR Compliant, and SSO Enabled.
- Business Plan: If you’re looking for a comprehensive business plan for your online presence, Jasper can help. Their team of experienced professionals will provide you with a custom plan tailored to your needs.
- Jasper Chat: Jasper also provides a chat feature that allows users to communicate with it as if they were speaking to another person. Complete your tasks quickly and efficiently with this powerful feature.
Jasper Pricing
With the Creator package, you get some pretty neat AI tools to help you craft and enhance your blogging content And it’s priced at just $49 a month.
Oh, and a tip: if you decide to go for the yearly plan, there’s a 20% discount waiting for you.
If you’re part of a team or handling content for multiple brands, the Teams package might be better. It’s designed with advanced AI tools that not only help in content creation but also make collaborating on campaigns a breeze.
It costs $125 a month. And just like the Creator package, there’s a 20% off if you choose the yearly billing.
Grammarly
Grammarly starts at $12 per month and promises to make your written words sing.
Does it? The answer is an absolute YES.
Here’s how others use it: They enable the Chrome plugin in their browser. The plugin starts underlining the words you write (as you’re doing it) so you can immediately correct your writing.
For me, I find that to be distracting. I prefer to write out all my thoughts and then edit afterwards.
I then take the content I’ve written (using the first draft of the above as an example) and paste it directly into grammarly.
Then I choose my goals.
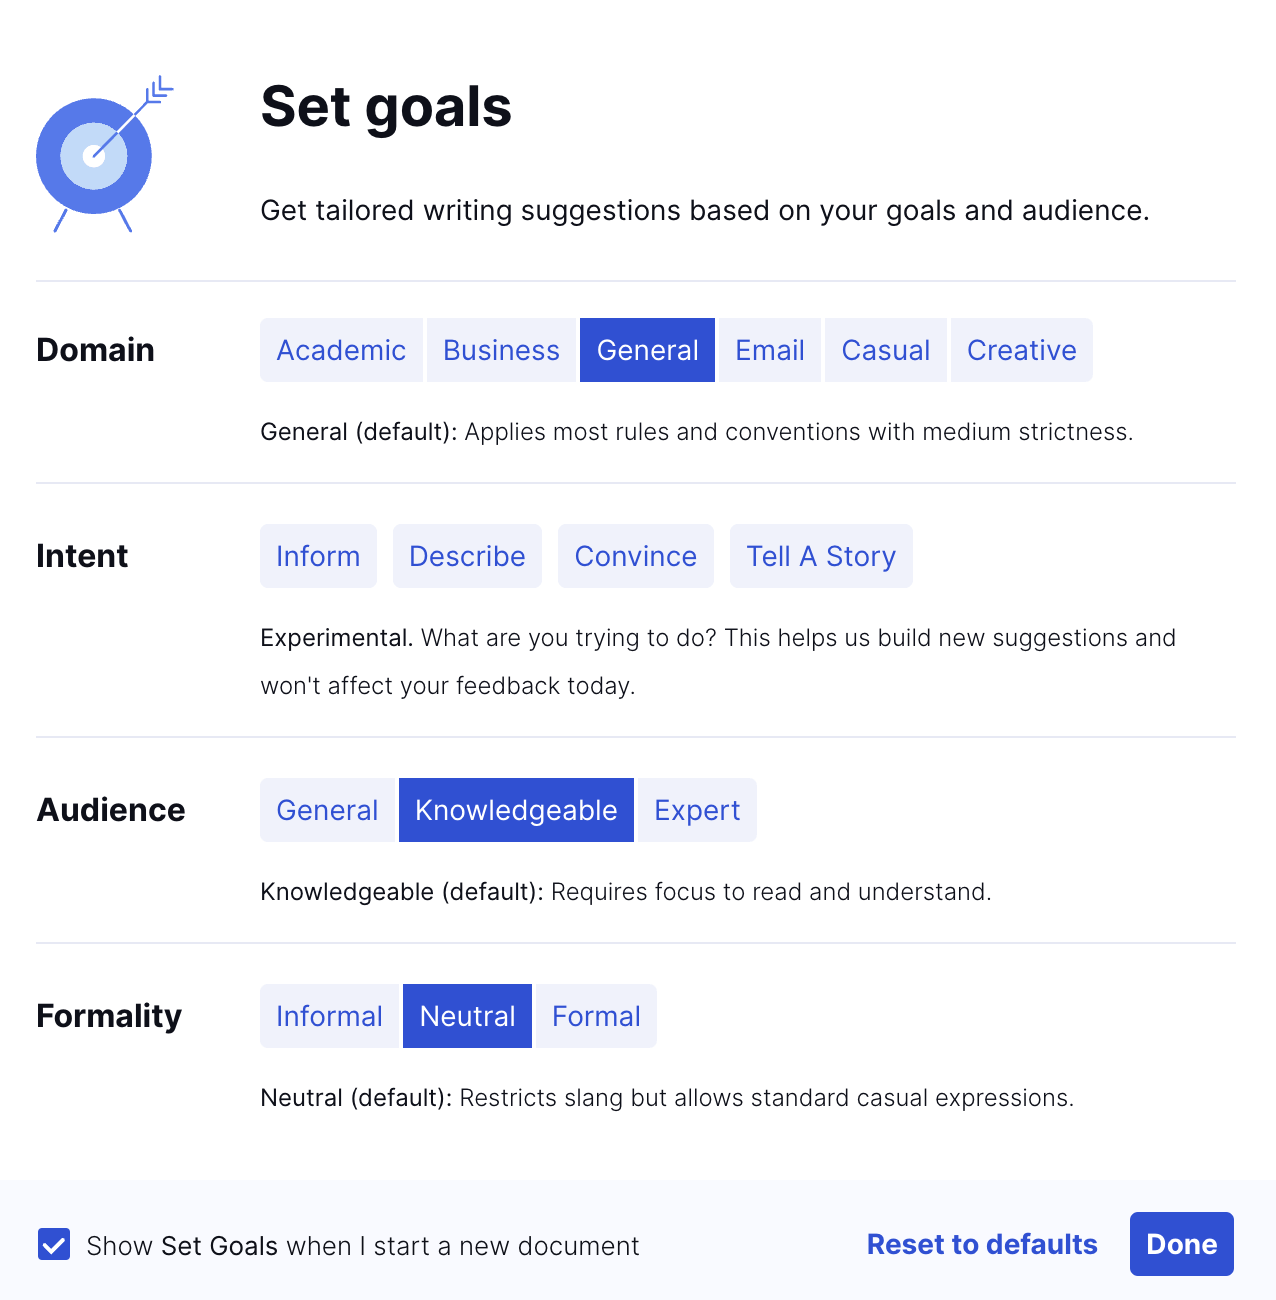
To be honest, I don’t usually change anything. The default settings are pretty good. However, you’re free to do so for specific types of writing.
Your audience can also affect Grammarly’s filters and can change the intent and formality of your content. Next in the main document, I can see Grammarly’s initial feedback:
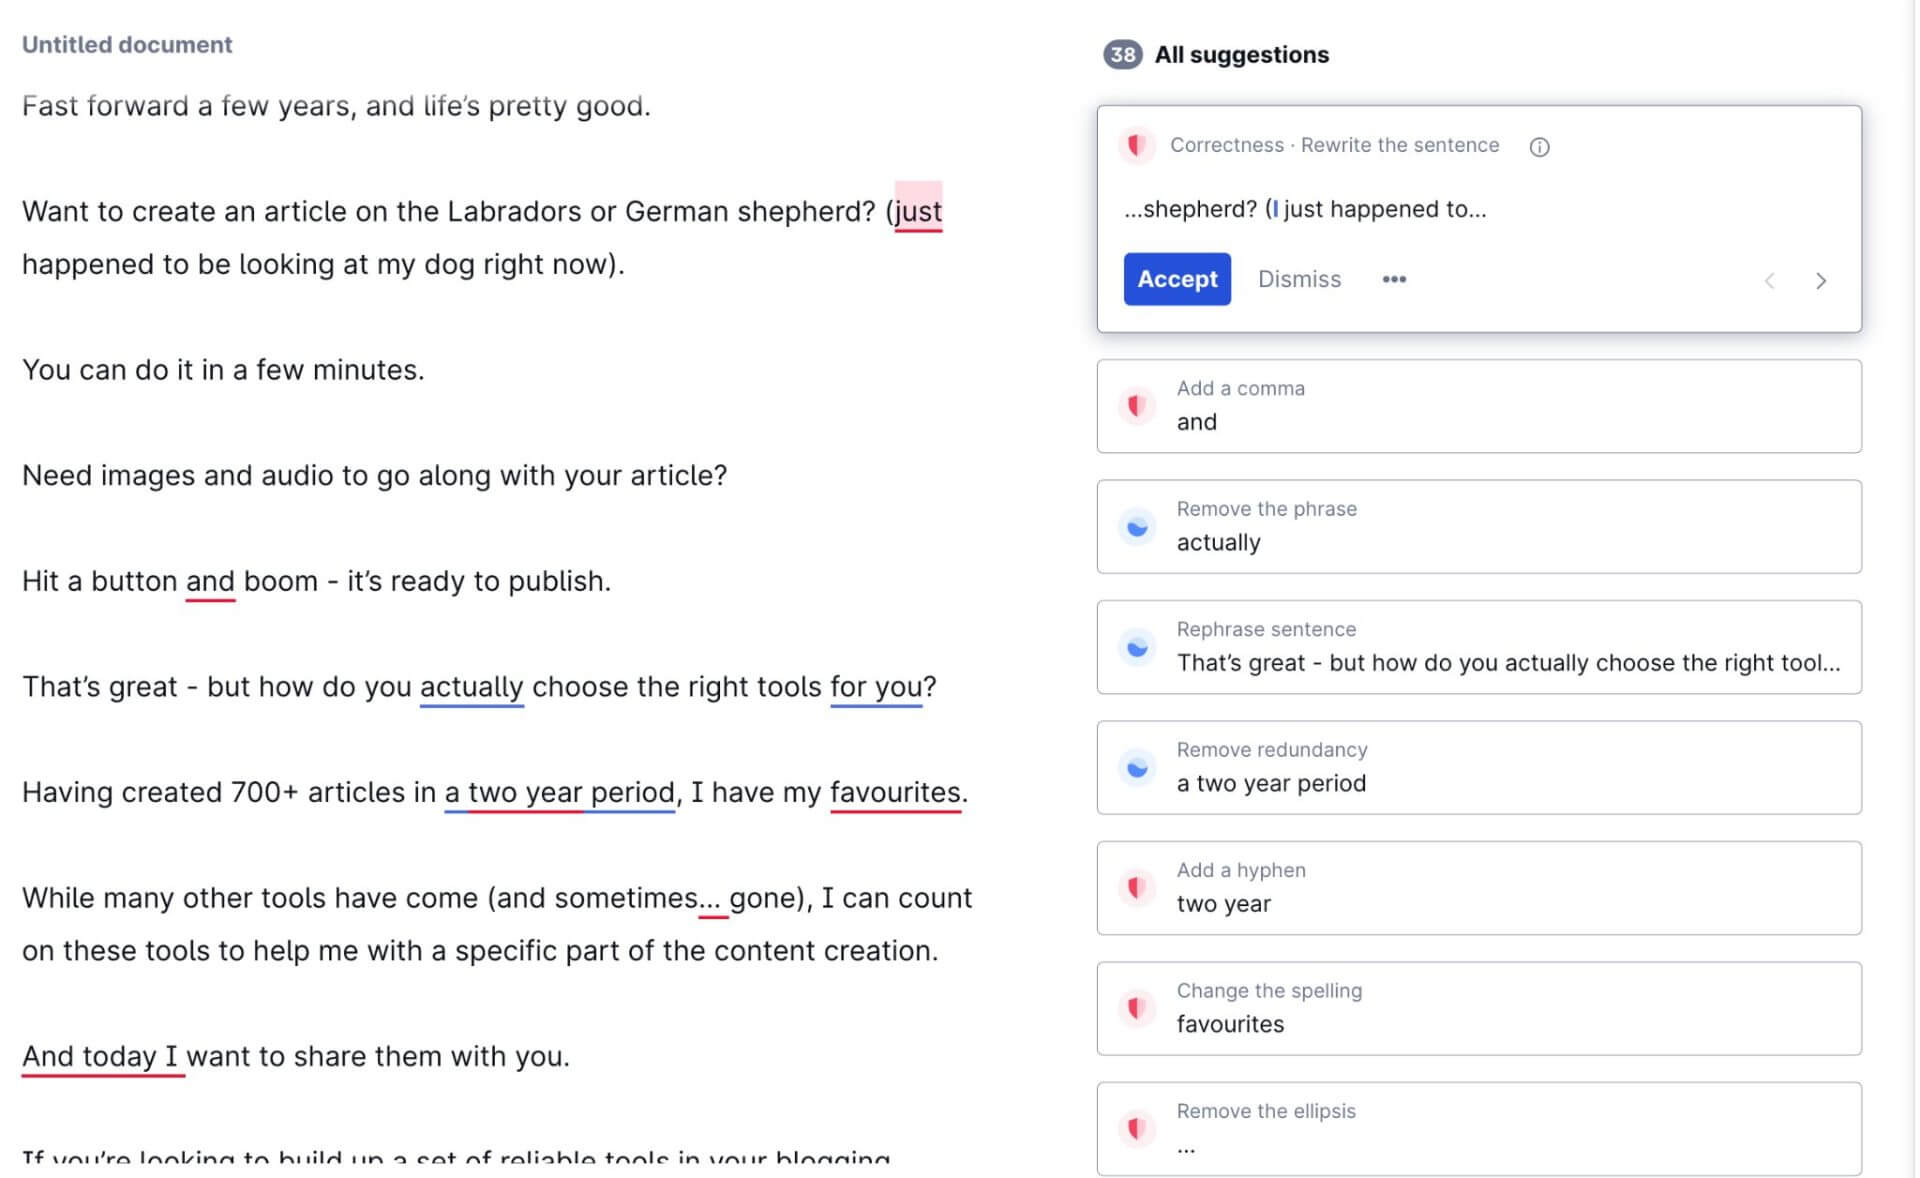
Some words are underlined in blue; many in red.You could also get green underlined words.
Grammarly’s Colour Coding
So what does that all mean?
Here’s the breakdown:
- Red underlines signal spelling, grammar, and punctuation errors.
- Blue underlines indicate suggestions for improving clarity.
- Green underlines mark suggestions to make your writing more enjoyable – like word choice enhancements.
Once you get your screen looking like a rainbow, you have two options to fix the errors:
- The manual way
- The semi-automated way
The manual way involves double clicking on the underlined phrases and replacing them with a better alternative.

The semi-automated way is all about using Grammarly’s wizard to help.
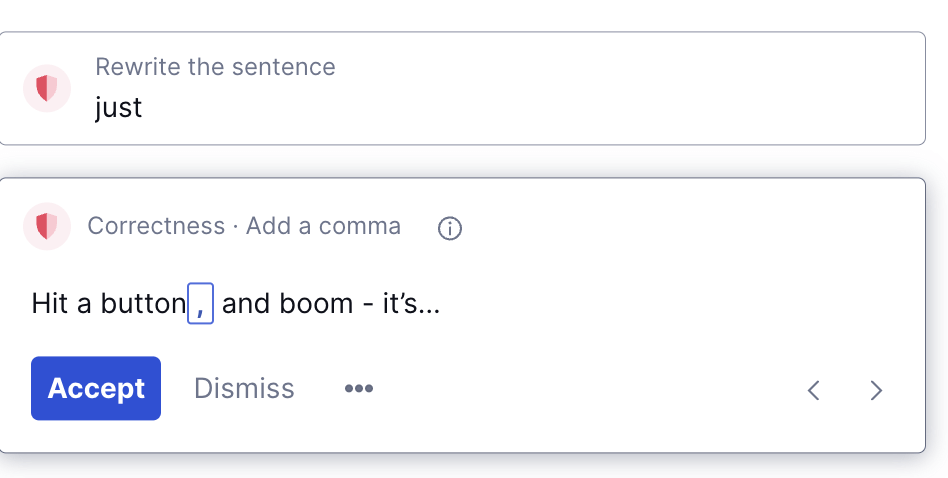
Hit the accept button and watch the magic happen. Grammarly simply updates your content with the improved version.
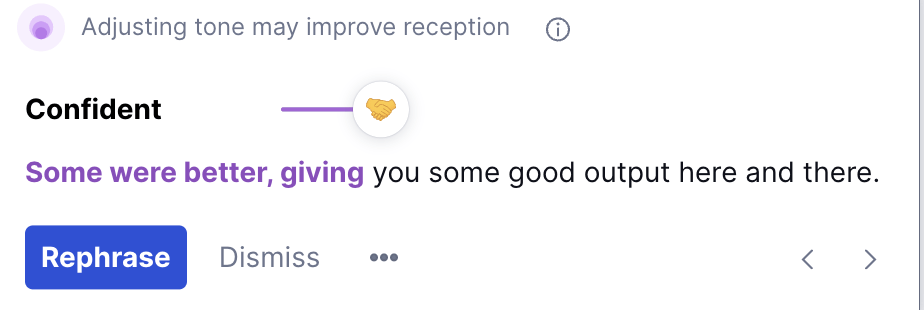
Grammarly also gives you ideas on making your text sound more confident.
Imagine if you could translate that to real life.
One-click confidence – that would be something, wouldn’t it?
Anyway… there are also a few interesting stats to consider:

Most interesting for me is the readability score. As a paid content creator, I want to get a score of 60 or above.
Doing so involves writing short sentences, using the active voice, and being as clear as possible in what I say.
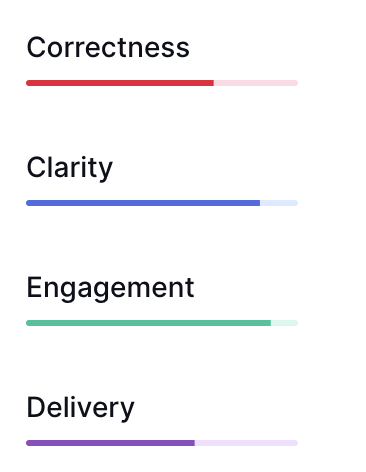
One thing I also like is the visual representation of:
- Correctness
- Clarity
- Engagement
- And deliverability
The higher these are, the better the final output will be.
Should You Pay For Grammarly?
Is the paid version worth it?
Starting out, I went with the free version. It served me well and helped get the job done. Knowing what I know now, I wouldn’t advise you to do this.
The free version focuses on:
- Spelling
- Grammar
- Punctuation
- Conciseness
Not bad if you’re starting out.
But if you want all the good stuff including:
- Sentence rewrites
- Ability to adjust various tones
- Detecting plagiarism
- Choosing formality level
- Adjusting fluency
The premium version is where you should be.
If you’re creating content professionally and want to take your blog to the next level, I would say go for premium. It’s well-worth the monthly charge.
They also have a business version which I’ve never been a part of. These features might be useful in some cases but I’ve never found myself needing them.
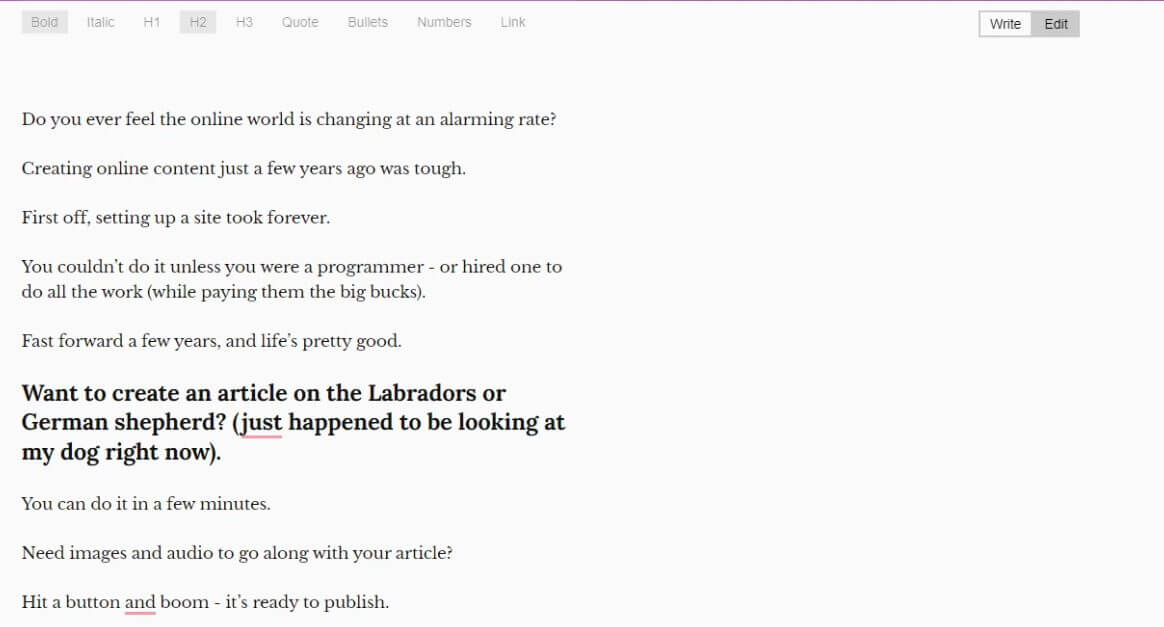
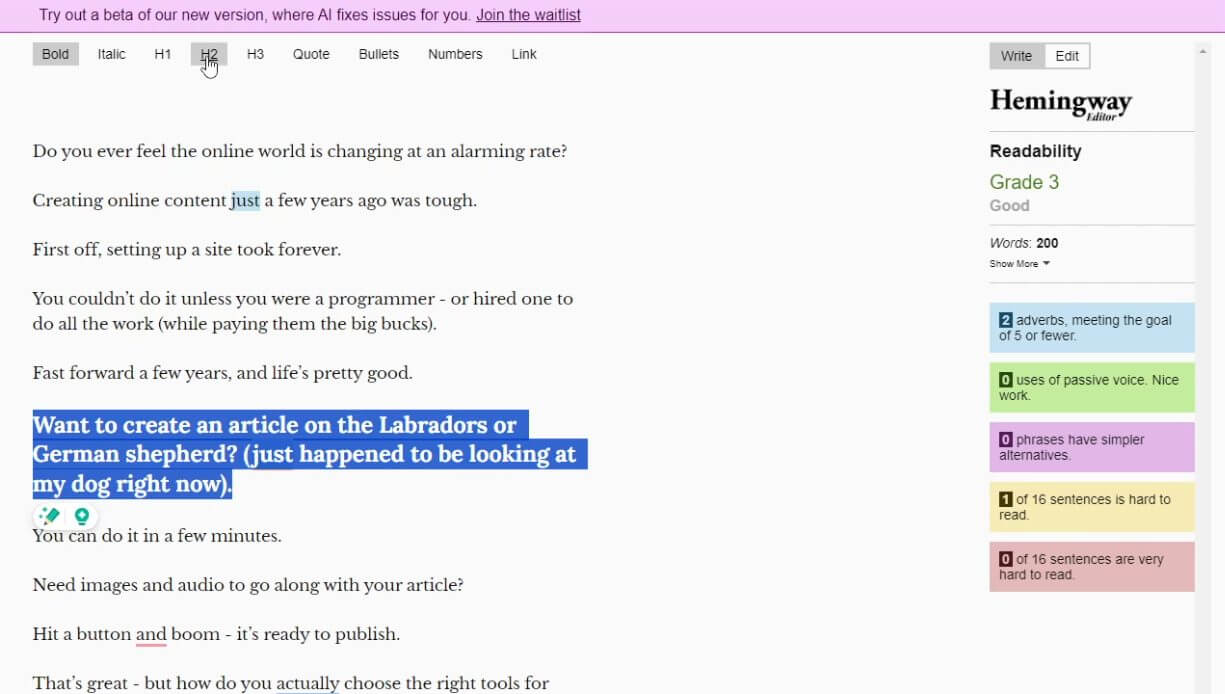
Hemingway Editor
If there was anything as close to a writing-best-friend-forever, I’d consider Hemingway to be this.
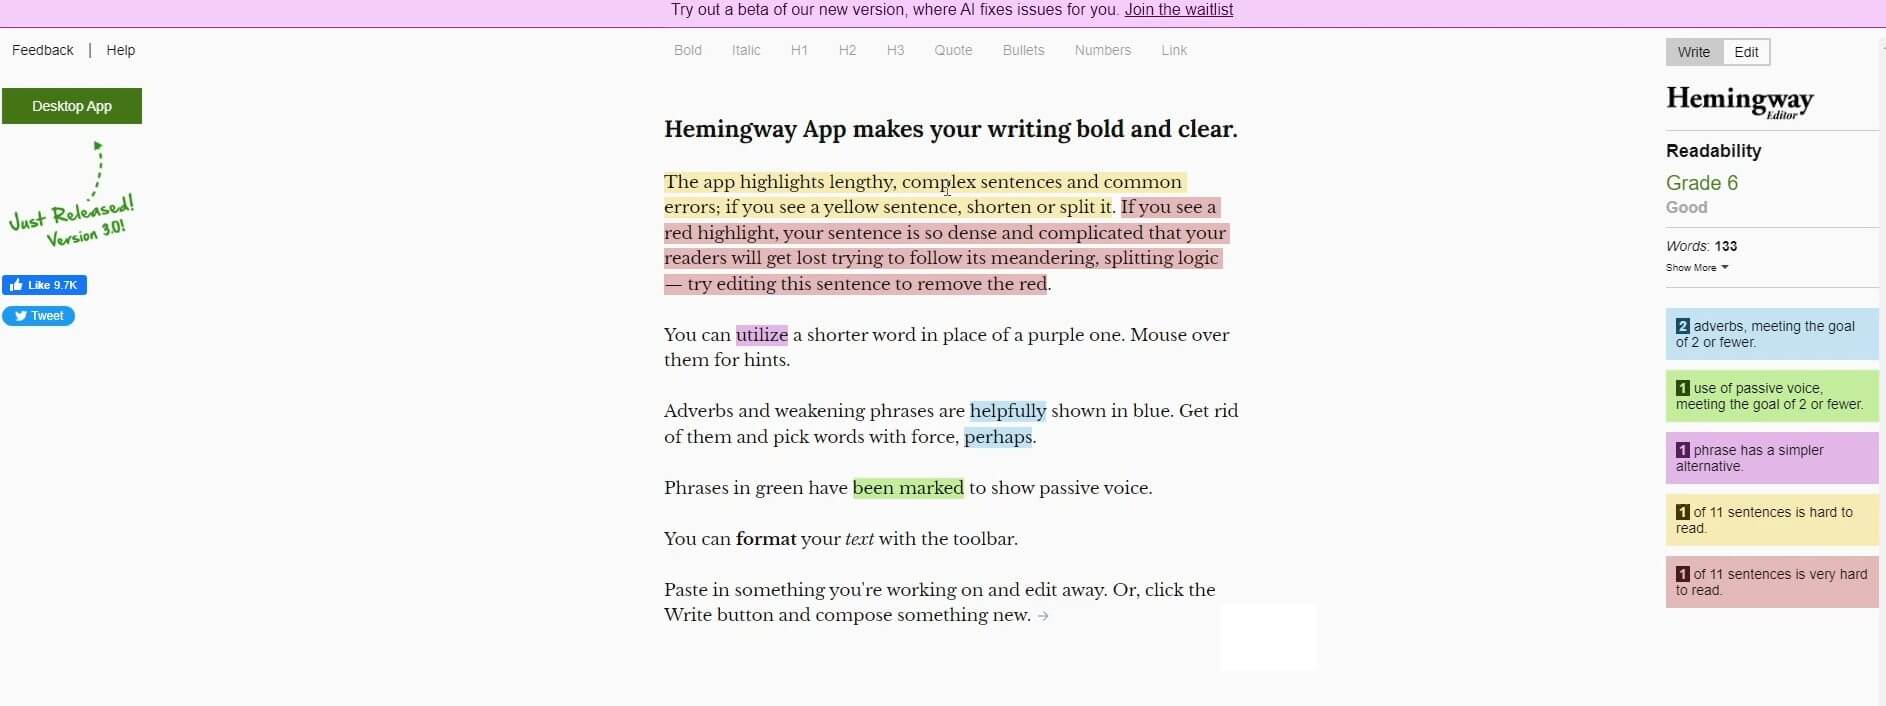
First of all, it’s much more color-friendly than Grammarly. The range of errors are also limited to just a few.
There are yellow alerts – representing hard-to-read sentences. While you might want to change these, it’s not the end of the world if you leave them in your writing.
There are then the red alerts. The “stop-what-you’re-doing-and-fix-these-immediately” kind of stuff. Changing these phrases into better reading text makes everything better. You also get information about adverbs.
If you want your text to flow more easily, Hemmingway recommends finding other ways of saying things.
Finally, there are the green highlights. These show you the use of the passive voice. There are some situations where the passive makes sense.
HOWEVER, the more direct (active voice) you can be, the BETTER!
Is Hemmingway Better Than Grammarly?
Yes and no…
Yes – if you use it as an addition to Grammarly. It does make your text simpler to understand. At the same time, no – simply because there is no auto-suggest solution (unlike Grammarly).
You can’t just magically hit a button and find your text fixed. You have to do this manually (for now). I find this to be a bit time consuming but it also gives me more control over the final product.
Using Hemmingway As A Writing Space
The Hemmingway editor is also a space where you can write. Simply hit the WRITE tab and the editing mode goes away.
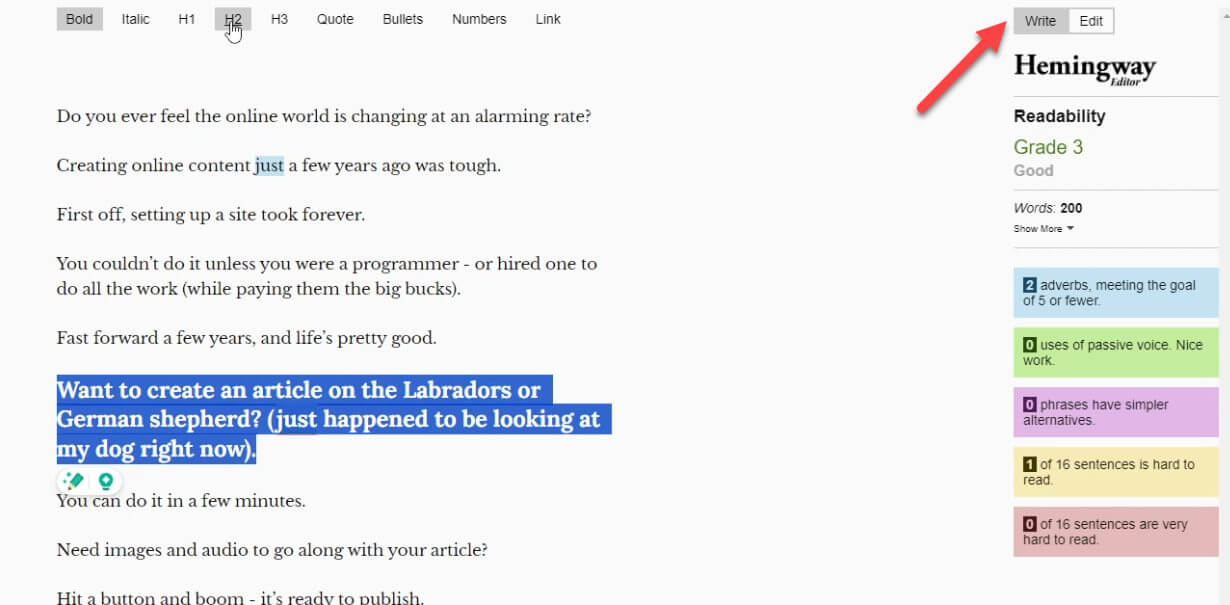
Super useful if you find yourself in trouble when wearing too many hats.
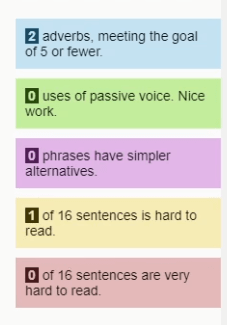
But what if you’ve already created your text? Simply paste it in the editor and the real time magic will highly all the above mentioned errors. Go ahead and tweak them and you’ll see the error stats going down in real time.
You can also use the editor to jazz up your text with bold, italics and other fancy headings.
By the end of the process, you’ll have a document that’s ready to go.
Hemmingway’s Other Useful Features
Hemmingway recently announced an AI-powered beta that can help with this. There’s still a waiting list to try out this tool so I can’t comment on how effective it is. What I can say is that when this works properly, Hemmingway might be a real competitor to Grammarly.
But what if you use Hemmingway on a super regular basis? The company recently launched their desktop app.
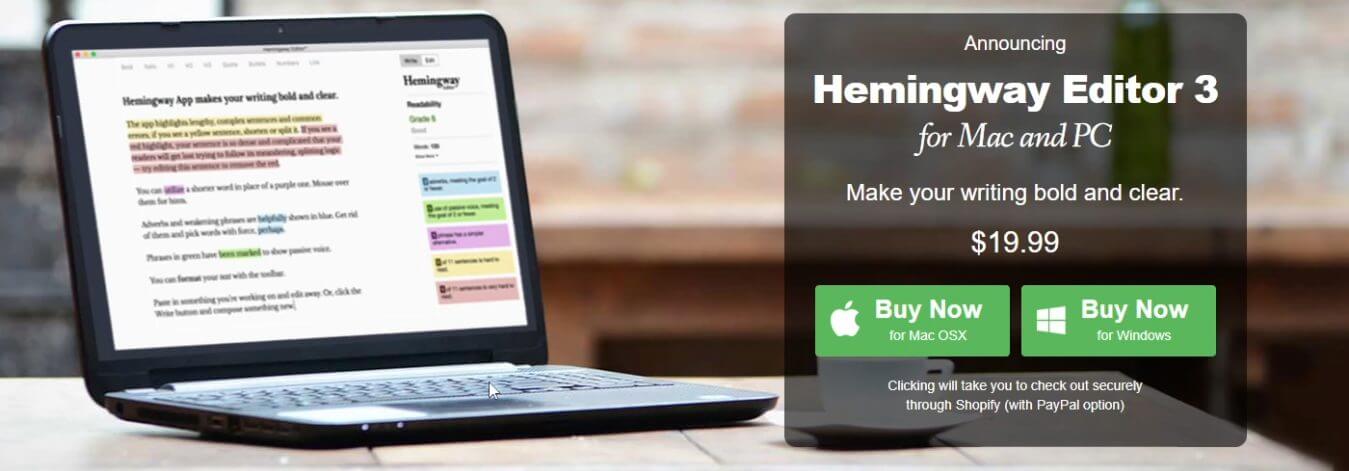
Simply download your operating system-specific version (Windows or Mac) and you’re ready to get going. The app is also a one-time purchase – no monthly date with your wallet needed.
Grammarly requires a recurring subscription so the one-time purchase is definitely a plus.
Another great feature I like about the Hemmingway app is the publishing ability. If your site runs on Medium or WordPress, you can upload directly to the platform.
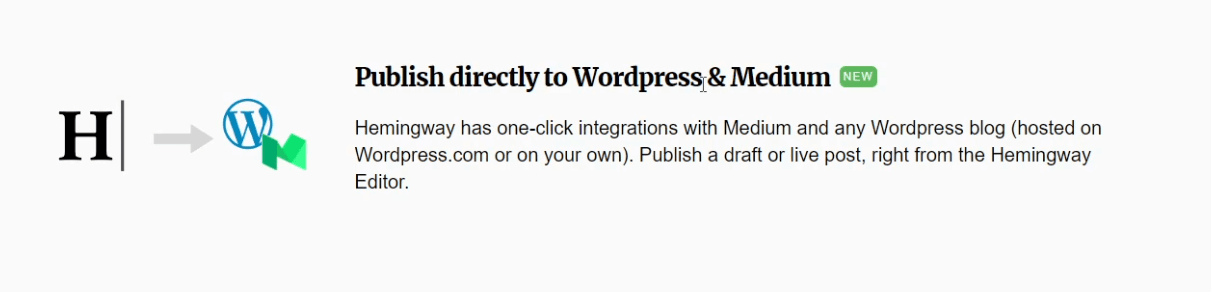
Because why take multiple steps when you can combine everything together?
Final Thoughts
Simplicity is the name of the game with Hemmingway. Simply “plug, play, and slay”.
If you want an editing tool that allows you to get started quickly, check out Hemmingway. It’s one of my favorite editing tools for taking my written thoughts and forcing me to make them simpler.
And when it comes to valuable content, nothing can beat simple thoughts that everyone can understand.
Mastering Visual Magic: Creating High-Quality Graphics
Visually compelling graphics can enhance the overall quality of a blog post. Visuals also make posts more engaging and shareable, and can help convey complex information more easily.
In turn, this increases the time spent on your blog. It also increases the chances of virality. Clear visuals also ensure your message is effectively communicated to readers.
These factors can boost your online reputation, improve search engine rankings, and lead to more monetization opportunities, collaborations, and a loyal readership base.
“But I heard creating high-quality graphics is difficult”, you might be thinking…
Nothing could be further away from the truth.
Whether you’re a beginner or a more advanced visual wizard, here’s one of the best visual content creation tools I always turn to.
Canva
I once wanted to become a graphic designer and tried to start learning Photoshop.
Let’s say that ‘career’ didn’t get far.
Canva is the best tool to create visual content without understanding what’s happening in the background.
No matter what you’re trying to create, you can probably get it done (fast and easy) in Canva.
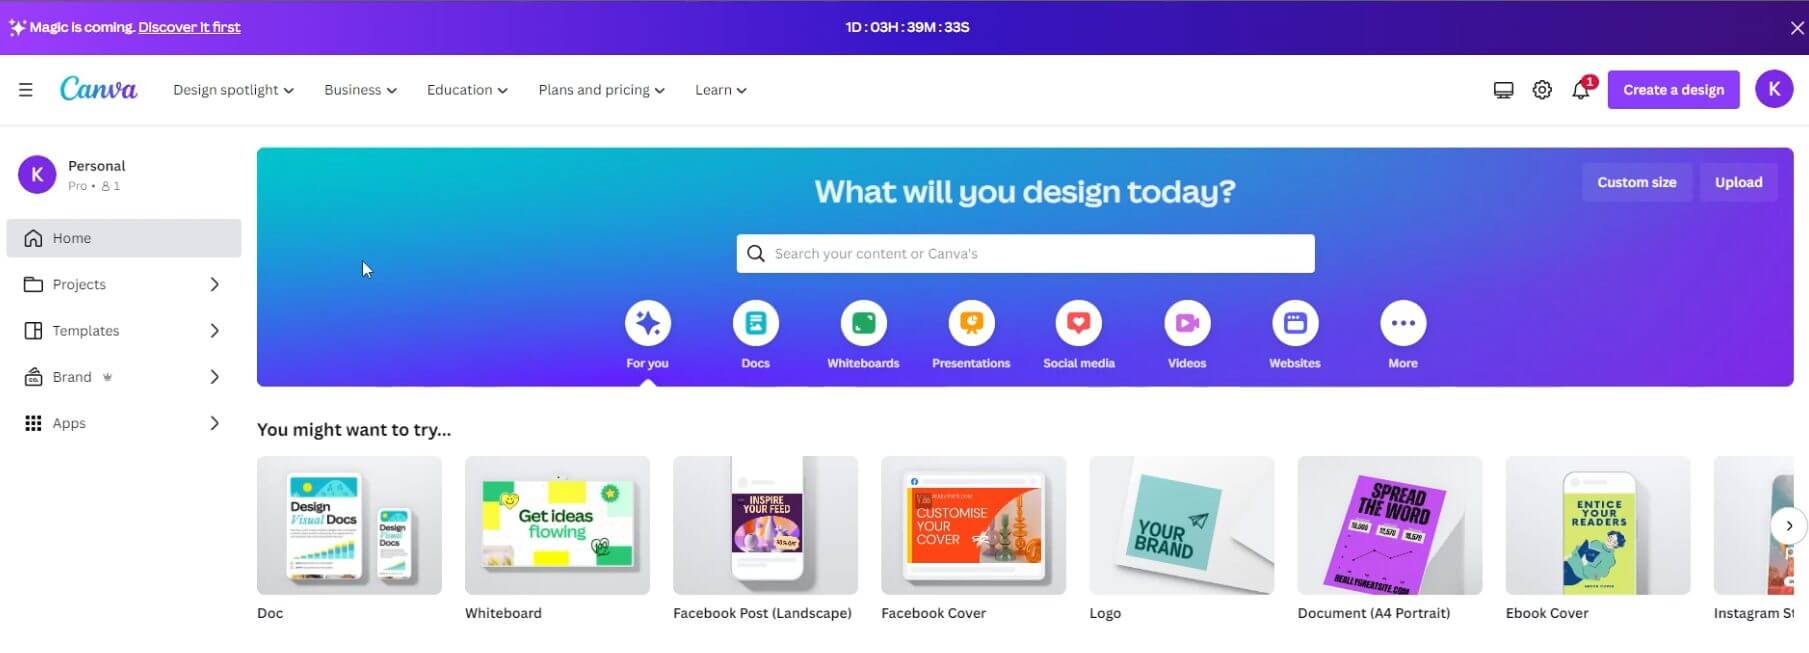
The Canva Interface
Diving right into the Canva dashboard, you can search for the type of design you’re looking to create. Doesn’t matter if you want social media posts, mobile wallpaper or anything in between.
Let’s say I’m after a WordPress featured image.
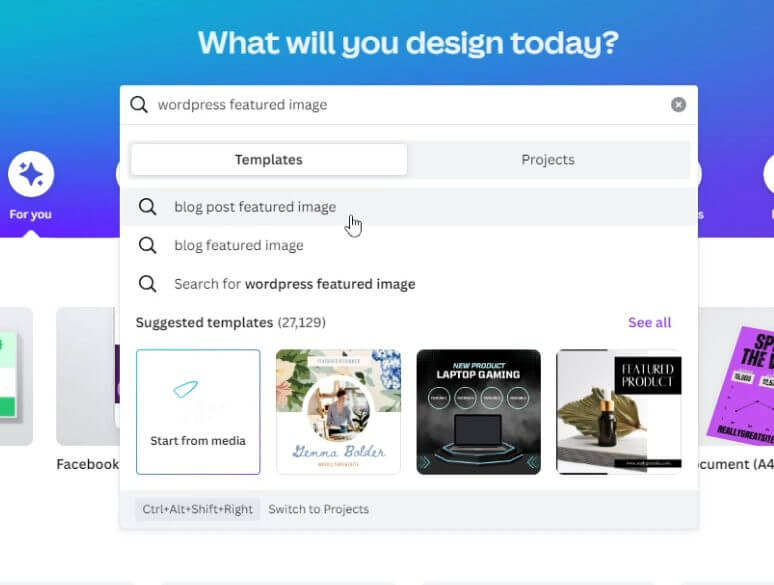
I just click on the design I’m after and boom.. Ready to start editing. I can also organize all my projects under the “Project” tab. Super helpful as you start creating tens of different designs for your projects.
Another useful feature is what goes into the “Brand” section.
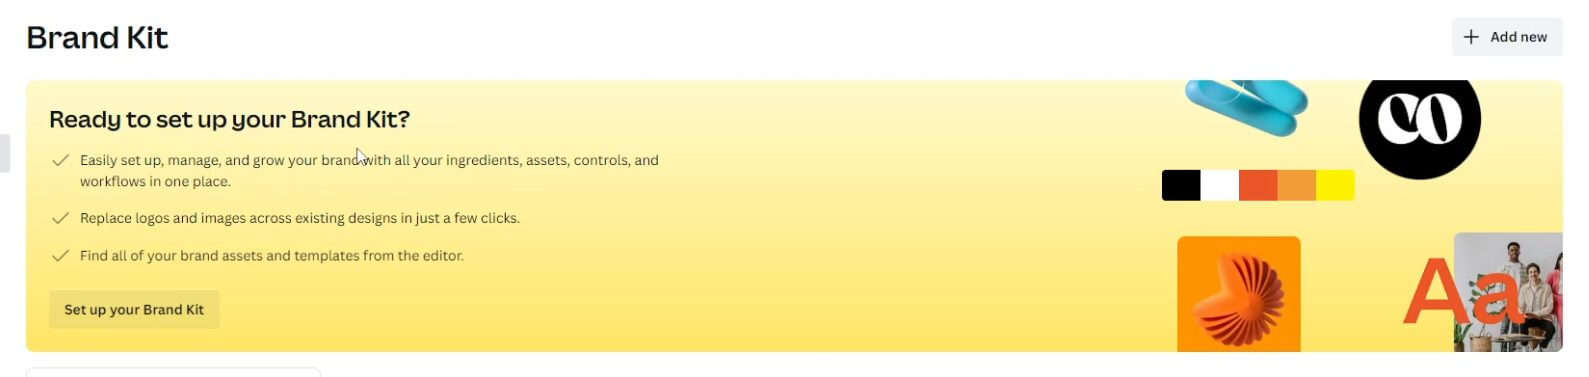
If you want to keep track of the colors you use, the same types of logos and your general outputs consistent, you’ll probably love this section.
Also if you’re part of a team, Canva is a great collaborative tool. You can ensure everyone’s working on the same page and creating designs that compliment each other – rather than having multiple variations floating around.
Using The Canva Blog As Inspiration
Do designers suffer from writer’s block? Is it called designer’s block? Or does the same concept apply to designers as well?
Curious questions that I’ve just Googled. Apparently, taking a trip somewhere is a cure to designers’ block. While I can’t disagree with that, I don’t think you need to (or want to) do that each time you face a block.
Instead, you can just check out the Canva blog for inspiration. Their design guides can help you become better at the designs you create.
While you won’t necessarily become a pro overnight, it will help you get the job done – well.
Amongst other things, you can get:
- Juicy design tips so you can stay ahead of the curve
- Proven marketing tricks to help you improve your craft
- Branding information to help you be consistent
Their guides are very detailed and run through the step-by-step you’d need to take to create the output you want. Let’s say I want to design a baby shower invitation.
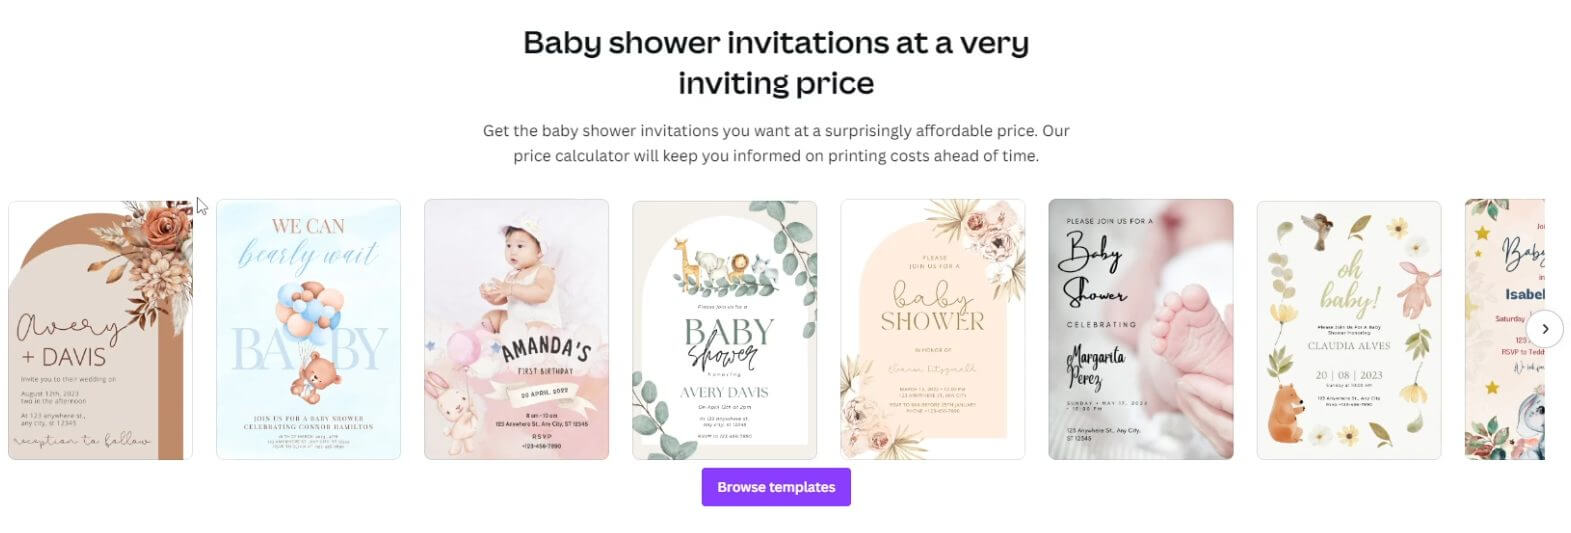
No problem at all. Want to create a pop up store? Easy!

I love the easy-to-understand language, the visual examples and the depth of information they have on their site.
Unleash Your Inner Designer In The Canva Editor
But what about the editing process itself? Glad you asked! Creating and editing designs is super straightforward.
Choose your elements (they provide their own library of royalty free images and elements). Sprinkle some text if you want (hundreds of designs available) Upload any custom images you want (you can just drag and drop).

That’s pretty much it.
You’re ready to move your elements around, resize as needed and publish your designs. You can also download your work in multiple formats that best suit you.
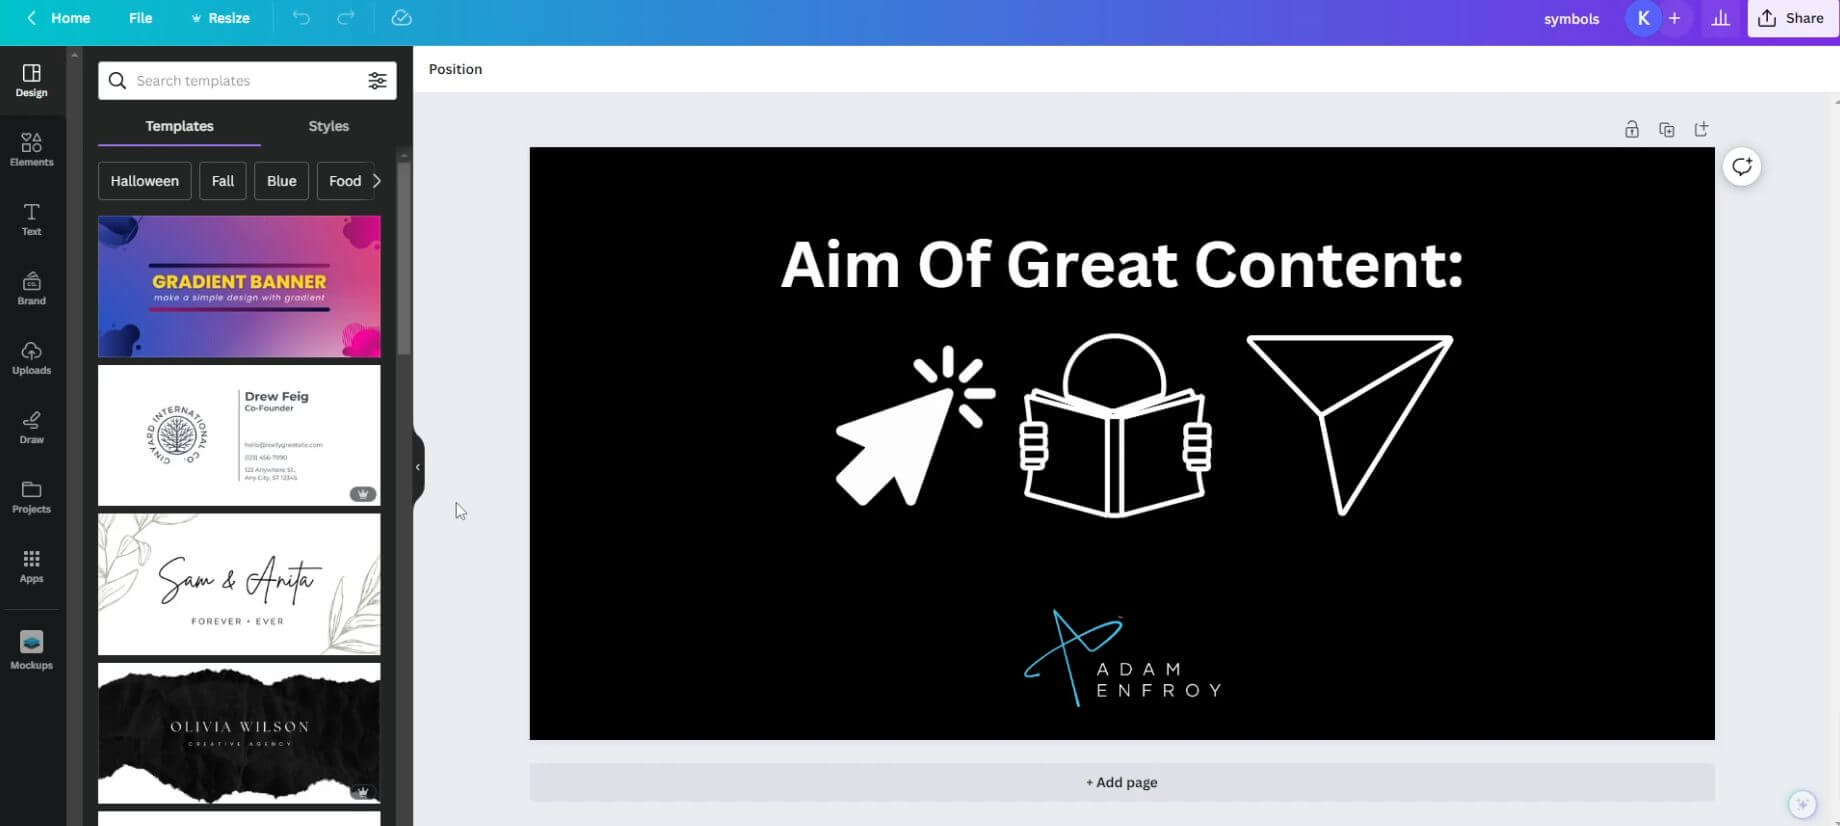
How I Create Custom Images On Canva
Personally, I use Canva to create custom images for AdamEnfroy.com. I look at the section where I want to insert an image and consider what type of images would fit in.
I then hop into Canva and search for elements that make sense. Once I find them, I create a rectangle shape, change the background color to black and upload the AdamEnfroy logo.
I then add the elements and move them to the right sections on the screen. I use Canva’s rulers to ensure that the elements are in alignment on screen (whether that’s centered, left or right).
I might also add text if it makes sense. I then choose the lower-sized images (don’t want to have slow-loading images) and download my design. Then I head to WordPress and upload the newly-designed image.
That’s all there is to it.
Advanced AI Features
Canva has recently jumped on board the artificial intelligence train and included several tools that can take your designs further. The background remover is one of my favorites.
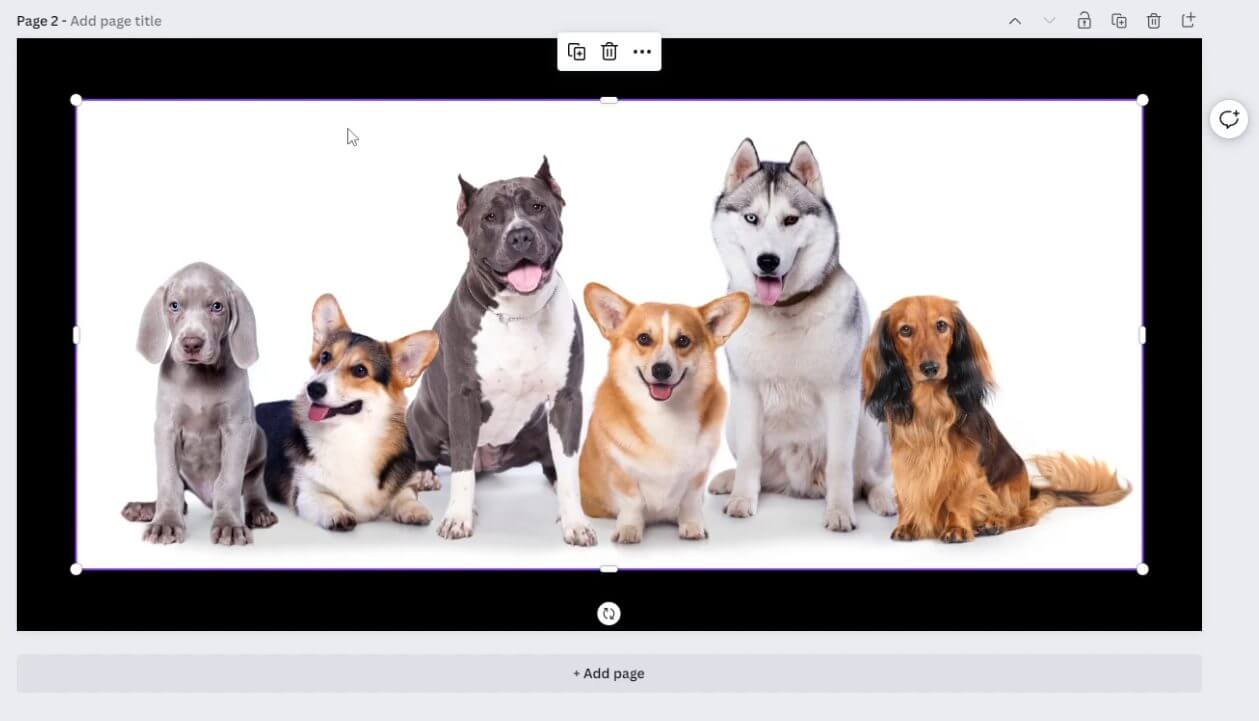
Hit a button and the background disappears.
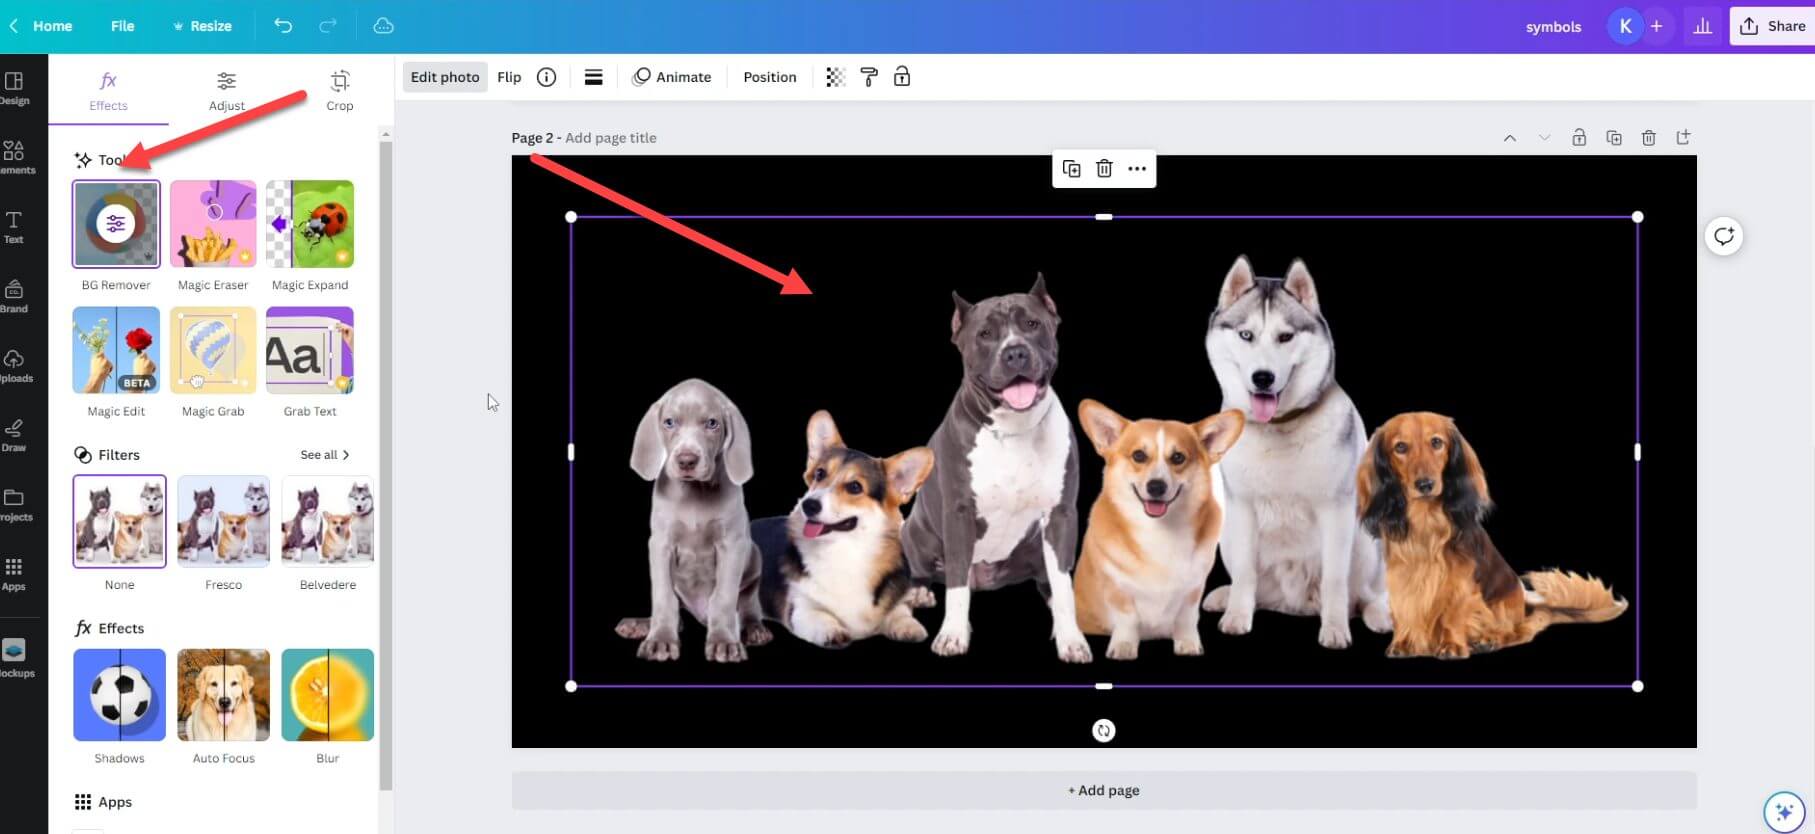
Great for creating images that pop!
You can also type in commands and Canva will auto generate additional items into your image. Great if you want to add to your output without learning fancy software.
Canva Pricing Plans
The great news is that Canva’s free version works well. However, you won’t get access to more advanced features. You also won’t be able to use some elements and royalty free images.
I think that’s totally understandable.
If you want to make use of everything I mentioned above, you should definitely consider the paid version.
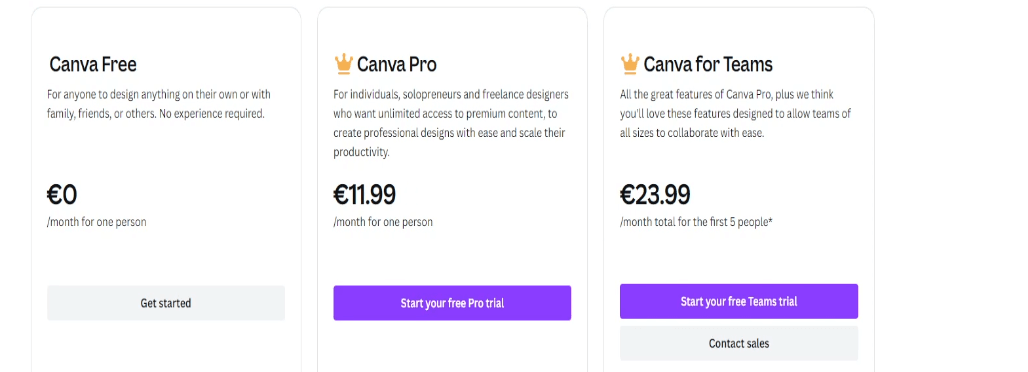
Canva Pro is aimed at those going on solo design adventures and freelancers who need to create quick designs. They also have their team plans where collaboration is a must. Since teamwork makes the dream work, I can certainly see the value in that.
If you want to have a tool that grows with you – at a constant price – this might be the one to check out. You can tell Canva how many people are on your team and you’ll get an accurate reflection of how much you’ll end up paying.
Great for those whose teams might go up or down in size.
Turn Your Words Into Cinematic Brilliance Using Video & Audio Editing Software
Want to know the quickest way to enhance your storytelling and reach out to a broader audience?
Creating engaging videos with solid audio.
Not to mention this audiovisual combination can:
- Cater to different audience preferences
- Increase overall engagement and retention
- Tap into multiple platforms that prioritize video and audio
Learning basic video and audio editing is great for bloggers. It turns you from a single-track blogger to a versatile content creator.
Adam’s YouTube channel now has more than 150,000 subscribers. This channel provides additional sources of income, more exposure, and an opportunity to collaborate with other brands.

Here are the two tools I recommend bloggers use regarding video and audio creation.
Filmora
Most people would think about Adobe when thinking about video editing.
I don’t.
This isn’t to say Adobe doesn’t produce some amazing tools (that can help you produce Hollywood style quality movies). It’s just that as an online content creator, I don’t need all the advanced functionality. I don’t need to create 3D animations that move through a virtual world.
Or add super special effects that require a team of talented professionals. I just need to put together some videos quickly.
That’s why I use Filmora.
Filmora is one of the best video content creation tools that offers an easy interface that’s quick to learn. It allows me to combine multiple video clips, add music, and upload directly to YouTube.
Getting Started with Filmora
To start off, I import my video clips as media into the software.
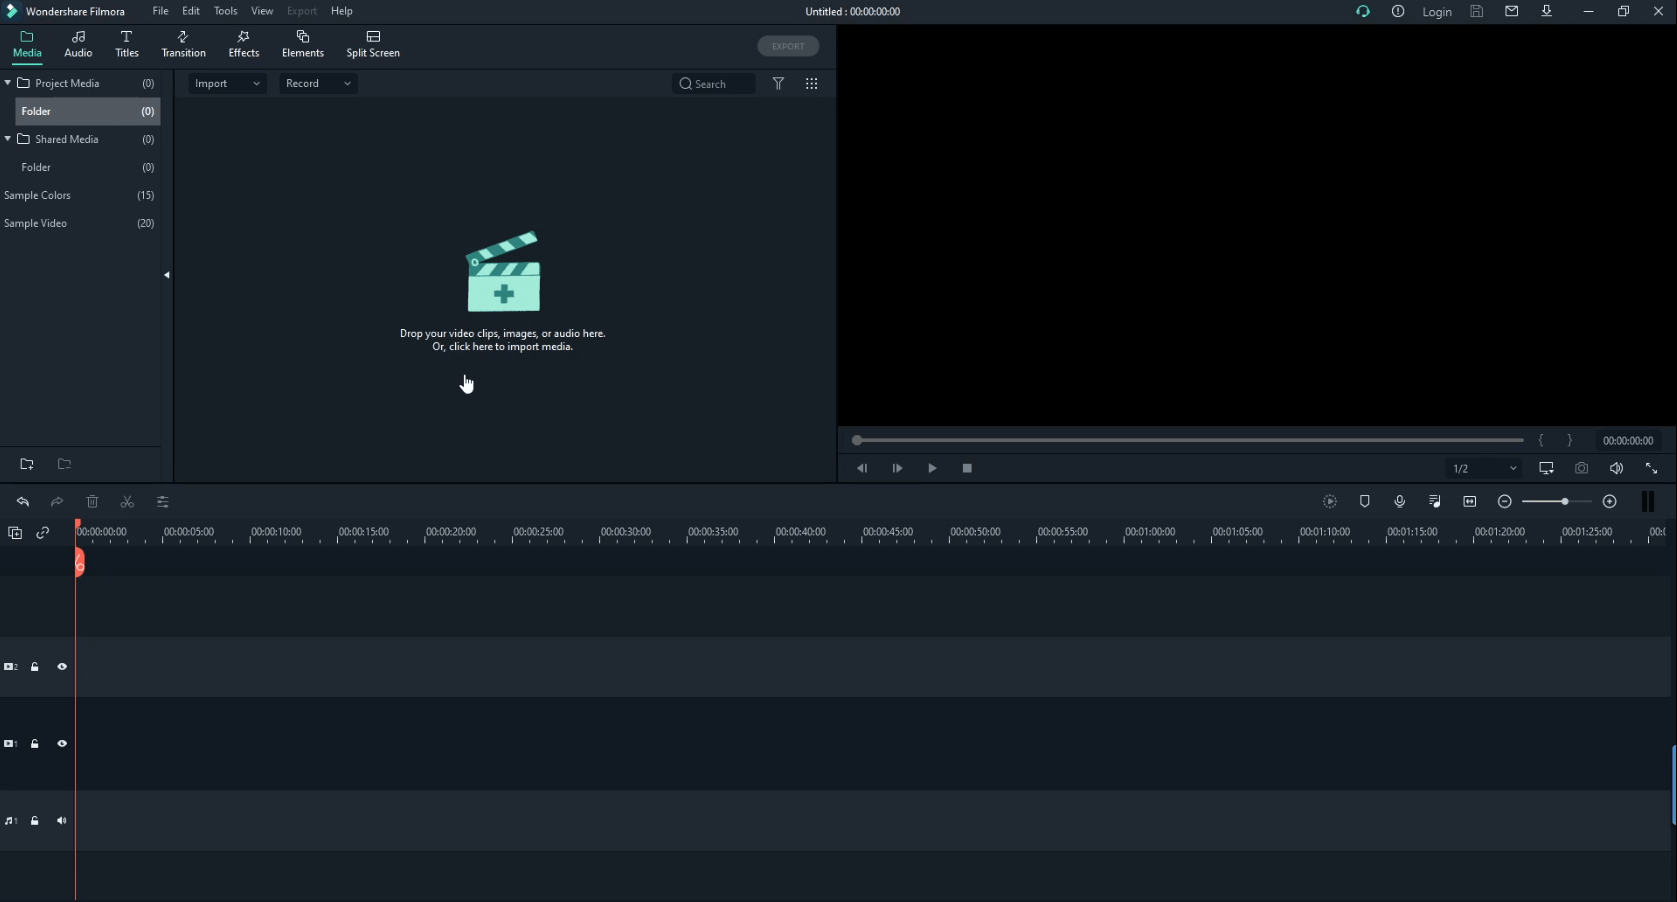
I then include the clips I want into the timeline. Here I’m working with a video that Adam recently uploaded to YouTube.
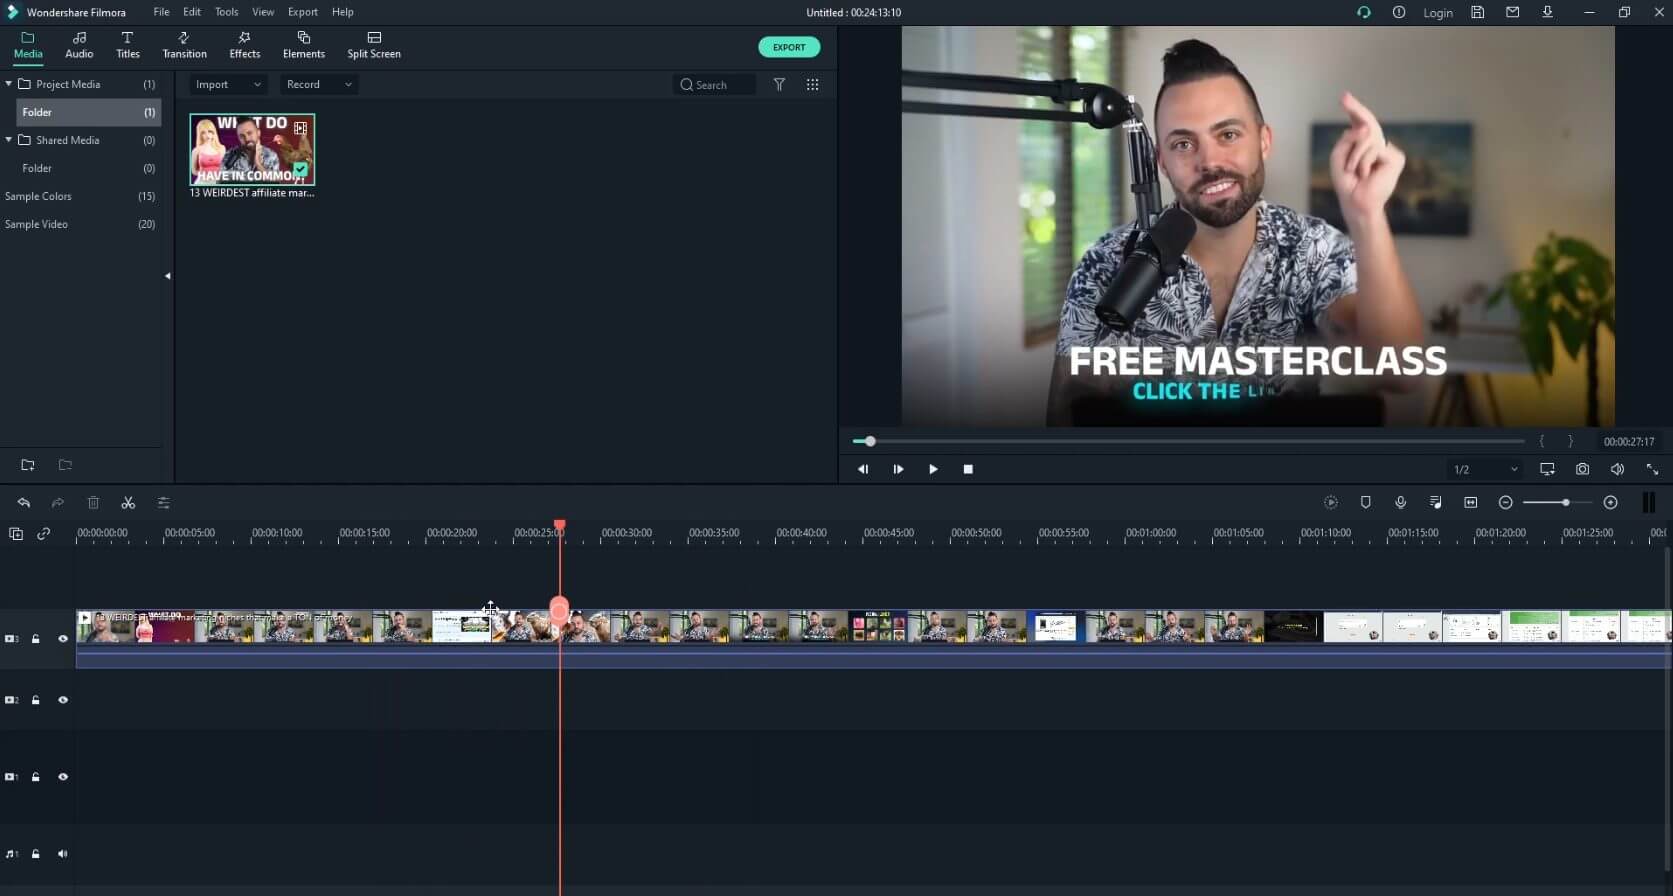
Once the video is on the timeline, I can do all the required operations. If I want to split the clip and create additional clips? Simply go to the right location and click using the scissors icon.
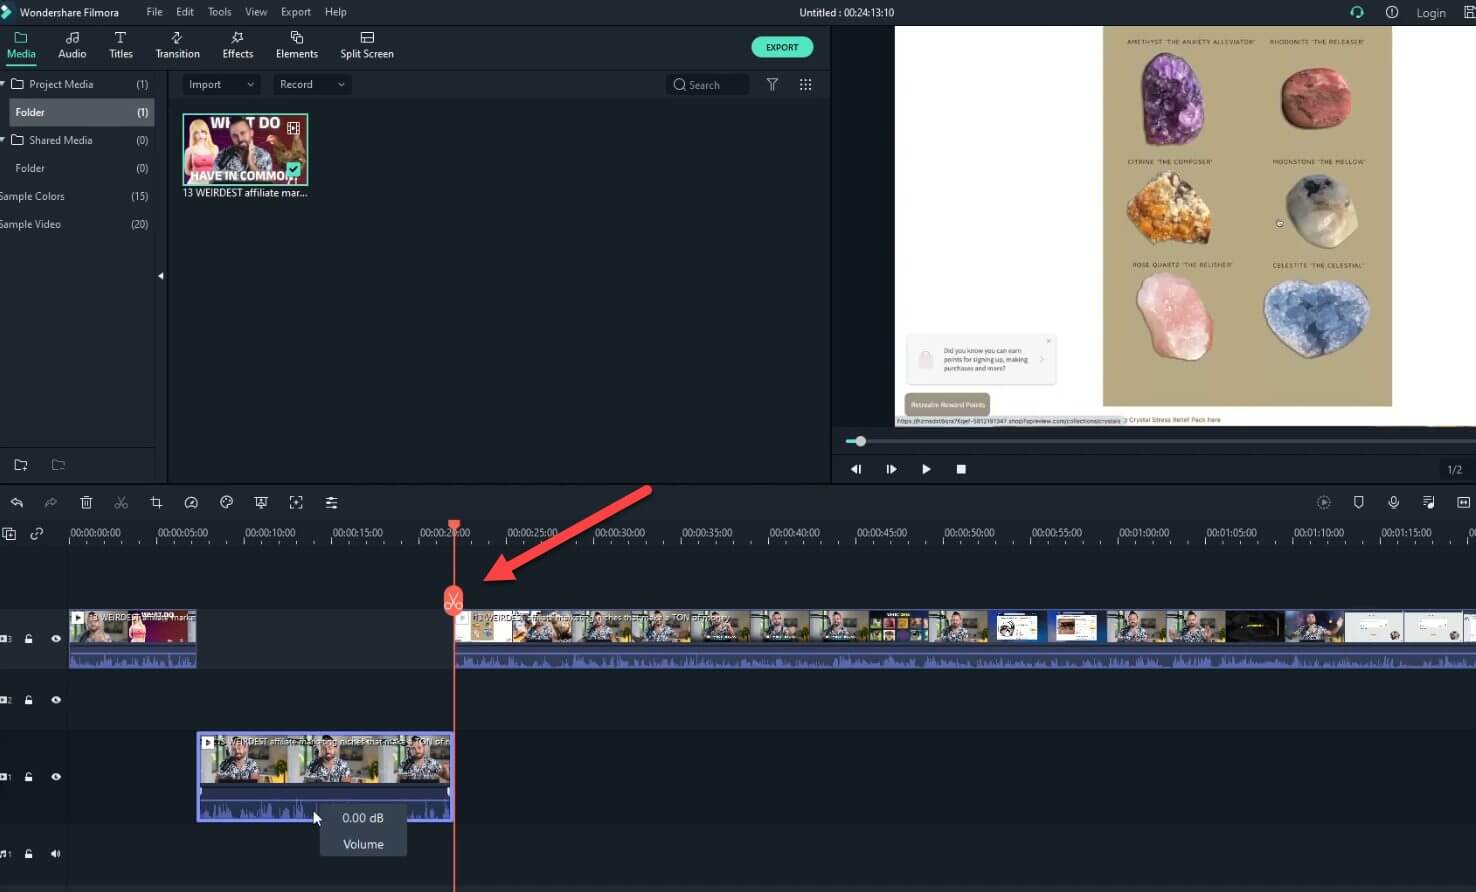
If I want to edit any particular clip? I click on the clip and use the editing options available. If I want to add music to my video? I hit the audio icon to search for tracks from Filmora’s library.
Here I can choose from royalty-free music or even upload sounds. To be honest, it has all the features I need to edit videos from scratch or take existing footage and make it better.
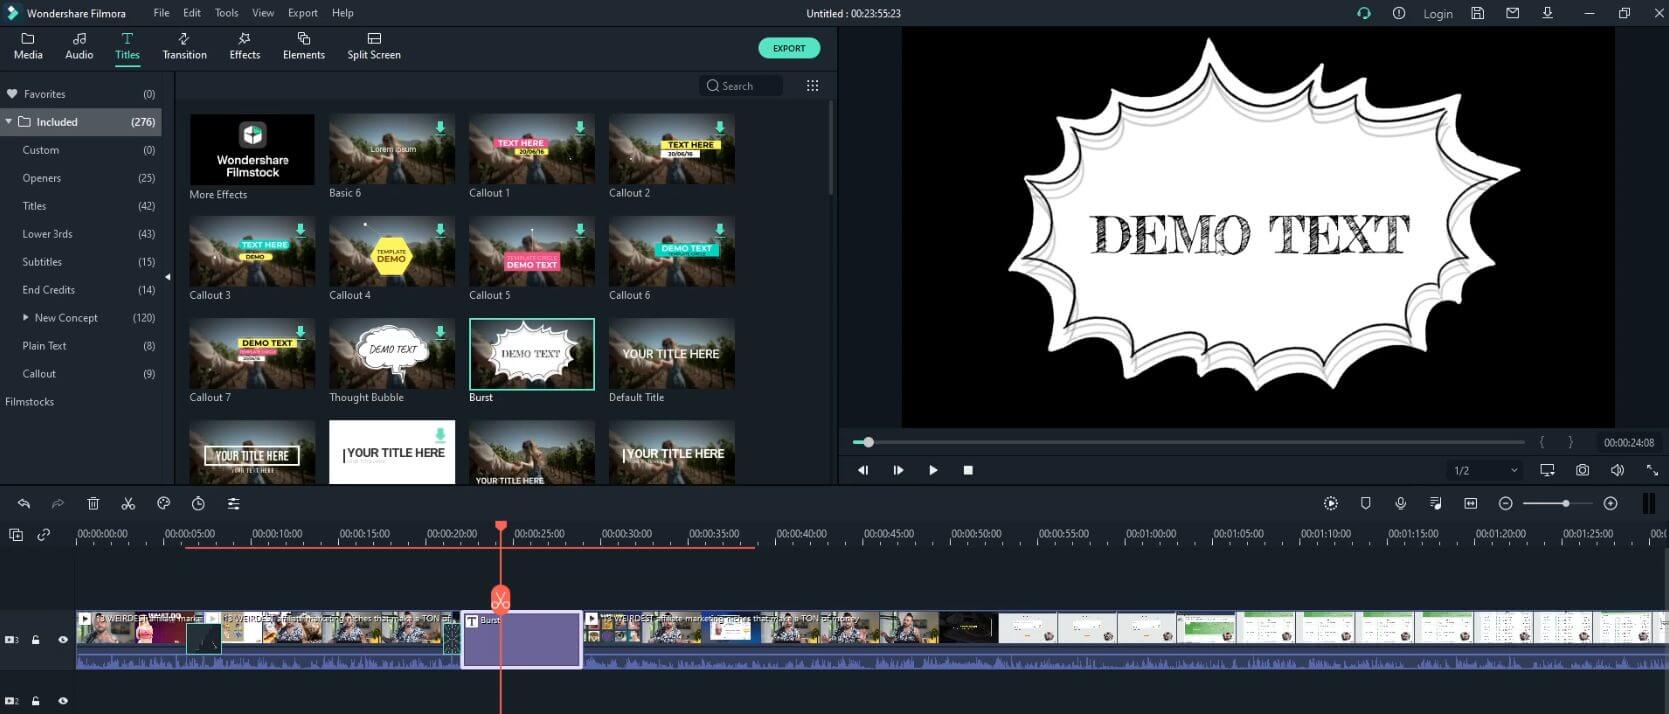
Smooth Transitions, Titles and Effects
Want to slide from one scene to another in style? There are tons of transitions to choose from.
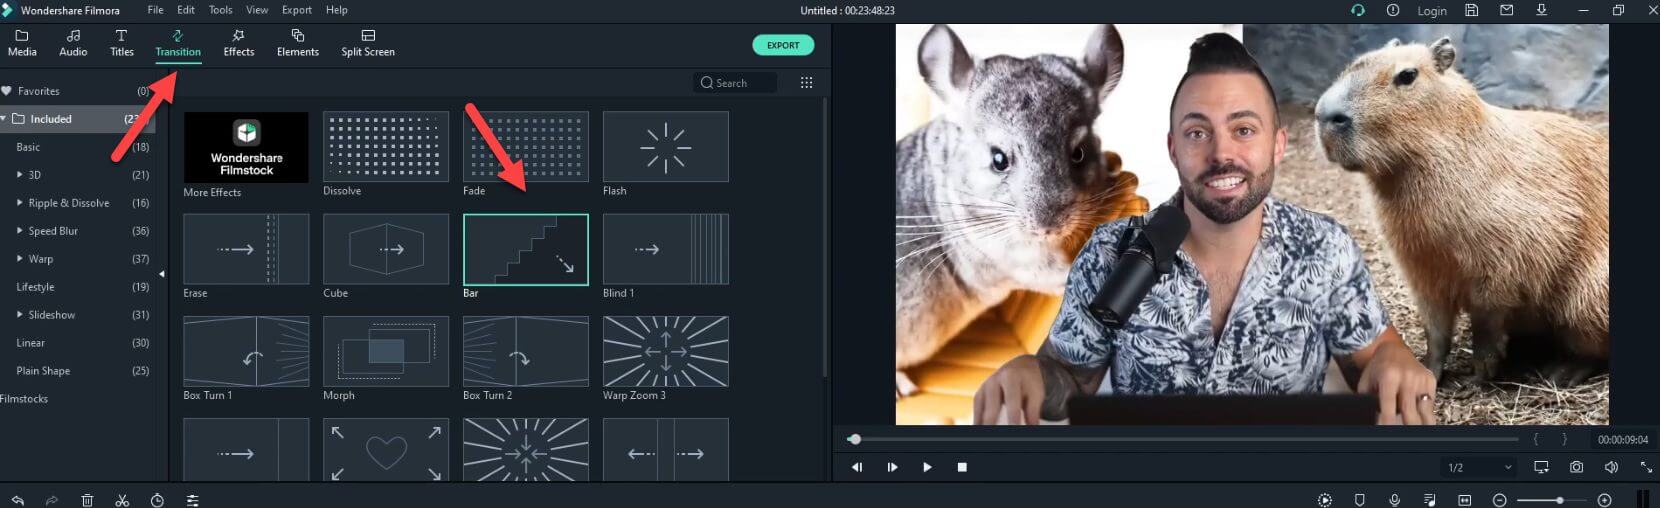
These transitions make it easy to flow from one clip to another. You can also jazz up your video with a range of titles. After all, your story, your style!
But what about effects? Let’s say you’re after something vintage. Choose the style, drag it onto your timeline and just like that, you have that old video effect.
Using Split-Screen Magic
Another great feature is the split-screen. Use it to show multiple clips at once. Compare and contrast them, add motion graphics, or have an ongoing conversation going on screen – all with a single split-screen effect!
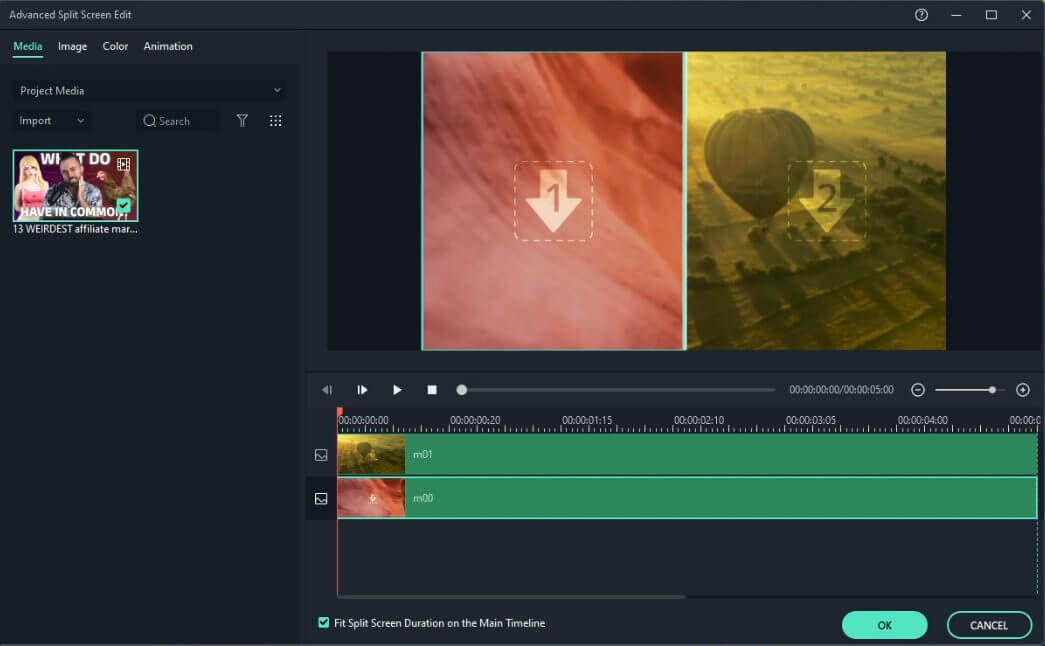
You can also make it even cooler by flipping your video footage upside down, adding fade in/out effects or zooming into part of the frame as needed. The possibilities are literally endless.
Export & Share Your Video
Once you’ve perfected your video, it’s time to export it. Select the right option and quality for the platform you are about to publish. It’s easy – just click on export, select where you want it saved and let it render out.
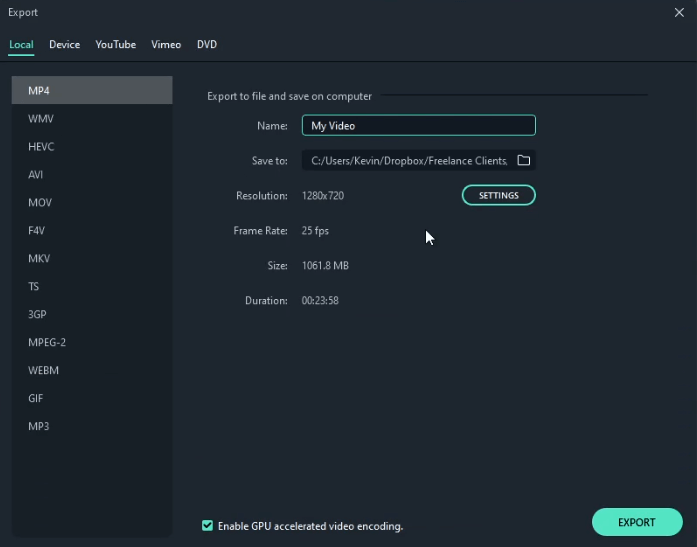
Now that your project is done, all you need to do is share it with the world! If you’re looking for a versatile and intuitive video editor, Filmora Video Editor is a great choice.
Filmora Pricing
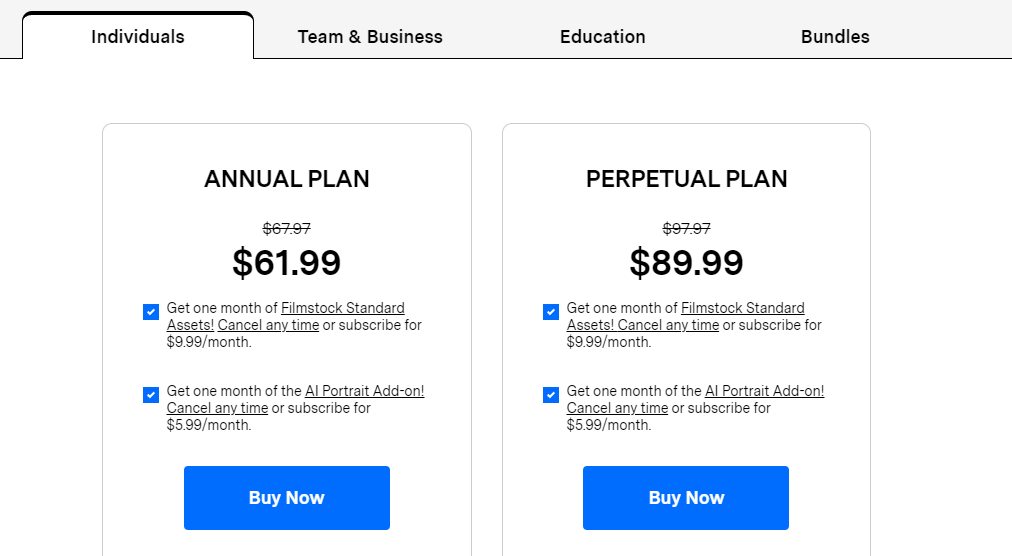
Filmora offer pricing for four categories:
- Individuals
- Team & Business
- Education
- Bundles
For individuals, there are two possibilities:
- Annual: $61.99
- Perpetual: $89.99
Perpetual simply means that you get lifetime access to the current version of Filmora. In other words, if they release an update in the future, you won’t have access to it.
Audacity
Want a simple tool to record audio, mix your tracks and create a simple output file? As an online blogger, I’m not a big audio guy.
But whenever I need some simple audio tweaks, I turn to Audacity.
Importing Or Recording Your Tracks
As a first step, you need to record your audio tracks. Simply hit the record button and start speaking into your computer’s microphone. Generally, Audacity will detect this immediately if it’s set up correctly as the default input device.
You can record for as long (or as short) as you want.
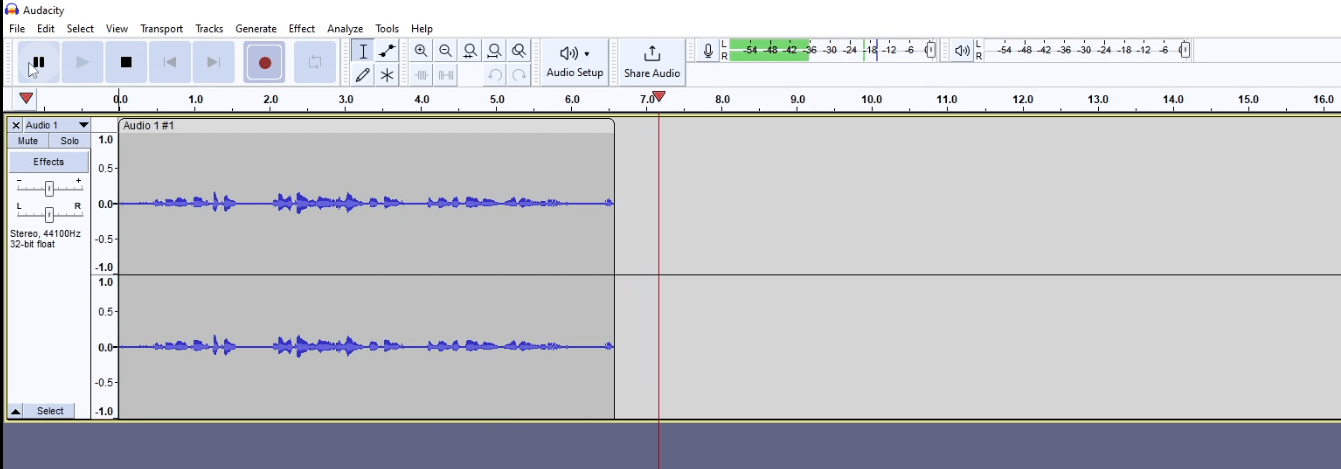
You can also pause a recording or even stop the current one and start a new one. In the latter case, the new recording will be placed after the initial one.
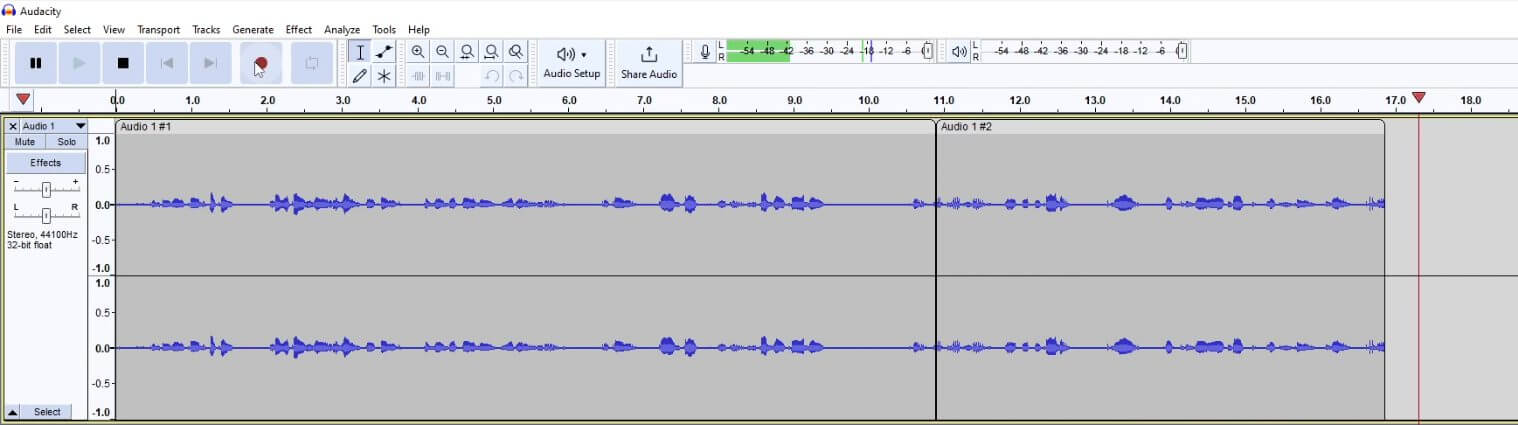
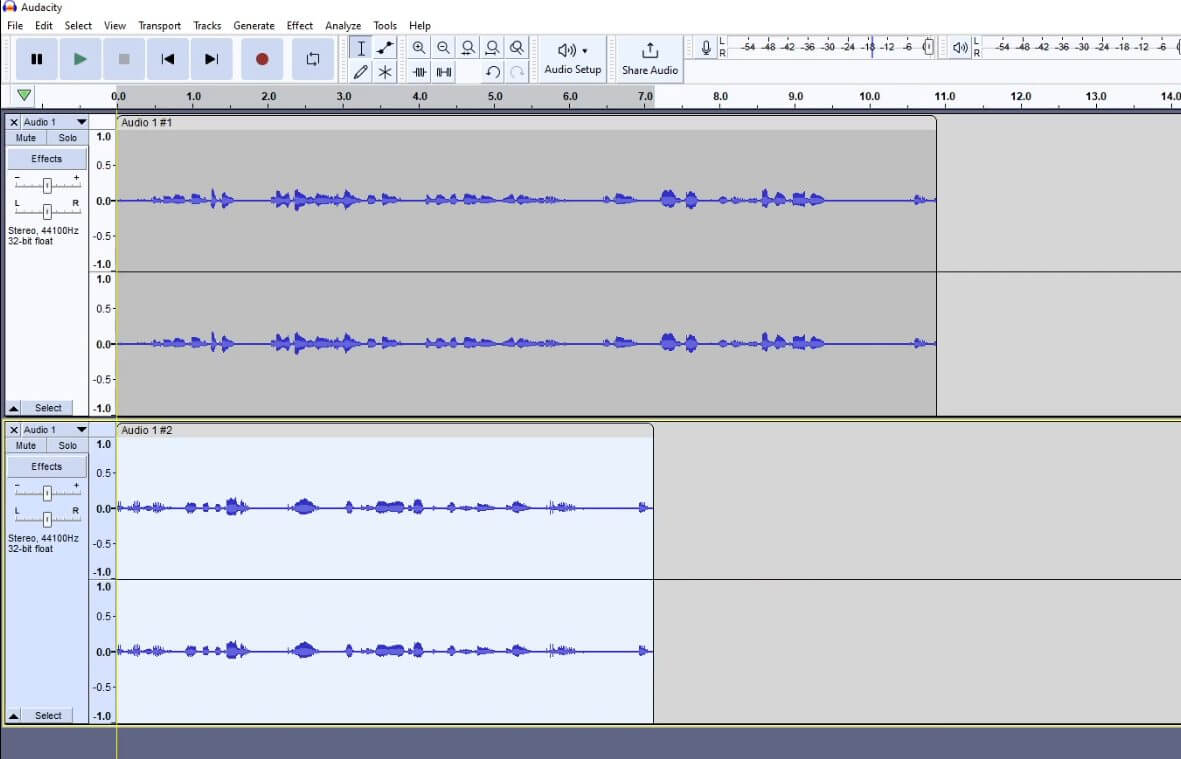
If you don’t want to record (i.e. you have your audio tracks ready), just drag and drop your files into Audacity. You can then layer up your tracks on top of each other, move them side by side or in whichever order you please.
Audacity Editing Fun
Let’s now get into editing audio on Audacity. Highlight the part of the audio you want and use simple keyboard shortcuts to cut, copy and paste.
CTRL (or CMD for Mac users) + C to copy / + V to paste / + X to cut. Pretty straightforward.
It’s like editing a normal document – which is insane when considering its simplicity.
Want two recordings playing together? Just paste the second into a new track and they’ll play simultaneously.
You can also boost certain frequencies, reduce noise levels, edit sections with precision and add effects like reverb or echo for some added depth. This allows you to customize the sound of your recordings to the finest detail.
Making The Recording More Professional
Now let’s look at how you make the recording sound more professional by using mixing techniques in Audacity. You can add compression to levels out peaks and valleys of a track or apply EQ to different sections to emphasize certain frequencies over others.
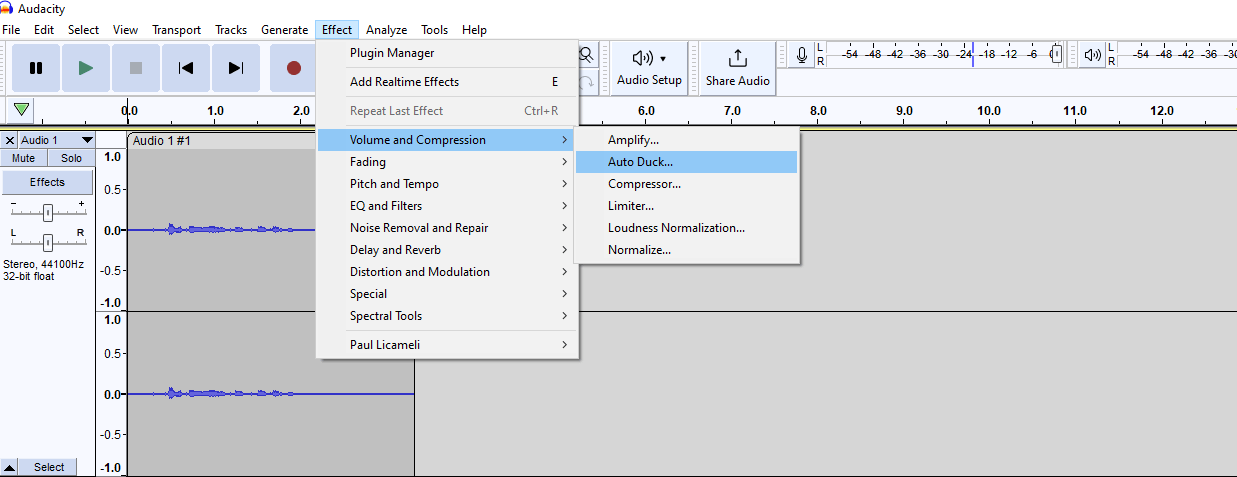
You can also pan tracks left and right, adding a sense of space and stereo effects. These techniques can really help to bring out the best in your audio recordings. With the right settings, you’ll be able to fine-tune your sound with every track you work on.
And when all that’s done, you’ll have an amazing sounding recording!
Using The Macro Manager
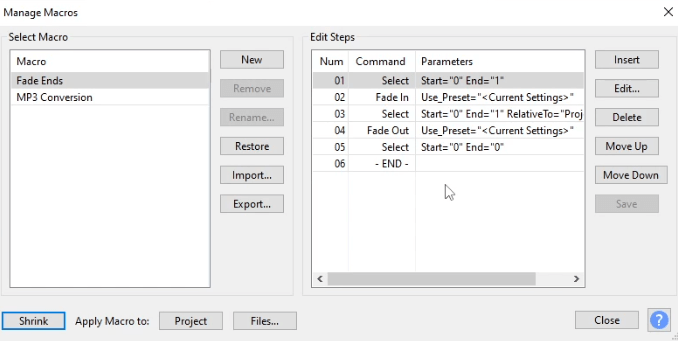
If you’re working on a large project, the macro manager is a great way to save time. You can create and store macros with customized sequences of commands that you use often.
You end up not having to manually repeat your process each time. You can even assign descriptions or key commands to your macros for easy access in the future.
The macro manager also makes it easy to transfer macros between projects, which helps to speed up collaborative efforts. So if you’re working on a complex audio project, the macro manager can become your best friend.
Sharing Your Output
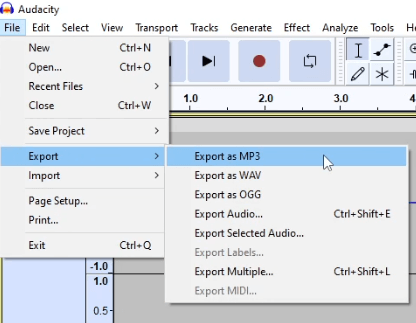
Done editing? Time to share your masterpiece. Hit Export, choose your format, and wait while Audacity creates the output. I generally go with .MP3 as it’s a lightweight format that works on most devices.
After that, it depends what you intend to do.You can upload it to streaming services, burn it to a CD (if you’re old school) or upload it to Youtube.
Pricing
Audacity is free to use.
The First Steps To Digital Visibility: SEO Research Tools
On the surface, SEO research tools help bloggers identify relevant keywords, understand search intent, and optimize their content.
But underneath that layer, the right SEO research tools do SO MUCH MORE.
These tools help you create content that your readers want to read. No more wasted time and effort creating content that no one consumes. If you already created content in the past (that isn’t bringing in people to your site), SEO research tools can give you clues as to how to breathe life back into it.
If you want to experience long-term blogging success and establish yourself as an authority in your niche (and fully profit from your blog), choosing the right SEO research tools is a crucial decision.
Ahrefs
Using Ahrefs is like hopping on a train with a final destination in mind. There are multiple stops you’ll need to make along the way to get to your destination.

At the same time, you know that if you follow the process, you’ll get to where you want to be. From its Keyword Explorer tool to its Site Audit, Ahrefs provides you with all the content-based information you’ll need to make calculated decisions about your online blog.
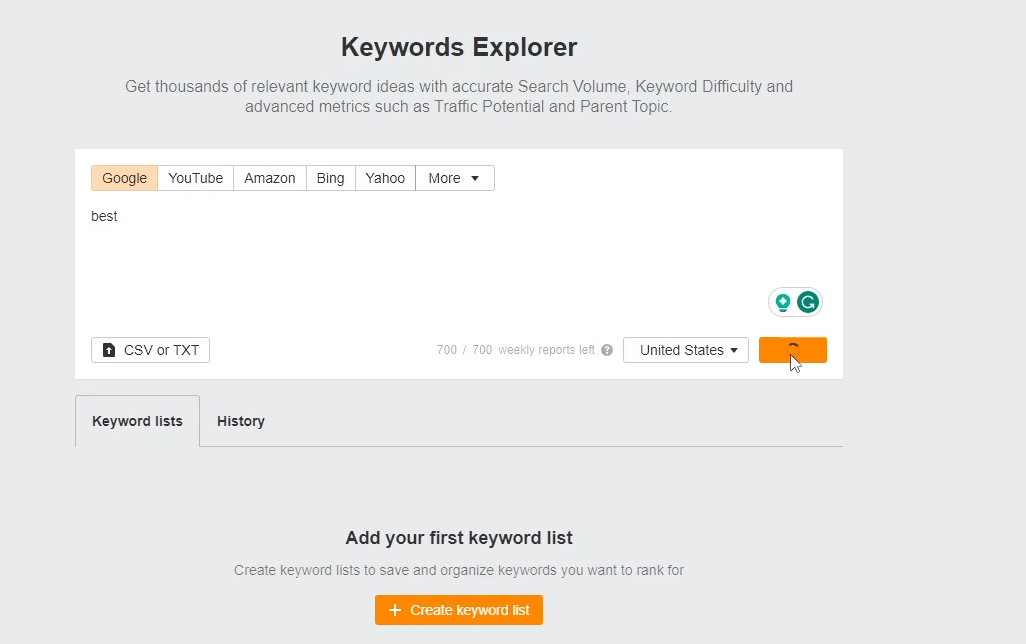
Stepping into Ahrefs’ Keyword Explorer
The first stop to consider is Ahrefs’ Keyword Explorer. The keywords to look for here depend on the type of blog post you are creating.
Let’s say you’re writing a transactional article. In this case, the word ‘best’ will likely be part of your keywords.
For example:
- Best dining room tables
- Best sofas for small homes
- Best online marketing platform
I’m sure you get the idea.
In this case, let’s go with best dog food.
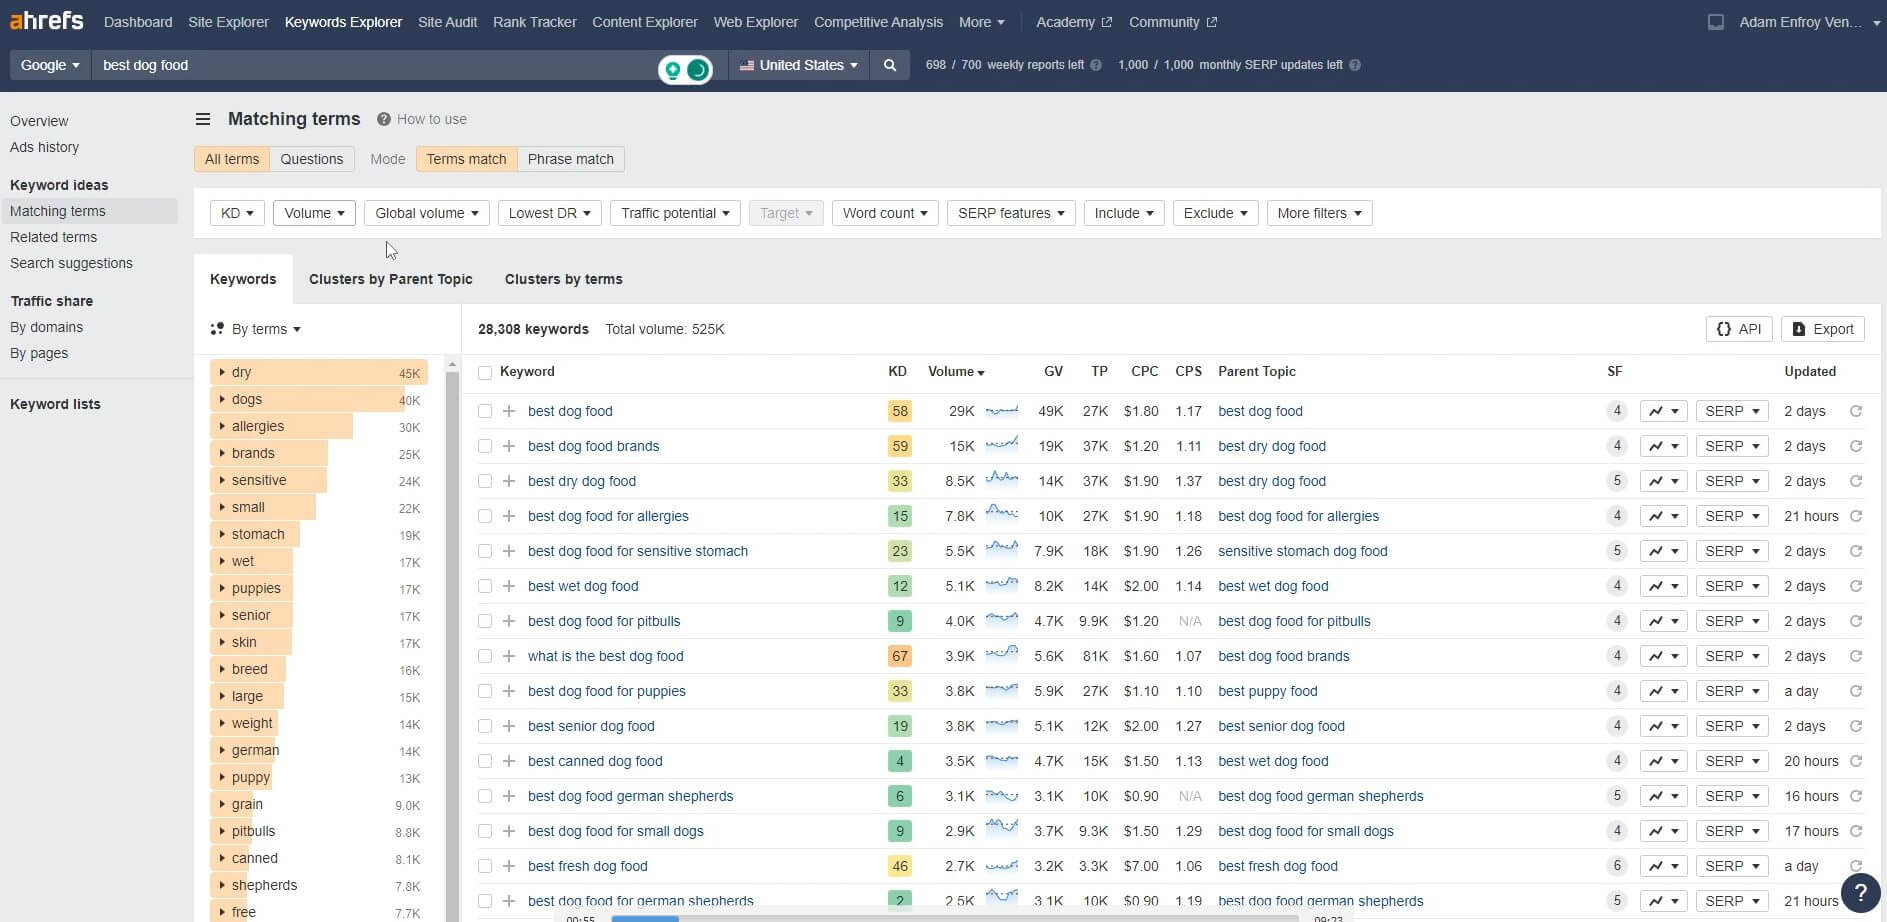
Now I can see this keyword along with other potential ones to target. When I open up the specific keyword, there are a few key metrics to consider.
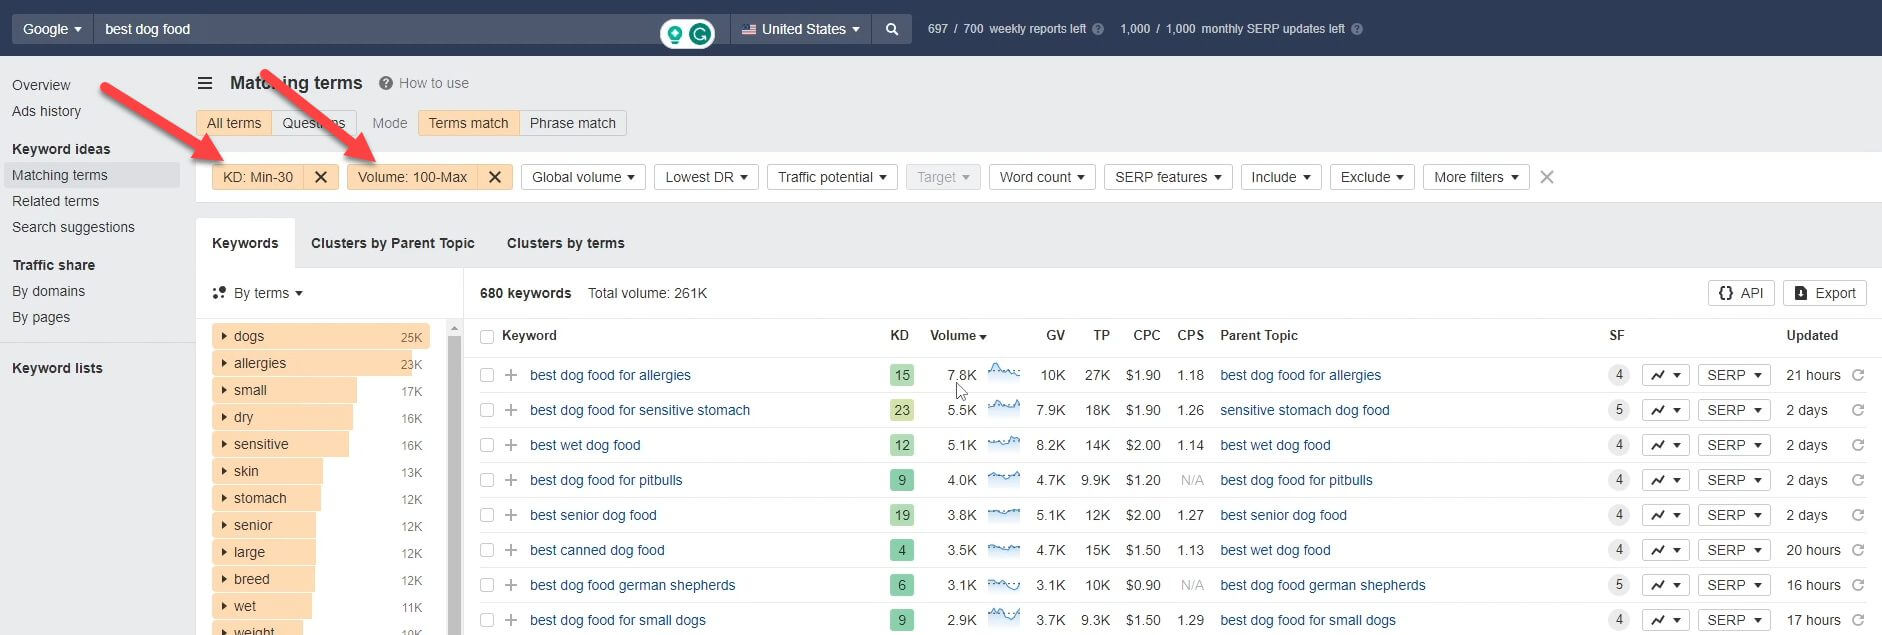
First of all, there is the keyword difficulty. If you’re just starting out, I’d recommend finding keywords with a score of 30 or less. This keyword difficulty generally means that it won’t take a HUGE amount of backlinks to rank for such keywords (keep reading for an exception to this).
I also look at the search volume.
We want keywords that a good number of people are looking for. There’s no point in ranking for keywords that do not get a good search volume.
What’s a good search volume you might ask? It depends!
In general, the more the better… but there are niches where a low search volume isn’t necessarily a bad thing. If you sell high-ticket items like cars or expensive jewelry, even a few searches can be enough to make a good income.
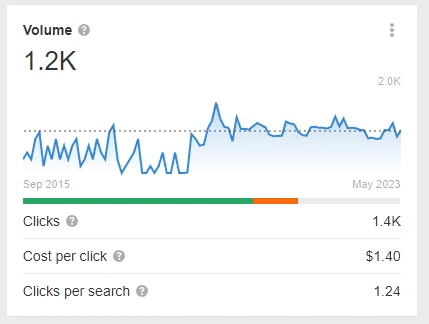
I then look at the search trend.

Is it something that’s:
- On the rise
- Steady
- Or falling?
In the first two cases, it might be worth considering. In the last one, not so much. Here’s an example of a keyword showing a steady search volume over the last few years.
Don’t Fall Into The Keyword Black Hole
Keyword research can take a LONG time. You can strive to find the perfect keyword. You can go back and forth until you make up your mind. The truth is that there isn’t a perfect keyword.
There are a bunch of great keywords that will give you results. Also, keep in mind that tools like Ahrefs can also provide estimates. At the end of the day, only Google knows what Google knows.
What I mean is that you can make the best decisions based on the data you have and then go out and create great content. However… before you do, let’s consider your competitors.
Looking at SERPS for Competitors
Before deciding on a keyword, have a look at the bottom part of the Ahrefs keyword page. Here you’ll see which competitors are ranking in the top 10 positions.
Look at the domain rating (DR) column.
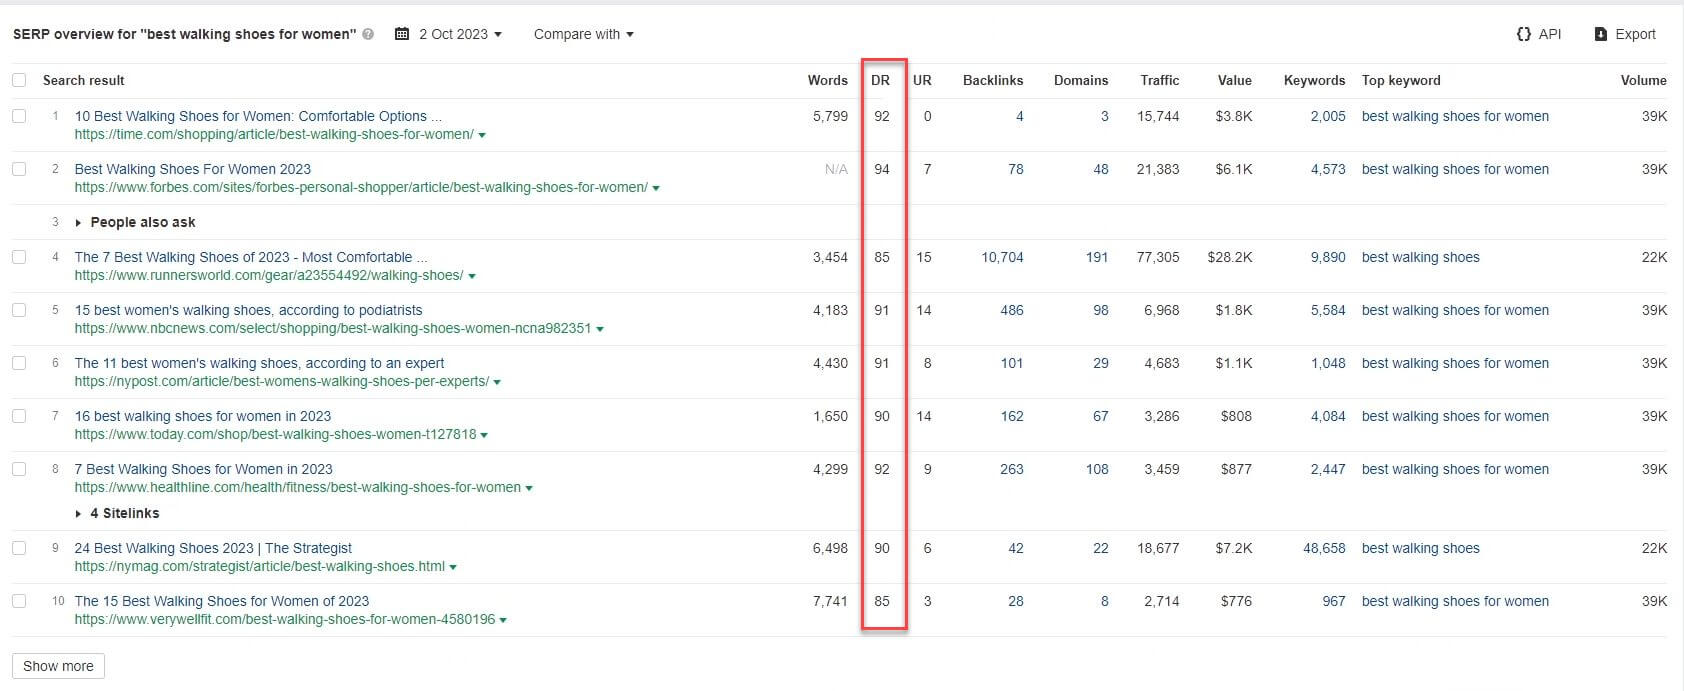
The higher the DR, the more difficult it will be to rank for the keyword – especially if you’re just starting out. What does this actually mean?
Even if a keyword shows as having a low keyword difficulty, a high search volume and an increasing search trend, your future competitors also play an important role. If you are up against sites with huge DRs (think 60+), it’s going to require a lot of work (namely backlinks) in order to get to the top of the search result pages.
If you are brand new in your blogging journey, finding other keywords where competition isn’t as high would be one thing I suggest.
What Else Can Ahrefs Do?
Ahrefs is an SEO Swiss army knife.
Apart from keyword research, this is how I (and you) can use Ahrefs:
- Perform site audits: when your site is up and running, auditing it to see what’s not working and should be fixed is crucial. The site audit feature provides you with an in depth list of warnings and errors that can hinder your SEO efforts. The solution? Fix these asap!
- Generate content ideas: Want to know about content your competitors are ranking for but you aren’t? Just plug in your competitors’ sites and you’ll see what your gaps lie. This is also a tactic I use when I’m trying to compare multiple competitors to each other.
Considering Ahrefs’ Pricing
Here’s the good and the bad. Which one do you prefer first?
Let’s go with the bad. Ahrefs isn’t free. Its starter plan comes in at $99 per month.
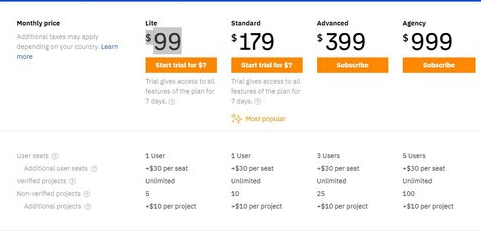
The good news? You get a treasure trove of SEO information that shines a line into the direction to take your blog. Without a tool like Ahrefs, you’re walking in the dark and hoping for the best.
Not the best plan for someone who wants to be successful.
Google Trends
Just like I spoke about trends when using Ahrefs, you can also go directly to the one-and-only Google.
Finding trends on Google gives you the ability to dive into more detail, including:
- Longer time range
- Countries where trend is happening
- Country specific trends
- Similar trends to the one you’re looking at
- And more.
Let’s take a concept such as “CRM tools” and explore how Google Trends works. I’m going to time travel five years back and look at the peaks and valleys of this trend.
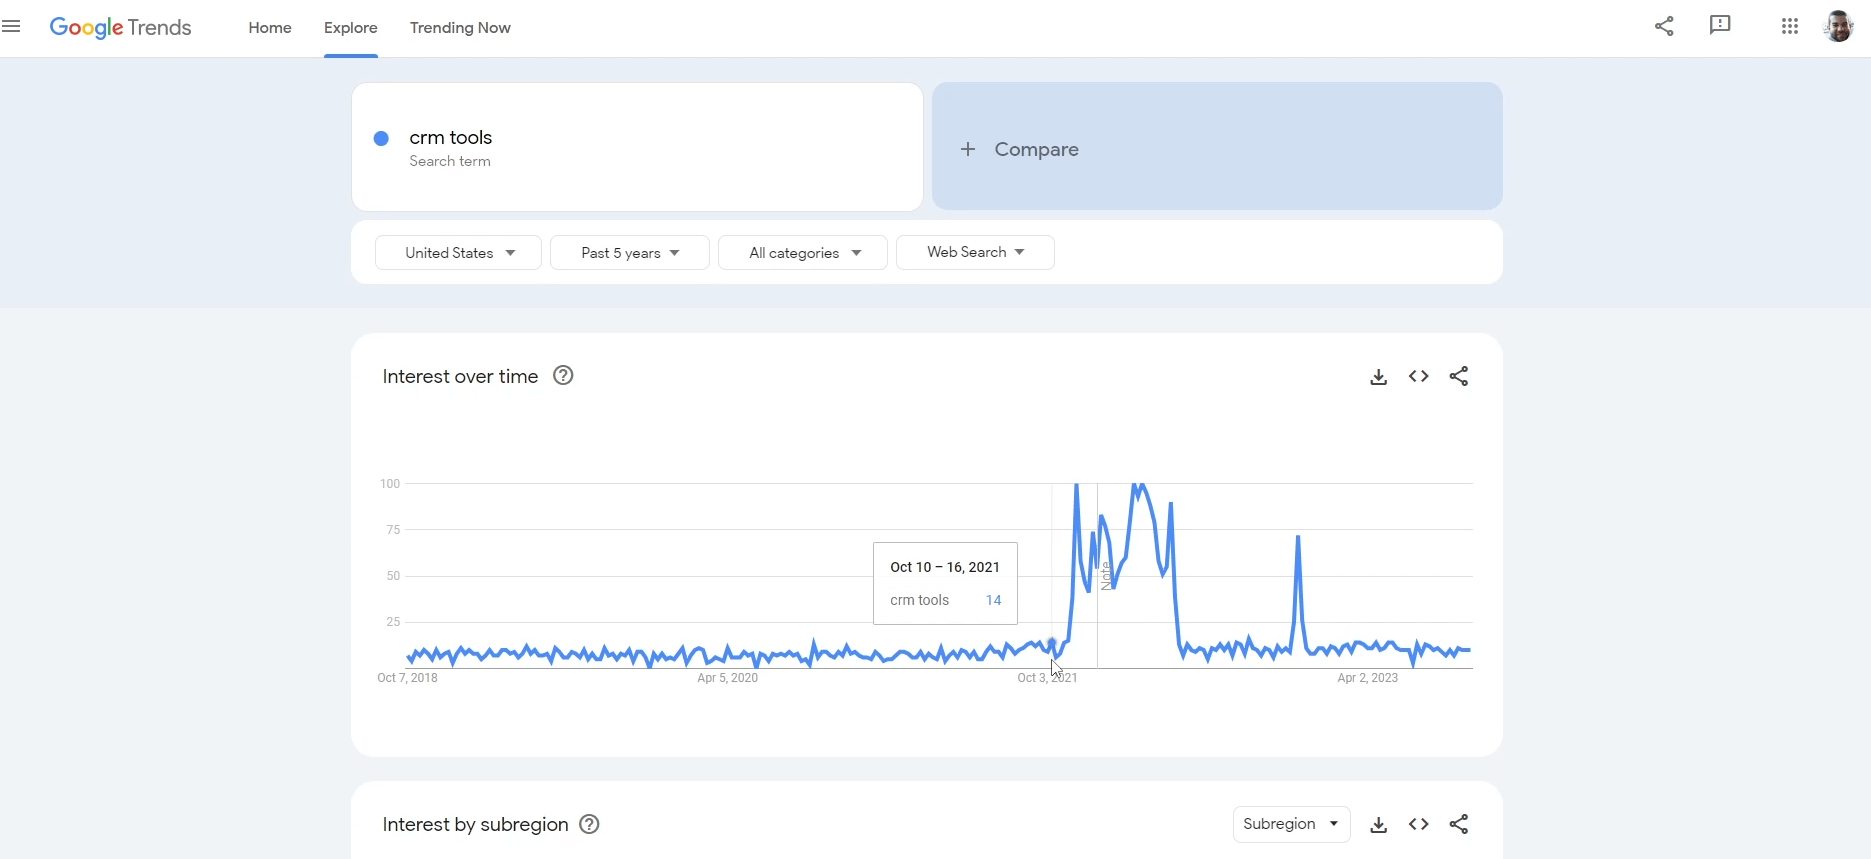
As you can see below, the term was quite popular a few years ago. However, it’s not the same now. Let’s do another search with the term “AI CRM”.
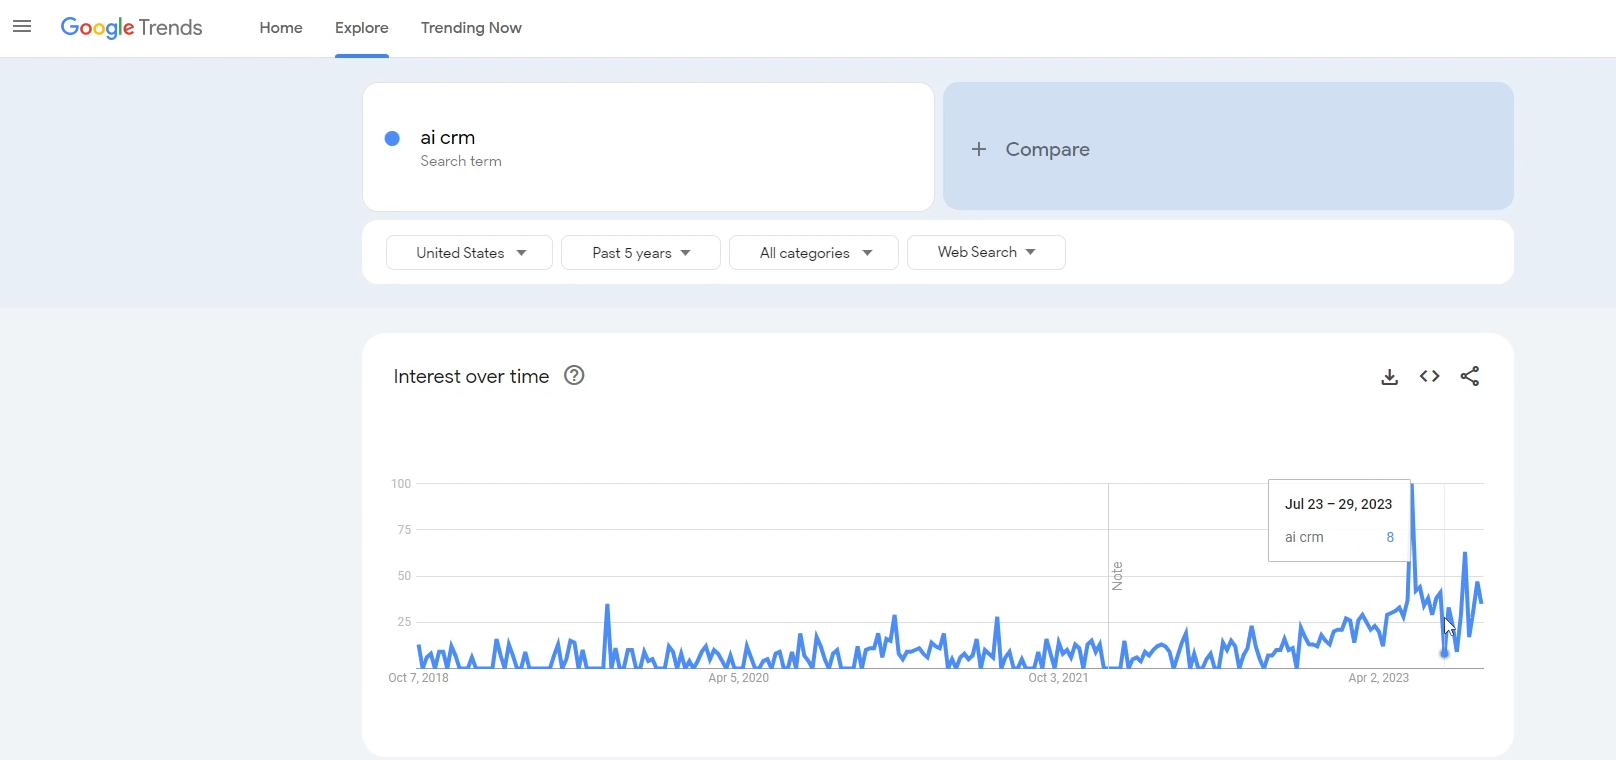
As you can see, we have periods where the trends rise, dip or even stay stable. Let’s dive a bit deeper into the AI trend and explore the keyword “AI CRM”. Not too bad but nothing to write home about.
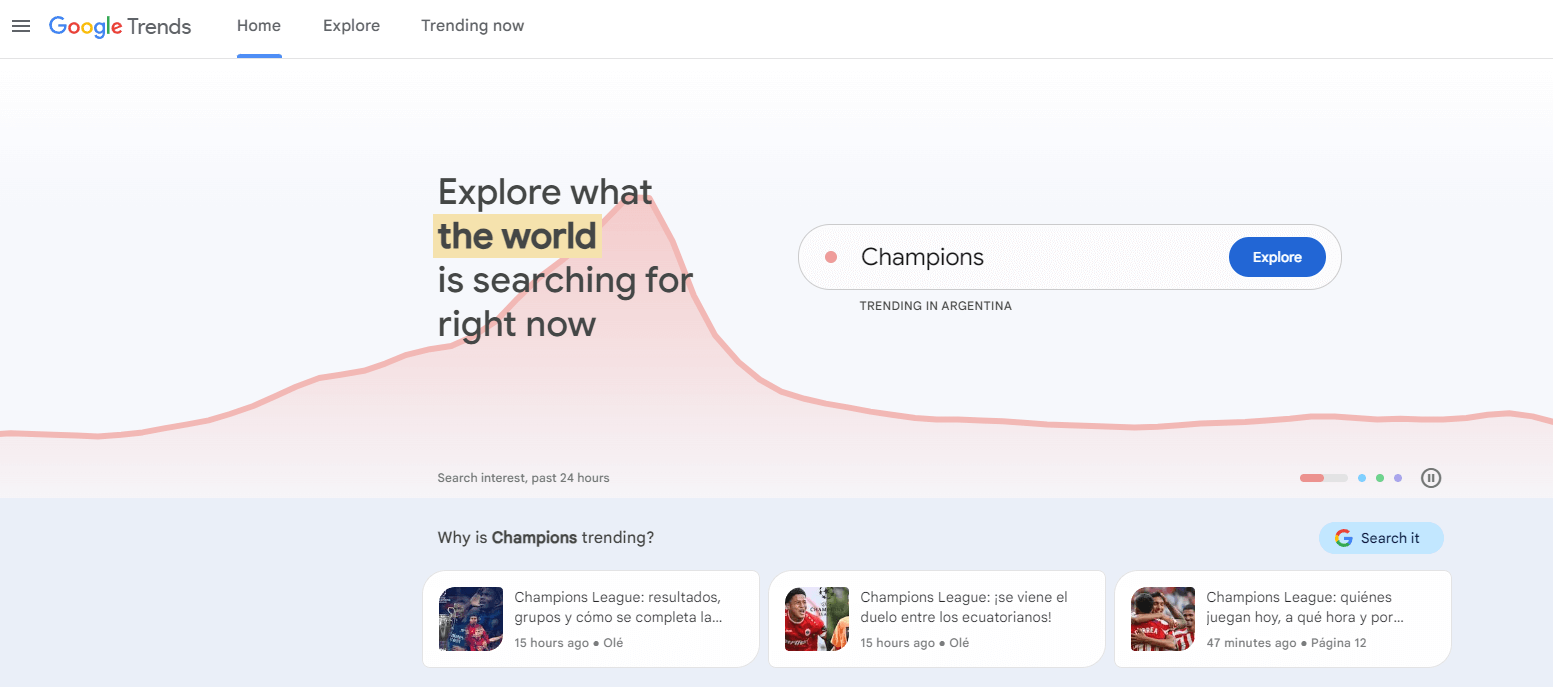
Let’s also try “ChatGPT Plugins”.
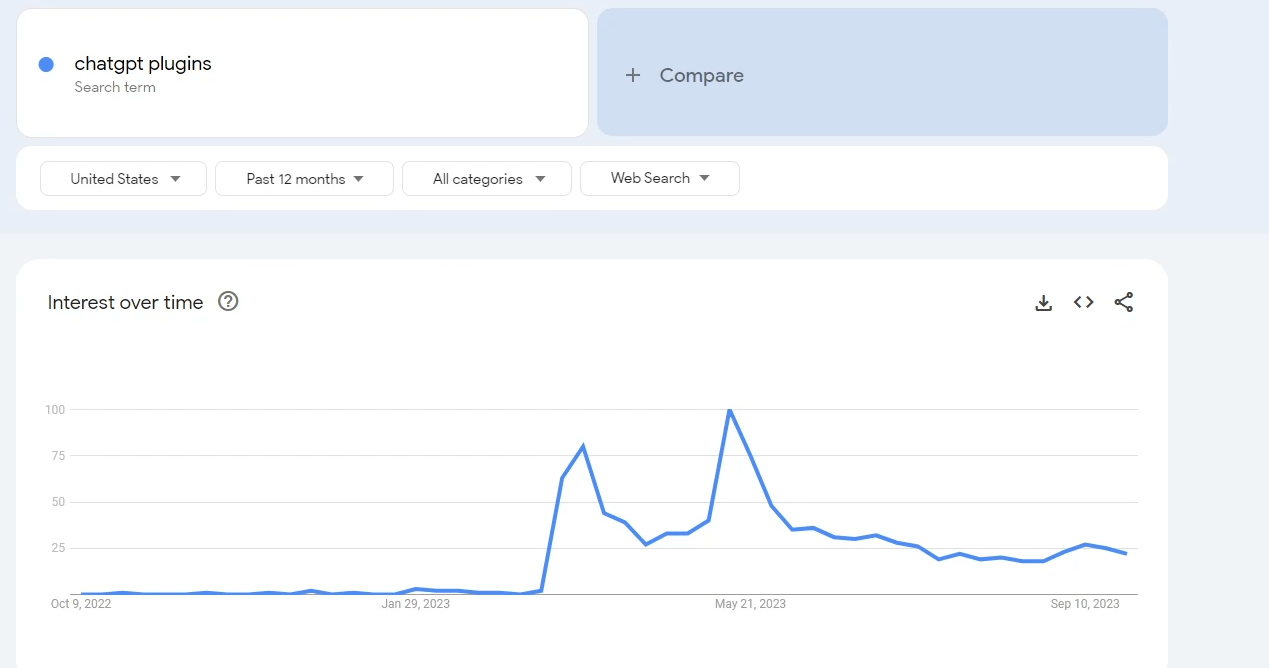
There was some interest earlier in the year but it seems to be on the decline now. So what’s trending now!?
Click on the appropriate tab and you’ll be able to answer that question. You can also go into specific categories depending on your blog niche. Let’s jump into science and tech.
“Nikon Firmware” stands out to me.
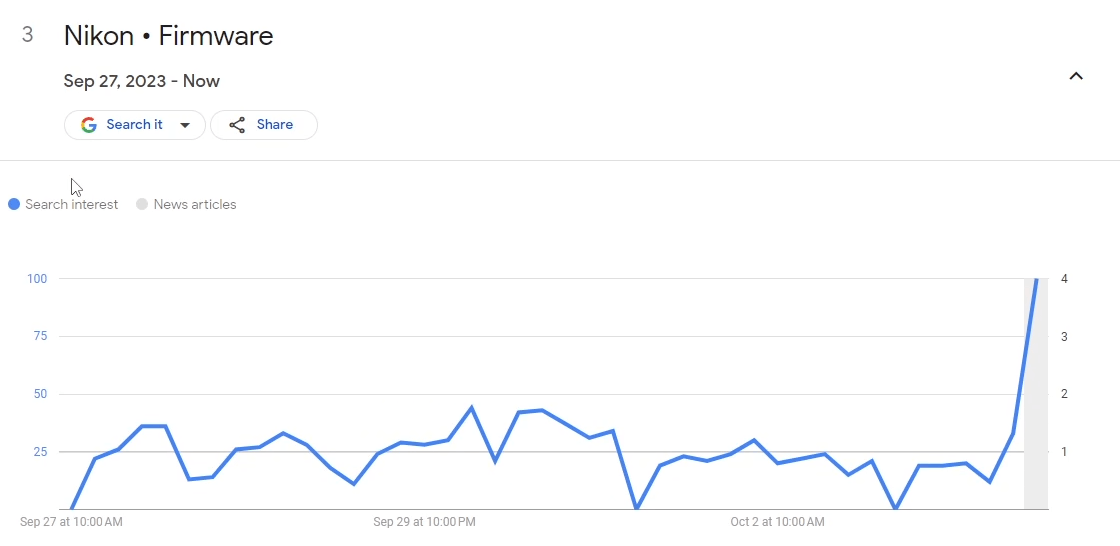
Here you can see that Nikon seems to have released a new update. People are searching for this specific term and want more information on it.
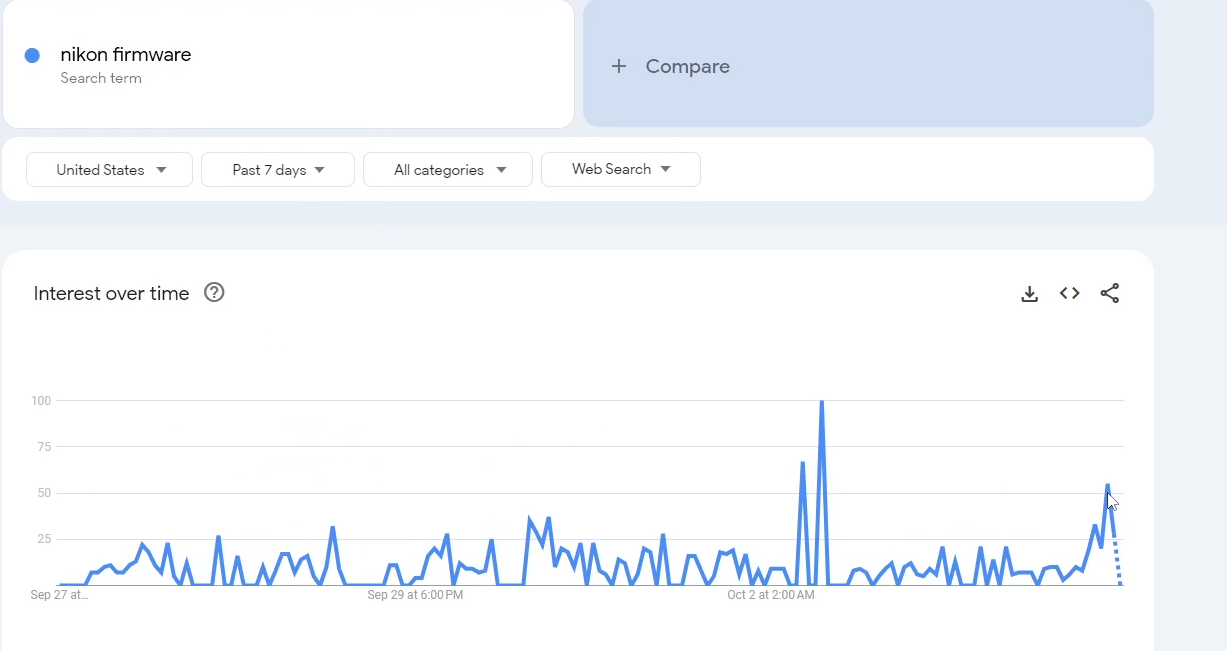
Comparing Multiple Keywords
The great thing about Google Trends is that you can also compare multiple keywords.
Let’s take “Nikon firmware” and “Nikon”. Who’s winning that search battle? Depending on how far back we go, we can see that Nikon is more searched overall but that trend reversed over the last few days.
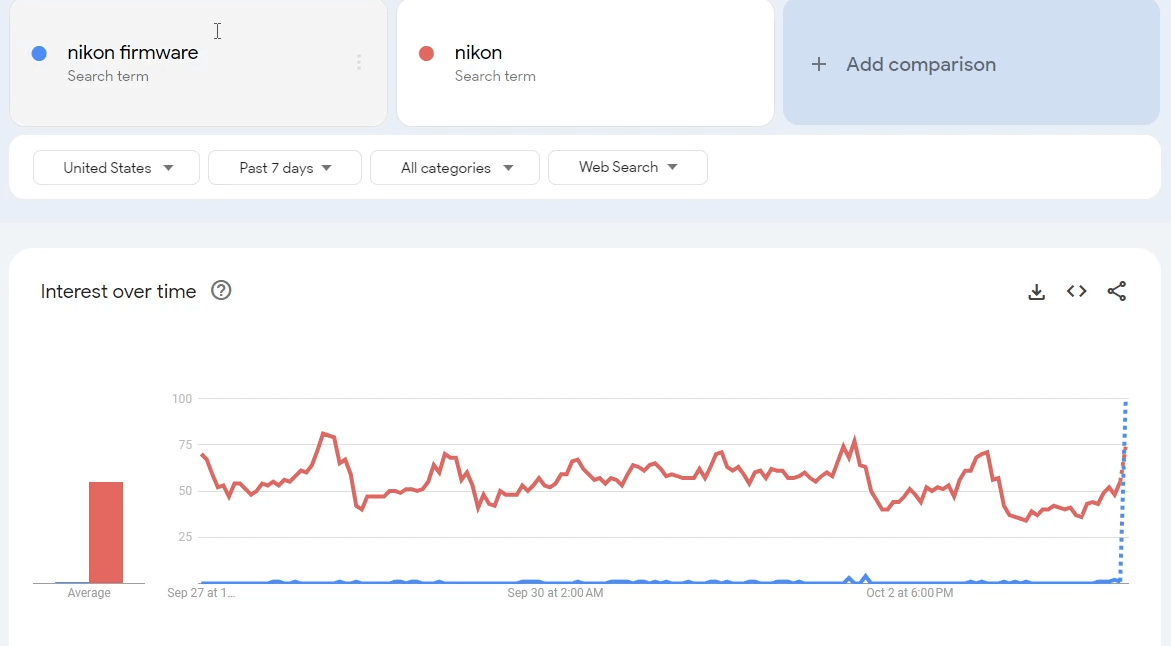
If I had a blog about cameras, this data can help me decide which topic I should be writing about. By understanding the current trends, I can create relevant content that is more likely to be successful.
Increasing Your Digital Presence: SEO Optimization Tools
Did you know that slow traffic growth is one of the main reasons why bloggers quit their blog?
If you’re using the wrong SEO optimization tools, you’ll get the wrong data. The wrong data ensures you take the wrong actions which lead to bad results.
Quite a vicious cycle, isn’t it?
Choosing the right SEO optimization tools means your content becomes more discoverable and increases your website traffic. If you value your blog’s sustainability, revenue generation, and growth, having a strong organic presence in search engines is key.
SEO optimization tools make this possible.
Surfer SEO
A chill-looking guy in his mid 30’s. Surfing on a big wave. Laptop in one hand. On the page screen, there are page 1 Google rankings for a bunch of keywords. The dude crushes the waves and with a smile goes back around and does it again… laptop still in mind.
That’s what I think about when I consider the brand name Surfer SEO.
But what is Surfer SEO?
Surfer SEO combines artificial intelligence and machine learning to help you rank higher in search engines.
It provides you with a bunch of tools to do just this:
- Keyword research tools
- Content editing (including an AI outline generator)
- Site audits
- SERP Analyzer
- Domain Planner
- Grow Flow
- And more.
To be honest, I don’t use it to its full capabilities – simply because there are other tools I use for some stuff.
Where I find Surfer to really shine is in the first two sections I mentioned – the Keyword Research and the Content Editor.
The Keyword Research Module
Keyword research – the gift that keeps on giving (or the curse that never stops – depending on how you look at it).
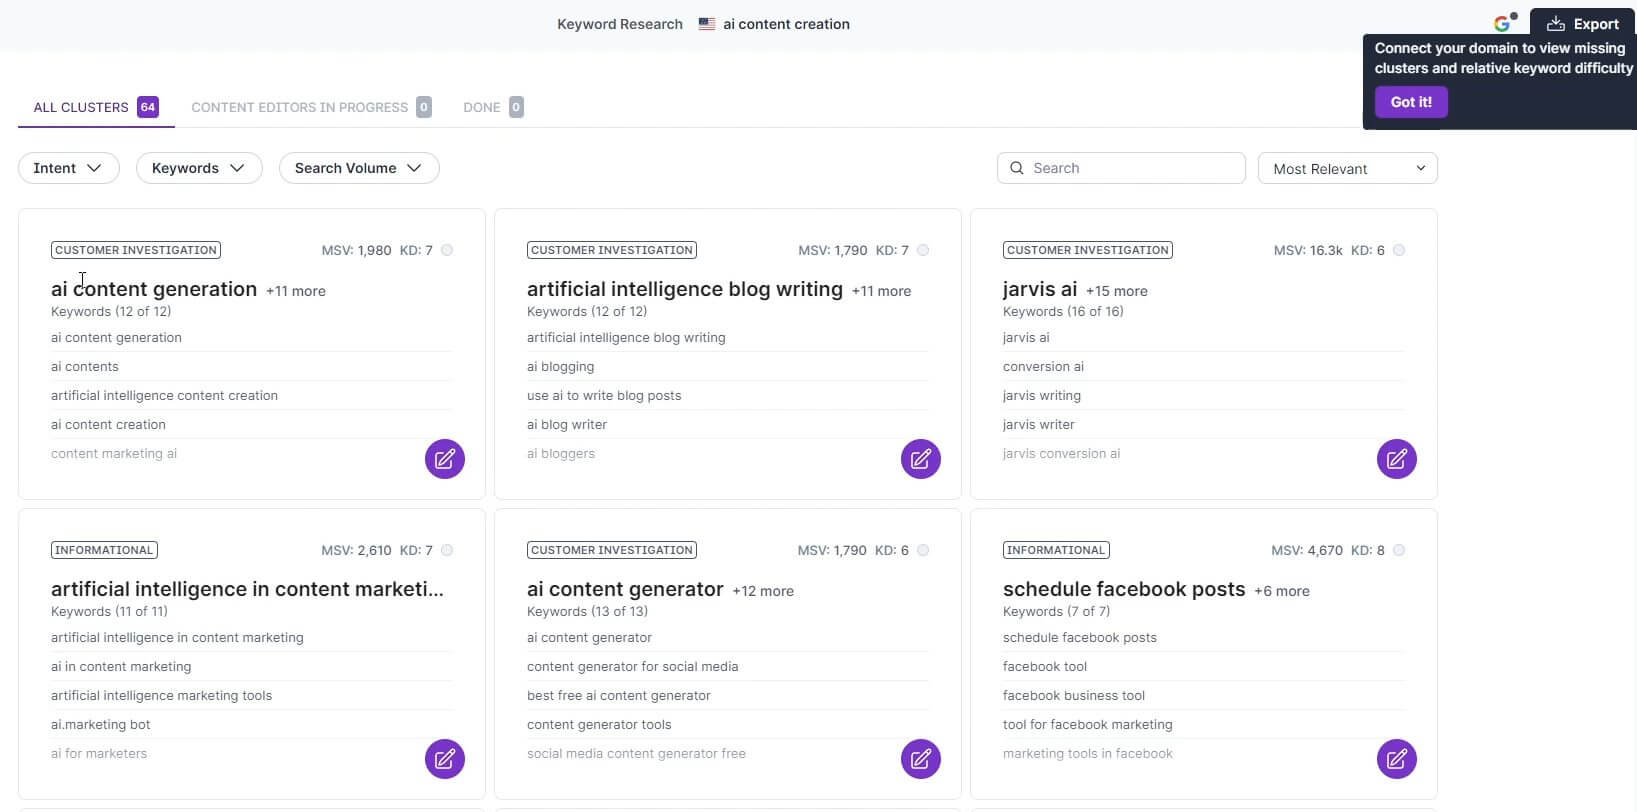
Surfer’s Keyword Research module is powerful in its own right. If you’ve gone through the Ahrefs section, you might think, “What’s the point of having another keyword research tool listed here?”
While Ahrefs can help you choose single keywords that you then group together, Surfer does that kinda automagically. All you do is start with a base keyword and then Surfer will go out and create a cluster of keywords you can target.
First off, having these clusters of keywords saves you a lot of time. Doing the process manually is not really the best use of your time. Even more importantly, you are able to create clusters that help build off each other.
This is great for building topical authority in your niche.
The more expertise you can show around a topic, the more Google will reward your site (i.e. more Google rankings). Clusters are also great for internal linking – it’s easy to create a web of links when you have related topics.
You can also dive deeper with specific intent filters to uncover the type of keywords you’re going for.
Whether you’re going for:
- Local
- Customer investigation
- Informational
- Shopping
Surfer will categorize the keywords for you. Talk about efficiency!
The Content Editor
After you have all the keywords ready to go, it’s time to start creating content. Surfer SEO shines in this area as well.
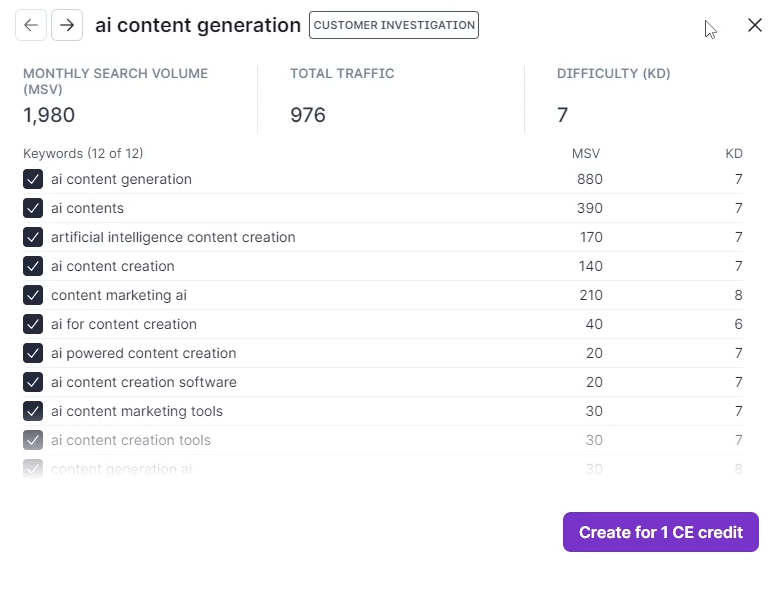
You’ll get a screen where your masterpiece (which might be blank for now) is on the left and the keywords to include are on the right.
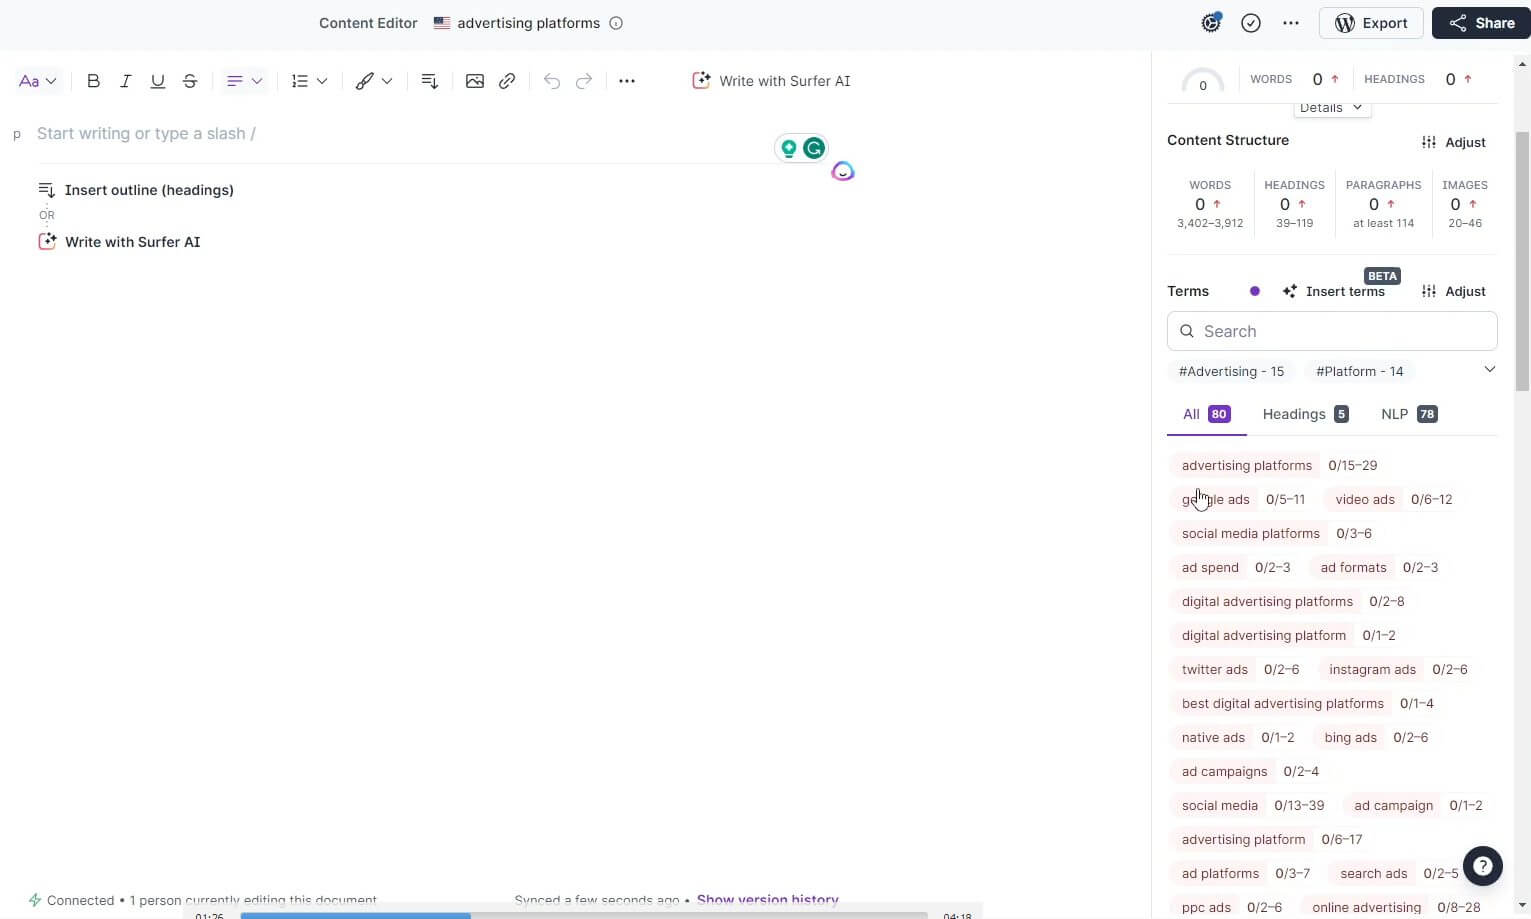
As you add more to your article, the keywords you use will be highlighted. You’ll get insights into which keywords you’ve used along with their frequency. You also get information on the number of times (given as a range) you should be using each keyword.
Speaking of stats, Surfer also provides insights on the ideal:
- article word count
- Number of headings
- Number of paragraphs
- Number of images to include
Building the Perfect Outline
But what if you’re not sure what content to write? Surfer introduced an outline feature that helps with this. Using artificial intelligence, the tool can help craft the ideal article from scratch.
In this AI build, you can include:
- Custom knowledge
- The article type
- The tone
- Your competitors
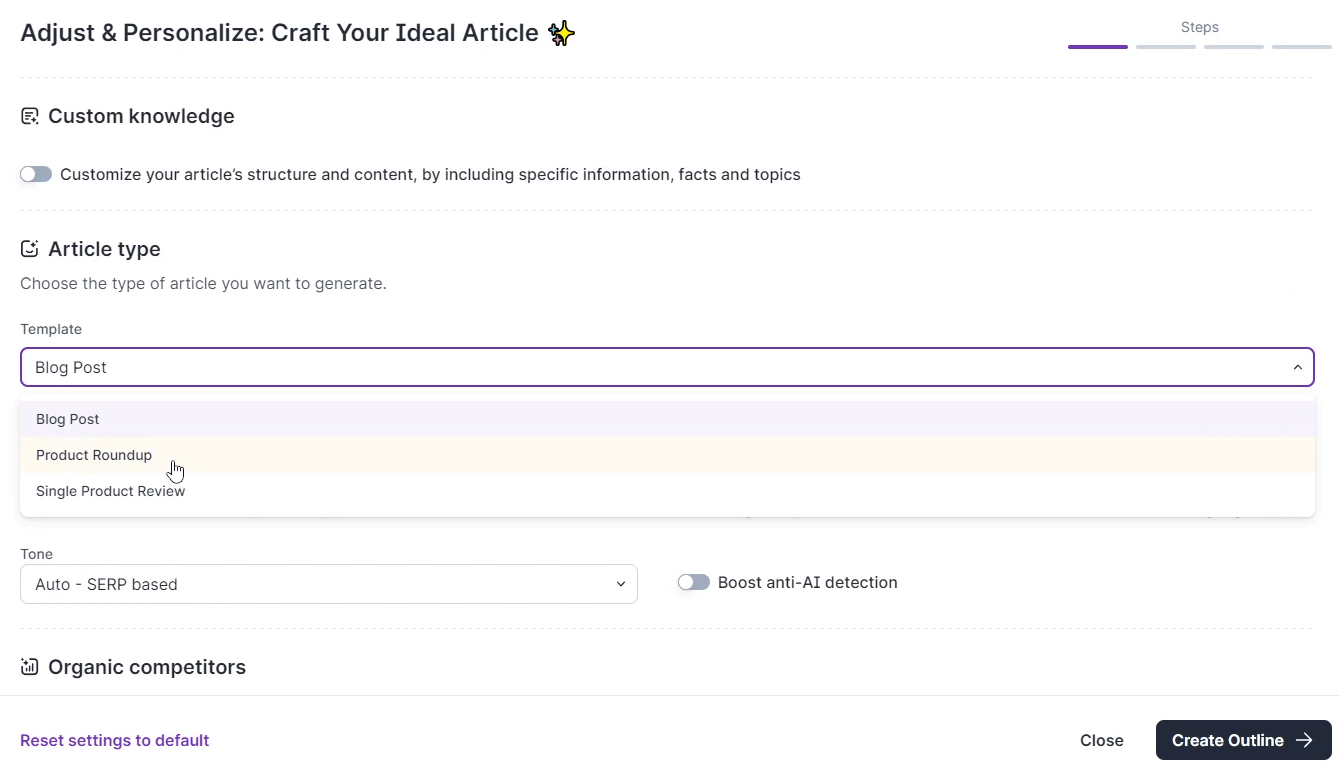
Doing so means you have a higher chance of creating a unique article.
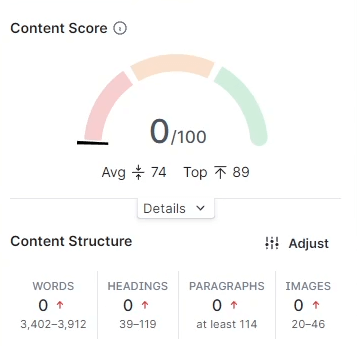
Getting Real-Time Content Feedback
As you (or the AI) create the article, you’ll get real time feedback on your content. I love seeing the indicator increase as I type away and find the best way to express my thoughts. I always aim to get a green score (generally 70+).
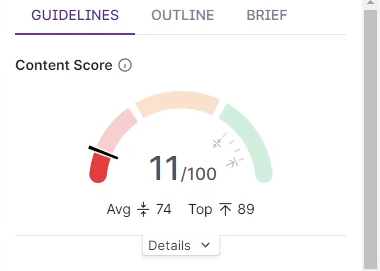
I also look at what the average score is and where the top competitor for the keyword is currently at. This helps me know where I stand and where I need to be.
Content Creation Tools – FAQ
What Are The Different Types Of Content Creation Tools Available?
Here are the broad categories of digital content creation tools available:
- Writing Tools
- Editing & Proofreading Tools
- Visual Content Tools
- Research & Citation Tools
- Video/Audio Creation Tools
What Are The Best Content Creation Tools For Beginners?
As a beginner, it’s important to start with the basics.
Writing tools like Google Docs or Microsoft Word are great for getting started. They provide easy-to-use interfaces and helpful features. Editing & proofreading tools such as Grammarly can also be useful in ensuring that your content is free of errors.
For SEO research, Surfer SEO can help you identify topics and keywords to target. These are some of my favorite content creation tools that I stand behind.
How Do I Choose The Right Content Creation Tool For My Business?
It all depends on the type of content you wish to create.
If you’re creating text-based articles dealing with specific topics, doing your research and then typing your content into a text editor such as Google Docs is probably the easiest way to go.
If you want to create content faster, an AI writing tool like Jasper and an editing tool like Grammarly could be a good choice.
If you’d like to create visual content, such as graphics or videos, Canva is an excellent tool for quickly creating stunning visuals
How Can I Use Content Creation Tools To Create High-Quality Content?
While artificial intelligence (AI) writing tools may produce content quickly, it’s not an end-all solution for high-quality content.
Working with an AI tool and ensuring your voice is consistent is essential for creating high-quality content.
Moreover, reviewing any work you create (whether through a tool or manually) to ensure accuracy and clarity is also important.